Author Archives: D.R. Snell Nursery

Plant a Tree This Fall

There are so many reasons to add a new tree to your landscape this fall that it’s hard to find a reason not to.

Just think about it, trees will…

  • Beautify the Environment
    Trees add texture and color to the landscape. They soften the harsh lines of buildings and driveways, while their foliage and blooms add seasonal color changes and variety.
  • Stabilize Soil
    Tree roots prevent soil from blowing or washing away, minimizing erosion and providing protection for the surrounding landscape.
  • Provide Wildlife Habitat
    Trees provide shelter and food for birds and numerous small animals, including squirrels, raccoons, insects and more.
  • Make Food
    Many trees provide fruits, nuts, seeds, sap and berries for human consumption. Wildlife will also rely on the food provided by trees.
  • Create Oxygen
    Through photosynthesis, trees take in carbon dioxide, carbon monoxide, sulfur dioxide and other poisons from our air and release pure oxygen for us to breathe. One tree can produce enough oxygen for 10 humans for one year!
  • Filter the Air
    Trees act as giant filters trapping dust and pollution particles with their leaves and bark until the rain washes the particles away.
  • Cool the Air
    Air will remain several degrees cooler in the shade of a tree canopy. This is accomplished by not only by blocking the sun’s rays but also through transpiration. Tree leave transpire, or release moisture, which cools the surrounding air. A large tree can release as much as 400 gallons of moisture from its leaves daily.
  • Reduce Utility Bills
    Deciduous trees planted on the south and southwest sides of a home will shade the structure during hot summer months and reduce air conditioning or other cooling needs. In the winter, with the leaves fallen, the sun is able to warm the structure, reducing heating bills.
  • Reduce Noise Pollution
    Strategically planted, trees can dramatically reduce the volume of unwanted noise from loud neighbors, nearby businesses or car traffic.
  • Hide undesirable views
    Purposefully sited, trees can camouflage unattractive views and create privacy, providing a natural sanctuary in your yard.

In our area, fall is just about the best time of year to purchase and plant a tree. The soil is warm, air temperature is cool and morning and evening dew increase available moisture to nurture a new tree. Stop in and see our extensive collection, and we can assist you in choosing the tree that is perfect for your landscape and lifestyle needs.

PlantATree_2

PlantATree_3

PlantATree_1

Save

Fall Lawn Care

Fall is the best time of the year to overseed your existing lawn or establish a new lawn. If your lawn is a bit thin, has bare patches or needs good care, now is the time to take care of it so it can become thoroughly established before warm temperatures arrive in spring.

Overseeding A Weak Lawn

A weak lawn may have thin or scraggly patches, seem overrun with weeds or have bare patches that are difficult to keep green and lush. Overseeding can help eliminate these problem areas and create a more consistent, luxurious lawn.

  1. Spray broadleaf weeds with a selective herbicide and wait 2 weeks for the weeds to disappear. Several treatments may be necessary if the yard is thick with weeds.
  2. Take a soil sample of your lawn to determine the pH. A garden extension service can help determine pH levels, or home test kits are available.
  3. Mow shorter than normal and rake clean to remove unnecessary debris that may keep seeds from reaching the soil.
  4. Core aerate if you have compacted soil or heavy thatch. Remove the cores and dispose of them properly to keep the soil light and airy for seeding.
  5. Apply starter fertilizer and lime if determined to be needed by the pH test, or choose a grass type that will thrive in your soil’s conditions.
  6. Dethatch your lawn if thatch is thicker than ½ inch. This can be done with heavy raking or a special dethatching rake may be necessary in extreme cases.
  7. Overseed with the proper seed. If core aerating, lightly topdress with topsoil or humus.
  8. If needed, cover the freshly seeded area with netting or hay to discourage birds or other wildlife from consuming the seed before it grows.
  9. Water daily until grass has germinated, then soak once a week to encourage deep root growth.
  10. Fertilize in late fall with fall fertilizer.

Seeding A New Lawn

If you have no existing lawn or the entire ground is overrun with nothing but weeds, it may be best to start from scratch and create the lawn of your dreams.

  1. Kill existing vegetation with nonselective herbicide. If you want to preserve nearby trees or shrubs, take steps to protect that vegetation from the treatment.
  2. Take a soil sample of your lawn to determine the pH. A testing kit can provide a good pH estimate, or a gardening center or garden extension service can provide a more precise evaluation.
  3. Prepare soil by breaking up the surface with a rake or spade using a crisscross pattern. All large lumps should be broken up, and any large rocks should be removed.
  4. Broadcast starter fertilizer, lime and gypsum as determined by the pH test. This will provide a nutrition boost for fresh seeds.
  5. Spread topsoil or humus to a ½ inch depth for appropriate planting.
  6. Rototill to a depth of 4 inches and grade smooth. This will mix all the top layers together for uniform soil and nutrition, ensuring even turf growth.
  7. Sow proper seed and mulch lightly with salt hay to control erosion and conserve moisture.
  8. Water daily until grass has germinated, then soak once a week to encourage deeper root growth to resist droughts and repel weeds.
  9. Fertilize in late fall with fall fertilizer to provide nutrition throughout the season.

Which Seed?

Not every lawn will thrive with the same type of grass seed. Allow our staff to help you select the seed that best suits your needs, soil type and planting conditions. Apply at the recommended rate and incorporate into the top ¼” of soil. Do not bury the seed or it may not germinate evenly.

No matter what the condition of your lawn, fall is the best time to take steps to help it rejuvenate so you have an amazing lawn to enjoy in spring.

FallLawn_2FallLawn_1

Save

How To Succeed At Seed-Starting

Seedlings can be purchased of course but, for a number of reasons, you may wish to start your own plants. By starting plants from seed, you have a much greater selection of flowers, vegetables and herbs to choose from. Old time favorites and less common varieties might not be available as plants but are readily available in seed. We offer an extensive selection including many hard-to-find, unusual, organic, non gmo and heirloom seed varieties.

CONTAINERS

Traditionally, seeds are started directly in flats or in peat pot and seed starting tray place into the flat. We carry a wide assortment of sizes and styles of these classic items as well as the ever popular Jiffy-7 wafer. When moistened, the Jiffy-7 expands to form a small, self-contained pot of soil into which seed is sown and, later, may be directly planted in the garden. This is an excellent choice for plants that do not like their roots disturbed during transplanting.

SOIL

It is best to use a light, soilless planting medium labeled as a “Seed Starting Mix”. These mixes are sterile and contain adequate nutrients to carry seedlings through until it’s time for transplanting. Never use garden soil, it is too heavy, causing poor germination, and may also introduce a fatal fungal disease called “damping off”.

SOWING

Seeds should be sown 2 to 10 weeks before the last spring frost date. Your seed packet will provide this information. Fill your containers to the top with moist growing medium. Tamp your container gently, but firmly, on the table top to remove air pockets.  Add more mix as needed to bring it the soil back to the top and smooth the surface flat. Larger seeds are generally planted deeper than small seed. Your seed packet will advise the planting depth. Gently press the seeds into the mix or simply set them on the surface of the soil and place milled sphagnum moss over the top to prevent damping off. Cover the flat with a clear humidity dome. Be sure to label your containers with plant markers and include the plant name and date sown.

TEMPERATURE

Many seeds require warm soil in order to germinate. You can accomplish this by using a heat mat, heat tray or heating cable. Flats may also be placed on top of the refrigerator or a hot water heater. Do not place seed-starting trays on a windowsill as early-season nighttime temperatures are frequently too cool to promote good germination. Once green is visible above the soil heating should cease.

MOISTURE

Seeds need to be kept constantly moist in order to germinate. Moisten the soil thoroughly before planting. Water again when the soil surface is dry. Watering from below is the best method. You may also water from above using  superfine nozzle or plastic spray bottle until the soil is saturated. The medium should stay constantly moist but not soggy. It is important not to overwater but also not to permit the flats to dry out. Once seedlings have grown a half-inch or so, you should water less frequently allowing the soil dry slightly between waterings. 

LIGHT

Seedlings will also need light and the best method is to use the traditional fluorescent fixtures or the new energy saving LEDs. Suspend lights just an inch or two away from the plants. Lights must be on at least 14 to 16 hours a day. As your seedlings grow, raise the lights accordingly. If your seedlings do not get enough light, they will become weak and spindly.

FERTILIZING

Fertilize seedlings weekly using a half-strength solution of a complete organic fertilizer. A fish and seaweed blend works well. Thin seedlings if they become overcrowded.

HARDENING OFF & PLANTING OUT

Seedlings may be moved outside after all danger of frost has passed. Move your trays outside gradually over a five to seven day period. Start by putting them out for a few hours, and then gradually increase the duration until they are left out all day and night. Keep them in a lightly shaded, protected spot during the day to prevent sunburn. Continue to monitor soil moisture and water as necessary. After you have “hardened off” your seedlings, gently transplant them into the garden. Try not to handle the root ball too much as they are quite fragile. Water thoroughly after transplanting and again every day for about a week. Newly set out plants will look sparse at first, but they are resilient and will grow and fill in quickly!

Gardener With Seedling Tray

Seedling Box Tray in Greenhouse

seed_starting_3

Save

Damping Off Disease

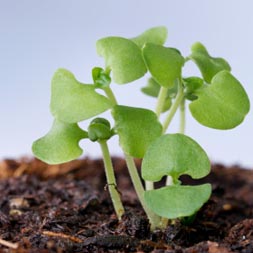
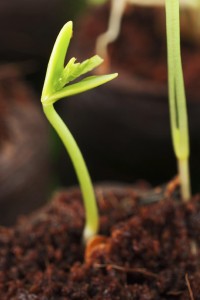
Arguably the most common, and certainly the most frustrating, seedling disease has to be damping off. Damping off is a common term used for several fungal diseases that cause sudden seedling death. Seedlings get very thin where the stem meets the soil. Young seedlings will then fall over, shrivel up and die.

The wisdom of Ben Franklin applies here; “an ounce of prevention is worth a pound of cure”. To prevent damping off you must:

  • Sterilize your containers with a 1:10 bleach solution
  • Use a sterile seed starting mix
  • Plant seeds on the soil surface and top with vermiculite, milled sphagnum peat moss, chicken grit or sand
  • A one time sprinkling of cinnamon or charcoal on the soil surface will act as an anti-fungal agent
  • Water containers from below allowing the surface of the soil to dry slightly between waterings
  • Provide good air circulation around seedlings with a fan
  • Spray seedlings with an ounce of cooled, strongly brewed chamomile tea diluted in a quart of water
iStock_000028335442Medium-200x300

More Than Just Mulch

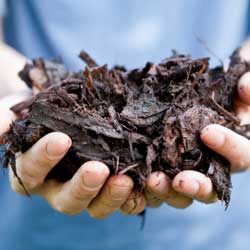
Not only does mulch add a decorative finish to your flower beds, creating a canvas to showcase colorful blooms, it also helps keep soil cool and moist, thus reducing the need for manual watering. The addition of a 3 inch layer of mulch atop your garden soil will also contribute greatly to weed suppression.  Including an application of a pre-emergent herbicide or corn gluten meal will discouraged weed seeds from germinating and growing. And, I’m sure we can all agree, weeding is a chore nobody likes to do!  So, which mulch should you use?

Pine Bark Mulch – Pine mulches is one of the best types of mulch for plants. As it breaks down it enriches the soil with nutrients.

Shredded hardwood – This is by far the most popular mulch. It has a dark color and knits together well so that it does not easily wash away.

Cocoa Mulch – Cocoa mulch provides a nice clean look with a delicious chocolate scent. It is, however, not recommended if you own a dog.

MULCH FACTS:

  • 1 cubic yard of shredded hardwood mulch will cover 150 square feet of area to a depth of 2 inches. We recommend a 2 to 3 inch depth to receive the best results.
  • There are 27 cubic feet in 1 cubic yard.
  • Compost is an excellent soil amendment but is not a replacement for mulch.
  • When applied correctly, mulches improve garden appearance, reduce the growth of weeds, prevent soil moisture evaporation and maintain consistent soil temperatures.
  • When fully decomposed, mulches will improve the soil structure and add nutrients back into the earth.

mulch_1mulch_2

Healthy Soil, Healthy Plants

The key to successful gardening is “healthy soil.” Quite simply, when you feed the soil the proper nutrients, you let the soil feed the plants. So how do you “feed” the soil? First, you need to understand some basic principles about soil and why it is so important, then you can take steps to improve it.

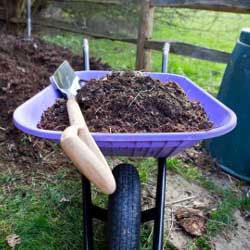
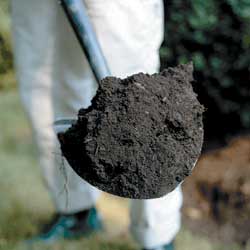
To start, you should determine the soil texture by moistening the soil and rubbing it between your thumb and fingers to determine its “feel.” Sands are gritty and will barely hold together; clay can be squeezed into a firm shape; and silt will act in a way to allow particles to cling together. Sandy soils tend to dry out quickly because they contain high amounts of soil air. Oppositely, clay soils have a tendency to pack together, shutting out air and water. The best garden soil, “loam,” has moderate amounts of sand, silt and clay. Generally, soil in our area tends to be clayey. This condition can be improved by adding sufficient amounts of compost. For sandy soils, humus should be added to help retain moisture and nutrients.

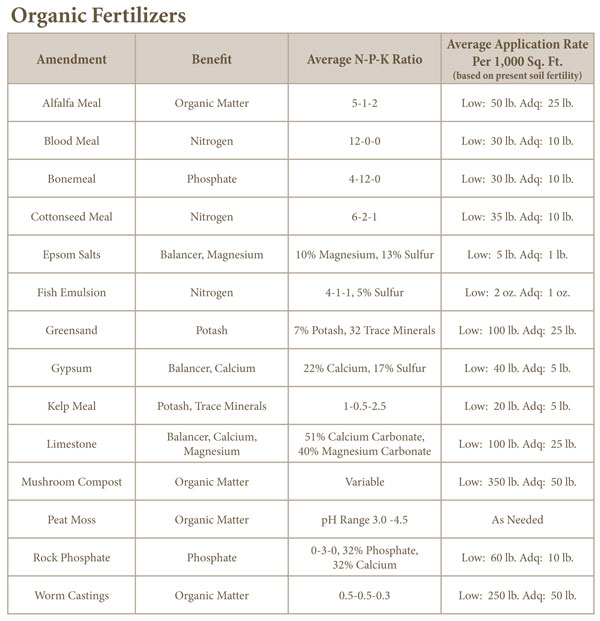
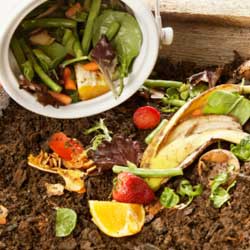
Next, you must evaluate the soil structure. Soil structure is affected by soil pH, the amount of humus and the combination of minerals in the soil. Ideal soils allow soil particles to clump together with air spaces between them for water drainage as well as oxygen consumption and carbon dioxide release from plant roots. The best way to improve soil structure is to add high amounts of organic matter like humus, dehydrated manure, composted manure, mushroom compost, alfalfa meal, peat moss, or worm castings.

You will also need to take a soil sample, to measure the pH and amounts of nitrogen, phosphorus and potassium in the soil as well as other nutrients. This will help determine exactly what the soil needs. Our staff will help you read the results and determine what to add to your soil and how much. Generally, a pH of 6.0 to 7.0 is acceptable. If your pH is lower than this, your soil is too acidic and requires lime to be added. If your soil is low in organic matter, it will often have a high pH level. All plants require a proper balance of nutrients – nitrogen (N), phosphorus (P) and potassium (K). Soils lacking any one of these elements will not produce healthy plants.

When dealing with poor, or improperly balanced soils, obtaining “healthy” soil may take two to five years to acquire. The best thing you can do to supplement your soil program is to use various organic fertilizers to meet your plants’ needs and regularly add organic matter. This will continue to help the soil structure as well as create biological activity that is also a vital part to developing productive soil.

fertilizer_chart

healthy_1healthy_2

Watering When Away

It’s vacation time! You’re going to be gone for two weeks or more, your friends, neighbors and family members are all busy and the weatherman says it’s going to be “hot, hot, hot.” What about your houseplants?

Fear not! A few minutes of thoughtful planning and a quick trip to the garden center will ensure meeting your plants’ watering requirements even when you can’t be home for daily moisture checks. Popular and effective solutions include…

  • Pre-Watering: Before you leave on your trip, make sure your plants are well-watered. Many houseplants can withstand some watering neglect, and if you aren’t gone too long, they may not need any supplemental solutions if you’re watered them right before your trip. Take care not to overwater, however, or you could be compounding the problem.
  • Anti-Drought Solution: Prior to leaving, water with an anti-drought solution. It temporarily forces the plant into dormancy. This reduces the water requirement for roughly two weeks (effective control will vary by product and plant type) while the solution gradually wears off. This can affect blooming or growth periods, however, so read instructions carefully and use the solution exactly as directed.
  • Self-Watering Containers: Planting your houseplants in self-watering pots is truly looking ahead. A reservoir holds water under the pot, and this water gradually travels to the soil via a wick, always keeping the soil moist so long as the reservoir contains water. If you want to use a specific pot without a built-in reservoir, use a conversion kit. Various sizes are available and some use fill tubes. Consider adding liquid fertilizer to the reservoir water to ensure your plant gets proper nutrition while you are away.
  • Individual Pot Drippers: These generally hold water above the plant. Various sizes and styles provide water to small and large pots. From beautiful blown glass globes to simple plastic bottles, these allow water to drip down into the soil through a drip-tip inserted in the soil. One style even looks like a flask attached to the side of the pot with a tube dripping water to the soil. Because they show above the plant, many people only use them during their vacation.
  • Automatic Watering Systems: These are more elaborate but very effective options. A large water reservoir feeds to clustered houseplants through small tubing attached to drippers inserted in the soil. Larger pots use two or more drippers. These systems pump water on a regular basis using a battery and timer, making them ideal for regular watering when you may be taking a longer trip. These also allow liquid fertilizer in the reservoir so your plants are properly nourished.

Go ahead and enjoy your trip…your plants should be fine!

Summer Lavenders

Do you enjoy making herbal or floral bouquets and wands to scent the house? Maybe you’re into the lavender cooking trend or like to infuse playful summer drinks with a floral touch. Perhaps you recognize the aromatherapy or medicinal qualities of lavender.

In other words, do you love lavender and are frustrated because the bloom season is so short?

Whatever you do with your lavender, you may have planted one and it bloomed for a few weeks. Now you think you have to wait another year to enjoy the beauty and fragrance. That’s no fun! But here’s a secret to prolong your passion during lavender season…

About Lavenders

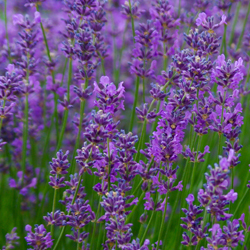
There are actually three groups of lavenders. Members of each group bloom around the same length of time, but each group blooms at different times. By planting at least one member of each group, you can enjoy lavender from early spring to mid-summer (and sometimes even longer with careful watering).

Members of the “Non-English Lavenders” bloom from early to late spring. “English Lavenders” follow and bloom from late spring to early summer. True summer lavenders, known as “Lavendins,” continue blooming into the hottest days of summer.

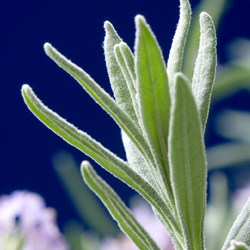
Also called “English Lavender hybrids,” the varieties in this summer group are crosses between the Portuguese and English Lavenders. They all have large gray leaves, grow into large plants, and grow best in the heat. They are all very fragrant, making them welcome additions to any lavender garden.

Abriali Lavender was one of the first hybrids. It produced cosmetic-grade oil until Grosso Lavender replaced it with superior oil production. Happily, gardeners can also enjoy Grosso in their gardens, as it’s frequently available at garden centers.

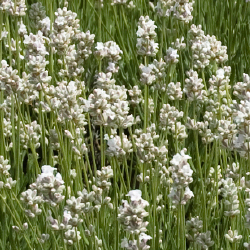
White Grosso Lavender, with the same beauty and fragrance, provides a nice background for a mixed flower border. Edelweiss Lavender, a smaller white lavender, mixes nicely in the garden, without a reduction of fragrance.

Hidcote Giant Lavender and Provence Lavender are garden center favorites. Approximately the same size, the Hidcote Giant has darker flowers than the Provence, which has a longer flower wand. Sachets usually contain Provance buds because they are exceptionally easy to remove from the stalk. Other popular varieties include Grappenhall, Dutch Mill, Seal and Fred Boutin lavenders.

Lavenders In the Garden

Growing lavenders could not be easier. All thrive in full sun in warm, well-drained, average quality soil. Dampness, either through poor drainage or humidity, will kill them. They grow well in pots with good drainage and fair soil. Prune after blooming to shape the plants and promote future blooming. While lavender is drought resistant, if the soil is dry, it is necessary to water well. Water again only when the soil is dry. Using compost as fertilizer will provide critical nutrients and improve soil drainage.

Using Lavender

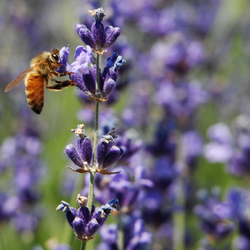
Lavenders are very attractive to bees. They happily buzz from flower to flower while collecting pollen. Some honey producers site their hives in the middle of lavender fields to produce lavender-scented honey. The honey’s aroma is a great way to start the day!

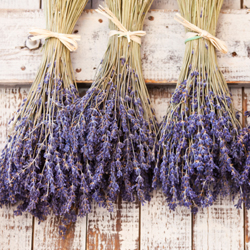
Drying lavender for future use is easy. Cut bundles of wands from the plants without cutting into the older woody part of the plant. Use a rubber band to hold the bundles together and hang them upside down in a dark, dry room such as an attic or closet. The darkness helps retain the bloom color. The bundle should be dry in 7-10 days.

Although lavender’s taste isn’t the same as its fragrance, lavender dishes appear in many trendy restaurants. Lavender martinis and teas, ice cream, cookies and other desserts accompany lavender-sauced meats and vegetarian dishes. Lavender is an ingredient in the herbs de Provence mix and replaces strong tasting herbs such as rosemary, thyme or mint in many cookbooks for meats, breads and general seasonings.

Some folks even use lavender as an antibacterial antiseptic to treat wounds and insect stings.

Even if you just want to enjoy lavender for the sake of its beauty and ease of maintenance, remember… Planting one of each of the three groups lets you love your lavender for three times as long. Enjoy!

Butterfly Bush

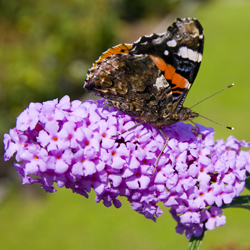
What could be more enjoyable than relaxing in your favorite lawn chair or hammock, your sunglasses on and a cool beverage in hand, staring at an enchanting array of colorful butterflies milling around their favorite plant? What could possibly be an easier way to accomplish this vision than by planting a simple butterfly bush?

About Butterfly Bush

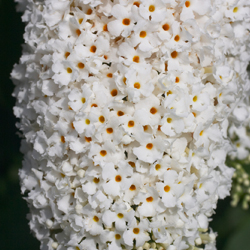
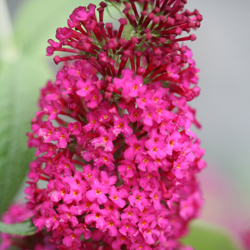
Buddleia davidii, the butterfly bush, is a flowering maniac. It pushes its proliferation of perfumed blooms straight through summer and well into fall, providing nourishment to butterflies all season long. Available in a multitude of colors ranging from white to pink to red to purple, there are colorful butterfly bushes to match any garden or landscape color scheme. The fragrant, long, spiked panicles are borne in profusion on long, gracefully arching branches that add drama and elegance to the yard. And it really is a butterfly magnet!

Growing Butterfly Bush

This quick growing, deciduous, woody shrub is winter hardy in zones 5-10. In the northernmost areas of its hardiness range, Buddleia behaves like a herbaceous perennial, dying back to the ground in very cold winters. In the southernmost areas, Buddleia is grown as large shrub and can flourish all year. In either location, however, you should treat this plant as a cut back shrub. Because butterfly bush blooms on new wood, it benefits the plant to be cut back to the ground each spring. This judicious pruning will stimulate lavish new growth and an abundance of flowers. It will also keep some of the larger varieties at a manageable size, particularly in smaller yards, corners or other confined spaces.

Plant your butterfly bush in full sun in just about any type of soil and it will thrive. Don’t worry about fertilizing as over-fertilization can encourage too much leaf growth over flower formation. Deadheading will encourage additional growth and new flower buds to extend the blooming season. Buddleia has a good tolerance for drought once established, but should be carefully watered when young. A good, thick layer of mulch will help maintain soil moisture and keep weeds down to keep the shrub healthy. Just be sure not to use insecticides or pesticides on your butterfly bush or you may be harming the very fluttering fliers you hope to attract.

Not sure which butterfly bush to try? Consider these varieties to choose the perfect color and style to suit your yard.

Recommended Buddleia Varieties

The “Miss” Series are all non-invasive, and get to be about 4 foot tall

‘Miss Molly’ – Intense almost red flower

‘Miss Ruby’ – Brilliant rich pink flower

‘Miss Violet’-  Perfectly Purple blooms

The Pugster Series have full size flowers on dwarf plants that only get 2 foot tall

‘Pugster Blue’ a nice true blue flower

‘Pugster pink’ a light pink bloom

‘Pugster Amethyst’ a amethyst toned flower


The N-P-K of Fertilizer

Once upon a time, Mary, Mary, Quite Contrary grew her garden with silver bells and cockleshells, but nowadays, most gardeners use some other forms of fertilizer that are better formulated than nursery rhymes. But what important components make up a fertilizer, and why are those components important for your plants?

Understanding Fertilizer

Simply put, a fertilizer has nutrients to make a plant grow better. Years ago, farmers used composted manure, ashes and urine. Today, most of us buy our fertilizer, but a trip to the store can be confusing. What do those numbers on the fertilizer bag mean? Should I buy liquid or granular? Which is better, slow or quick release? Let’s investigate…

Without getting too technical, the three numbers show the percentage of available nitrogen (N), phosphate (P) and potassium (K) in a fertilizer blend. By law, it always goes in that order. If you see a fertilizer with 20-5-10, it means the fertilizer contains 20 percent available nitrogen, 5 percent phosphate and 10 percent potassium. Other nutrients and filler make up the difference and are often chosen for specific types of plants, such as roses or flowers, vegetables, trees, etc.

What does that mean to your plants?

  • Nitrogen promotes chlorophyll, producing greener, more quickly growing plants. If your plants aren’t as green as they should be, use a fertilizer with nitrogen. Most lawn fertilizers have a relatively high nitrogen content and cause mowing to be more frequent as lawns “green up” and grass blades grow more quickly.
  • Phosphate improves root growth, flowering ability and bloom size. Use a fertilizer with a larger middle number (phosphate percentage) to encourage root growth during transplanting or to encourage blooms. This is especially important when initially planting so root systems become strongly established.
  • Potassium enables the photosynthesis process and improves plant resistance to cold spells, drought and insect attacks. Many people use a potassium fertilizer when the seasons change to help plants resist the stresses of those transitions.

Liquid or Granular? Fast or Slow?

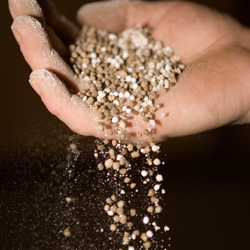
Fertilizers come in liquid and granular forms. Generally speaking, liquids are highly concentrated and need to be mixed with water before being fed to plants, but they are absorbed more quickly and are easy to apply more evenly. Granular formulas have small beads or grains that must be spread around and watered into the soil, and it can be difficult to spread an even layer over large areas unless a spreader is used. Granular forms need time to dissolve or decompose before they can be absorbed, but they last longer in the soil and can nourish plants for weeks or months.

Similarly, fertilizers come in fast or quick release forms as well as slow release forms. Both can work well in any garden, depending on your fertilizing needs, plant nutritional requirements and condition of your soil.

Read the label carefully for specific instructions and uses. It may seem boring, but reading that label will prevent bad results, as overuse or misuse of fertilizer can kill your plants, upset the balance of your soil and even cause environmental contamination – not the results you planned. Once you know more about fertilizer and how to use it correctly, however, you’ll enjoy the results this extra treat can give to your garden.