Author Archives: D.R. Snell Nursery

Orchids: Exotic Beauties To Warm The Winter

Orchids are some of the most exotic plants on earth. They display an amazing range of diversity in the size, shape and color of their unique flowers. There is a misconception, however, that these floral treasures are difficult to grow, when in fact more and more gardeners are growing and collecting orchids each year. Provide the essentials of good care and you too can grow orchids easily!

Growing Orchids

Orchids have some unique needs when it comes to proper care. Because they can be temperamental at times, it is best to carefully investigate the types of orchids you are interested in growing and be sure you can meet their individual needs.

  • Light: Most orchids prefer abundant, filtered sunlight. This can be met with west- or south-facing windows, or you may need some supplemental light sources. A few popular orchid varieties can grow in lower light levels.
  • Temperature: Like any plants, orchids can do well in a temperature range, though some prefer warmer locations and some prefer cooler locations. Measure the temperature range where you want to grow orchids and select varieties that will do well in that range.
  • Humidity: Orchids are tropical plants that do well in more humid environments. They can do well in terrariums or greenhouses where the humidity can be elevated, or you can take steps to increase the humidity around the orchids in your home, such as through plant grouping, pebble trays or misting.
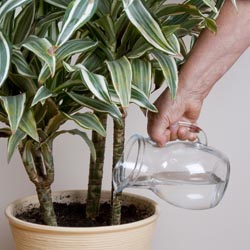
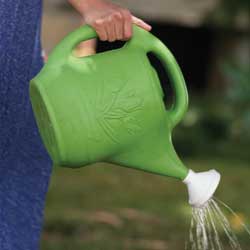
  • Watering: Orchids tend to do best if they dry out somewhat between thorough waterings. Plant your orchids in an appropriate medium, and take great care with watering so they can absorb sufficient moisture without fostering root rot or other mildew.
  • Fertilizing: Fertilizers are not critical for blooming orchids, but they can help provide better nourishment. Fertilizing lightly is better than over-fertilizing, and fertilizer should only be applied during active growth periods.

The exact care your orchids will need will depend on the varieties you choose. Research their optimal environments and you’ll be well prepared to host an array of stunning orchids in your home.

Common Orchid Varieties and Care

orchid-chart

orchids

The Benefits of Plants in the Workplace

Time spent in nature is well known to provide many physical, mental and emotional benefits, but what if your work schedule and career keep you in an office without many opportunities for heading outdoors? You can bring the outdoors in and reap many of the same benefits.

Plants Can Improve Your Workplace

There has been extensive research done regarding the benefits of plants in the workplace. With full time employees spending approximately one-quarter of their lives at work it is important that these buildings provide an environment of beauty, health and comfort. Studies confirm that there are both physiological and psychological benefits to surrounding yourself with nature at work. An eight-month study conducted by a Texas A&M University research team has concluded that plants significantly reduce workplace stress and enhance employee productivity, a win-win situation for both employer and employee. Other studies have verified those findings, as well as expanded the list of benefits plants can provide when used judiciously as part of an indoor workplace.

The presence of plants in the workplace can…

  • Lower blood pressure
  • Reduce stress
  • Increase humidity
  • Reduce illness
  • Purify air
  • Reduce dust
  • Lower energy costs
  • Quicken employee response time
  • Enhance problem solving ability
  • Spark creativity
  • Increase brain activity
  • Provide a positive outlook
  • Act as a mood elevator
  • Have a calming affect
  • Boost learning
  • Contribute to noise reduction
  • Improve office appearance
  • Reduce distractions

With so many obvious benefits just by including plants in office décor, every office – whether it is a large corporation, a simple business or a cozy home office – should include at least a few plants.

Bringing Plants to Work

There are many easy ways to blend plants into office décor. Popular ways to integrate plants into the office include…

  • Larger potted plants or containers in a greeting or reception area.
  • Ferns or hanging pots in broad windows.
  • A ficus tree or other large pot near a water cooler.
  • Pothos or other trailing plants on top of cabinets in a break area.
  • Small plants and flowers on individual desks.
  • Decorating for holidays with seasonal plants.
  • Giving office plants as gifts for work anniversaries, welcomes, etc.

When choosing plants for the office, be sure to opt for plants that will function best in the environment. Take into consideration temperatures, light levels and humidity so the plants will thrive. Selecting low-maintenance plants that can withstand good-natured neglect is also wise, so they will still thrive even when project deadlines, committee meetings and vacation days may make their care sporadic. Fortunately, there are many great plants that can liven up an office, and each one will bring great benefits to the workplace.

workplace-2workplace-3

workplace-1

Dormant Pruning With the Proper Tools

Late winter pruning is often recommended for many trees and shrubs. Pruning the plants while they are dormant is less stressful for the plant and it’s also easier to view the structure of deciduous trees and shrubs without leaves to ensure the pruning helps create the desired shape. It’s also a time of the year when late winter sunshine makes us all long to be in our gardens and pruning is an excellent job to get us out there.

Pruning Tools

To get out and get pruning, you will need the proper tools. There are several types of pruners that should be in every serious gardener’s tool shed.

  • Hand Pruners
    The simplest tool, but the hardest to choose, is the hand pruner. There are two distinct styles of hand pruners: the anvil type and the bypass. The anvil pruner is good for pruning deadwood or undesirable growth. For more valuable specimens anvil pruners tend to smash the wood during cutting, leaving the wound open to insects and disease. Bypass pruners are like a pair of scissors and give you an easier, cleaner healthier cut. Different hand pruners are available in different sizes and grip styles, including options for both right-handed and left-handed gardeners. To get the best results, it is important to choose a hand pruner that feels comfortable but still provides adequate strength for the job.
  • Lopping Shears
    Another tool that comes in handy is the lopping shear. They are used for making larger cuts up to 1-1/2″ in diameter, and have longer handles to provide more power without stress or strain. The longer handles also provide a better reach than hand pruners. They are also excellent for clearing away undesirable growth in your yard, including trimming hedges.
  • Pole Pruners
    The last tool you’ll need is a pole pruner. It is a combination lopping shear and pruning saw. The pole pruner extends out to twelve feet and can be used for making small cosmetic cuts or larger limb removals without needing to set up a ladder. Pole pruners are also useful in dense canopies when using a ladder would not be practical or suitable.

To learn more about pruning specific trees or shrubs and to choose the appropriate tools for the job, please stop in or give us a call. We’ll be happy to help you be sure you are equipped to make clean, appropriate cuts that will help your trees and shrubs look their very best.

dormant-2
dormant-1

Feng Shui in the Garden

Feng Shui is the ancient Chinese philosophy that believes in attracting and guiding the flow of cosmic energy to influence your health, wealth and happiness. If you are already familiar with Feng Shui, you should know that it is assumed by many that the same fundamental principles that apply to your home also apply to your garden, maybe even more so since the energy in your home is brought in from the outside.

Feng Shui means ‘wind’ and ‘water.’ According to Chinese tradition, everything in the world contains ch’i, the cosmic life force. Ch’i means to flow freely like wind and water, but it is alleged that its movement can be blocked or trapped. This, it is believed, can cause disharmony or misfortune in your life. The movement of ch’i is thought to be influenced by several things such as colors, shapes and sound. The purpose of Feng Shui is to ensure that ch’i is flowing smoothly and gently without being allowed to stagnate or move too quickly. This harmony in your environment is understood to create harmony in your life.

Bringing Harmony to Your Garden

Feng Shui starts with basic gardening maintenance. Ch’i is believed to stagnate in areas where junk accumulates. Clean up your patio or deck and screen your garbage cans from view. Throw away any broken pots, planters or tools. Good cultural practices are also considered important in the flow of ch’i. Mow your lawn, pull up weeds, edge your beds and remove dead plants. Prune any broken or damaged limbs, stake plants and take steps to control insects and disease.

Ch’i requires smooth curves to flow. It is funneled by straight lines but impeded by sharp angles. It does not need to be costly or time consuming to remedy these types of structural problems. A straight walkway can be softened with the addition of curved beds on either side. You may also try planting perennials that mound or spill onto a walkway to break up straight lines. To help ch’i flow gently around corners, consider the addition of a tree, shrub or climbing vine. A curved bench or fountain is another option.

Bright colors, especially red, are used in Feng Shui to attract ch’i. Poor Feng Shui, it is believed, is remedied by placing the five elements recognized by the ancient Chinese – wood, fire, earth, water and metal – in their appropriate direction to beneficially affect the movement of ch’i.

Why not try some of the elemental remedies below in their appropriate directional orientations? They may assist with the flow of ch’i in your garden and perhaps you will reap the benefits of good fortune Feng Shui reportedly imparts.

Feng Shui Remedies
fengshui

fengshui-3

fengshui-1

fengshui-2

Year-Round Container Gardens

The best gardens provide interest all twelve months of the year. In the spring and summer, gardens are full of color with bright, cheerful bulbs, pastel spring-flowering trees, vivid, multi-colored bedding plants and striking perennials; fall gives us shades of yellow, gold, orange, red and purple with the changing of the season, as well as abundant fruits and berries. Winter has its attractions as well with evergreens, hardy plants and persistent berries. With a little planning, container gardens can give us color and variety every month of the year.

Planning for Winter Container Gardens

While most gardeners have no trouble creating lush container gardens for spring, summer and fall, winter is more of a challenge, especially if you hope to enjoy the same plants in every season. Fortunately, many plants are suitable for winter container gardening. The best choices include evergreens, shrubs with berries, those with contorted branches or interesting bark and buds or later winter-flowering shrubs. These plants remain in the containers for year-round interest, while bulbs, annuals and perennials can be switched out for colorful seasonal interest. Consider how all the plants will change seasonally so you can create a living tableau that will retain gorgeous shape, form, color and texture throughout the year.

Planting and Care for Year-Round Container Gardens

When planting containers for all-season interest, frost-proof pots should be your choice. This includes fiberglass, polyethylene and structural foam planters. These pots resist winter damage, insulate to help regulate the soil temperature and retain moisture better than porous pots. They are also lightweight, so they can be more easily moved to a sheltered location in poor weather, or shifted to a sunny spot on a warm day.

Plant containers as you normally would, following good horticulture practices – enriching the soil, providing proper drainage and arranging plants for the best visual appeal. Be certain to give your pots shelter from the prevailing winds and water your plants when needed to keep roots from drying out. To water, check the soil moisture when temperatures rise above 40 degrees and add cold water as necessary. You may want to shift the containers’ location each season for the best light and weather protection. In winter, it may also be useful to add an insulating blanket around the pot or to provide more wind protection by stacking hay bales around the container.

Plants for Winter Interest in Year-Round Containers

While some plants are stunning for a season, the following plants are proven winners in winter and will bring great interest to your containers.

Evergreens

  • Buxus (Common Boxwood)
  • Pinus (Dwarf and Semi-Dwarf Pines)
  • Thuja (Dwarf Arborvitaes)
  • Juniperus (Dwarf Junipers)
  • Tsuga (Dwarf Hemlock)
  • Picea (Dwarf Spruces)
  • Taxus baccata (English Yew)
  • Chamaecyparis pisifera ‘Filifera Aurea’ (Golden Japanese False Cypress)
  • Pieris Japonica (Japanese Pieris)
  • Kalmia latifolia (Mountain Laurel)
  • Microbiota (Siberian Cypress)
  • Euonymus fortunei (Wintercreeper)
  • Sciadopitys verticillata (Japanese Umbrella Pine)

Deciduous

  • Amelanchier arboreo (Downy Serviceberry)
  • Fothergilla gardenii (Dwarf Fothergilla)
  • Corylus avellana ‘Contorta’ (Harry Lauder’s Walking Stick)
  • Ilex verticillata ‘Nana’ (Winterberry Holly)
  • Hydrangea paniculata ‘Grandiflora’ (PeeGee Hydrangea)
  • Cotoneaster (Cotoneaster)

Late Winter/Early Spring Accent Plants

  • Helleborus (Christmas and Lenton Rose)
  • Primrose
  • Ajuga
  • Violas or Pansies
  • Crocus*
  • Snowdrops*
  • Dwarf Iris*
  • Ivy

*Plant these bulbs in fall for winter flowering.

No matter what you choose to plant, it’s easier than you think to design delightful containers that will catch everyone’s eye all winter long.

year-round-container-gardening-4

year-round-container-gardening-1

year-round-container-gardening-2

year-round-container-gardening-3

Design a Raised Landscape That Works

Raised beds have been around for years, but have become increasingly popular recently because they make the landscape orderly, organized and easy to maintain. You can readily reach over and pull weeds as they appear, plant more comfortably and enjoy the new tiered depth and dimension of your lawn and garden. Raised beds are also particularly helpful if you are working with heavy soils that drain poorly, or if you have mobility limits that make getting down to ground level more difficult.

If you’re just getting started with raised beds, it’s easy to successfully bring your gardening to a higher level:

  1. Define the bed lines with a rope or hose. Consider the overall bed size, as well as the size and shape of your building material. You may want to position the bed along a fence or in a corner for more dimension and support.
  2. Dig a 4-6” deep edge along the perimeter. Don’t worry if this line isn’t as neat as you would like, because it will be more refined once you construct the bed frame.
  3. Remove existing sod/grass from the bed. You can compost the removed material, or use it to patch other spots in your lawn or turf as needed.
  4. Place concrete blocks, wall stone or other edging along this new bed line to build your bed frame. Wooden railroad ties or planks can also be used, but be aware that they may warp or decay in time. In general, stone or other sturdy materials are preferred.
  5. Build up your flower bed approximately 6-8” with top soil, mixing in peat moss for better drainage and compost, leaf mulch, cow manure or similar organic material to adequately nourish the soil.
  6. Compact your soil mixture as you build up each layer. This will help keep the bed from settling excessively as you plant and water.
  7. Increase the visual impact of your flower bed or gardening area by planting at different levels. Arrange shorter, lower growing plants in front, followed by medium and then tall plants in the back. You might consider some “spiller” plants along the sides and front if desired. Choose plants carefully to match the size of the bed, avoiding plants that will quickly outgrow the smaller, more confined space.
  8. Apply a 2-3” layer of mulch or stone and thoroughly soak your new landscape feature. Sprinkle Miracle Gro Weed Preventer or a similar product over the area to provide an invisible layer of protection against germinating weeds.

Before you know it, your new raised bed will be thriving and will quickly become the centerpiece of your landscaping. Then it’s time to construct another!

design-raised

Long-Blooming Perennials for Summer

By choosing long-blooming perennial plants, you can capitalize on the best of both worlds – plants that come back from growing season to growing season, and those that bloom for an extended length of time. This also means you’ll have more time to appreciate the gardens you create!

Here is just a sampling of long-blooming perennial plants perfect for the sunny summer garden:

  • Achillea (Yarrow) is a very drought and heat resistant plant once established. The flower heads are long-lasting and many colors are available including yellow, gold, pink and pastels in apricot, lilac, salmon, cream and white. Plants grow from 8-36″ tall, depending on variety. The flat-topped flower heads grow up to several inches across, and make excellent cut and dried flowers. The fern-like, gray to gray-green foliage is somewhat aromatic and attractive even when the plant is not in bloom.
  • Coreopsis (Tickseed) is one of the easiest and most rewarding garden flowers. The thread leaf varieties are usually the longest blooming, typically from June through fall. The pale yellow, bright yellow or rosy-pink daisy flowers smother the slender stems and thread-like leaves. Plant height, from 15-24″, is variety dependent. A mid-summer shearing of the seed heads will keep these plants blooming for many more weeks.
  • Echinacea purpurea (Purple Coneflower) is a sturdy, bold-textured favorite with dark foliage that grows to 2-3′ tall and wide. The flowers are large, daisy-like with unique standings of dark-rose purple and lighter in color. Birds and butterflies also love these flowers, adding even more beauty to your garden with their visits.
  • Rudbeckia (Black-Eyed Susan) is an old-fashioned garden favorite. It is hardy, reliable, insect and disease-free and an exceptionally long-blooming plant – typically from July through fall. This medium-green, bold-foliaged plant grows to about 3′ tall and bears golden yellow, daisy-like flowers with dark brown centers. Both Echinacea and Rudbeckia flowers make excellent cut flowers and a wonderful place for butterflies to sit and eat.
  • Gallardia (Blanket Flower) is an American native plant which thrives in the hot sun and has beautiful yellow-orange flowers, marked with red. Height varies according to variety. Some favorites include “Baby Cole” which is a dwarf only 8″ high, “Goblin,” a 12-15” grower, and “Burgundy,” which reaches 18-24” and whose flowers are a gorgeous shade of burgundy red.
  • Ceratostigma plumbaginoides (Plumbago) features intense blue flowers from mid-summer to September. Plumbago spreads quickly to form a neat groundcover and as an added bonus, leaves turn a brilliant red in the fall before dropping. This excellent perennial grows well in light shade also.
  • Veronica (Speedwell) has neat, attractive foliage and abundant flowers in densely packed spikes. Look for the cultivars ‘Goodness Grows’ and taller ‘Sunny Border Blue’ for a beautiful addition of blue to your summer garden, and pair it with red or white favorites for a patriotic theme.

Remember, this is just a brief glimpse of the long-blooming perennials available to choose from. Stop by to see our wide selection of perennials so we can help you determine which plants are best suited to your garden.

Long_3Long_4

Long_5

Long_1

Long_2

Save

Save

Summer Watering Tips

As the days heat up, watering can become a dreaded garden chore and too many gardeners use wasteful techniques that use plenty of water but don’t give their plants the moisture they really need. Make watering plants easier and more efficient with the proper practices and tools…

  • Mulches not only make plantings look more attractive, but their most important functions are to help retain soil moisture and minimize weeds, which would also usurp moisture from your plants. Mulch around plants to a depth of 2-4 inches, refreshing mulch as needed to maintain that depth and attractiveness.
  • Watering cans and small containers work great for spot watering plants with different watering needs by hand. You don’t always need to get out a hose or sprinkler to get the watering done.
  • Check to make sure that you have the proper length hose(s) to reach every corner of your garden. Take into account any obstacles in the way, and be sure you aren’t dragging the hose over any delicate plantings to reach more distant dry spots.
  • Add a water wand to the hose to get the water where it’s most needed – the base of the plants – without needing to bend over repeatedly, which can cause back strain.
  • The best time to water is during the early morning hours of a sunny day. This will allow plants to absorb more water before it evaporates when temperatures rise, but won’t leave water to sit on plants overnight when mold can develop.
  • Always water plants and container gardens thoroughly and deeply to encourage deeper, more drought-tolerant root systems. It is better to water less frequently but more deeply rather than more often but with less water.
  • In the landscape, a good rule of thumb is to provide an inch of water per week minimum. Keep track of precipitation with a rain gauge to avoid wasting water by overwatering when Mother Nature does the job.
  • New individual plants that are set out, direct sown seed beds, sodding, etc. often require daily care, including watering, until established. Check moisture levels carefully during this period so the plants are well cared for.
  • Use soaker hoses to provide slow drip watering. This allows plants to absorb water easily without wasting water by evaporating from foliage or spraying into the air. Soaker hoses can even be layered beneath mulch to preserve as much moisture as possible.
  • Pay extra attention to plants in containers and hanging baskets as they tend to dry out faster and with greater frequency. These plantings will likely need to be watered daily or even multiple times a day during heat waves.
  • Place Tree Gators, a drip irrigation bag, on newly planted trees for slow, steady watering that will soak down to the root system without draining away along the surface of the soil.

If you’ll be away on an extended vacation, or even just for a few days, make arrangements with a trusted friend or neighbor to “plant sit” while you are gone. There’s nothing worse than worrying about your garden while you’re away – except coming home to crisp plants that haven’t been watered properly!

wisewatering1

wisewatering1

Save

Dill, Delicious Dill

Have you enjoyed dill? An often overlooked herb, dill deserves much more attention in both the garden and the kitchen than it normally receives.

Growing Dill

This cool season plant is best when planted in very early spring or in late fall. Dill does best when planted from seed, because it doesn’t transplant well. Simply scatter seeds in a container on the patio or in the garden in early spring. Dill plants grow best in full sun. Other than this, dill will grow happily in both poor and rich soil or in damp or dry conditions, making it easy to add to any garden. One of the benefits of growing dill is that both the leaves and seeds of dill weed plants are edible.

When the daytime temperatures reach the mid to upper 60s, your dill will bolt, meaning it will put up seed shoots and go to seed. There is not much you can do to prevent this because the plant wants to set seed for the next season. Gather the ripened, dry seed for use later, or scatter the seeds immediately on the soil for another crop. Often you will get a crop in late summer that lasts through the first hard freeze, when the plant finally dies.

Dill is an annual, although the scattered seed will produce new plants the next season. Dill weed, or the leaves of the dill plant, are also easy to harvest and dry so you don’t have to go without dill in winter. Simply cut leaves and lay them on newspapers indoors, out of sunlight. In about a week the dill will be dried and you can put it in an airtight container to use later.

Dill Seasoning Tips

  • Dill seeds have a strong flavor, so use sparingly and taste often to balance the flavor to your preferences.
  • Dill leaves can be dried or frozen. Cut off leaves with scissors as needed.
  • Dill can be frozen in small plastic bags for up to 6 months. Use what you need and keep the rest frozen until later.
  • One tablespoon chopped fresh dill equals 1 teaspoon dried dill weed.
  • One half ounce fresh dill equals about one half cup of leaves.

Dill Recipes to Try

Dill can easily be used in marinades and rubs, and it can season soups, stews and even breads or crackers. If you want to extend your dill palate a bit further, try these delicious recipes!

Dill Dip (24 servings)

Ingredients:

  • 2 cups mayonnaise
  • 2 cups sour cream
  • 3 tablespoons chopped onion
  • 1 teaspoon seasoning salt
  • 3 teaspoons dried dill weed
  • 1 tablespoon white sugar

Directions:

In a medium bowl, mix together mayonnaise, sour cream, chopped onion, seasoning salt, dill weed and white sugar. Refrigerate for at least 8 hours before serving.

Garlic Dill New Potatoes (5 servings)

Ingredients:

  • 8 medium red potatoes, cubed
  • 3 tablespoons butter, melted
  • 1 tablespoon chopped fresh dill
  • 2 teaspoons minced garlic
  • 1/4 teaspoon salt

Directions:

Place the potatoes in a steamer basket, and set in a pan over an inch of boiling water. Cover and steam for about 10 minutes, until potatoes are tender but not mushy.

In a small bowl, stir together the butter, dill, garlic and salt. Transfer the potatoes to a serving bowl and pour the seasoned butter over them. Toss gently until they are well-coated. Serve immediately.

Once you taste dill, you’ll be curious to include it in many of your favorite recipes. Get planting and grow your own dill today!

delicious-dill

Fall Horticultural Oil Application

Autumn is an excellent time to apply horticultural oil. The oil smothers many soft-bodied insects and hard-shelled scales that are impenetrable to many insecticides, and can therefore help control some of the most stubborn insect populations. But is it right for your plants?

About Horticultural Oil

Horticultural oil, or hort oil, is typically derived from petroleum, and is a type of ecologically-friendly mineral oil. Some cottonseed and soybean oils can also be effective horticultural oils. Emulsifying agents are typically added to these oils so they can be mixed with water and used as a spray, which helps distribute them evenly over plant foliage to be most effective.

Pests That Don’t Like Horticultural Oils

Different types of horticultural oils can be effective against many unwanted garden pests, including…

  • Spider mites
  • Aphids
  • Whiteflies
  • Mealy bugs
  • Psyllids
  • Lace bugs
  • Caterpillars

In addition to smothering the larvae or insects directly, the heavy oil also makes it difficult for many insects to crawl therefore starving them to death and preventing them from spreading diseases from plant to plant. Additionally, the oil repels many insects looking for winter homes. The oils also act as fungicide against powdery mildew, rust and leaf spot on some plants.

Applying Horticultural Oils

Application of horticultural oils is easy, requiring only a simple hose-attached sprayer. Because oil and water do not mix, frequent agitation by shaking is required even if the oils are mixed with other agents to be more sprayable. These products are most effective if applied when plants are dormant, since oil-based products can burn and harm actively growing foliage, buds, flowers and fruit. Some lighter weight, summer-formulated oils are available, but they should be used only sparingly and only if absolutely necessary. Autumn and winter are the best seasons to apply horticultural oils when insects are a problem, though autumn applications can occasionally cause problems with plants dying back and other winter damage. Because the oils can evaporate and dissipate quickly, they should only be used when insects are present, otherwise they will be ineffective. In freezing weather the oil coverage will be inconsistent, so cool but not bitterly cold temperatures are best.

Of course, always follow the instructions for proper application rates, plant sensitivity and ideal weather conditions to ensure the most effective treatment. Because these oils are still pesticides, protective gear such as gloves and goggles should also be worn to avoid accidental irritation or more severe contamination.

Using hort oils can be a great way to control insects on your plants, but only if the oils are used appropriately. Come in for a consultation to see if these products can help end your insect problems.

FallHortOIl_1

Save