Author Archives: D.R. Snell Nursery

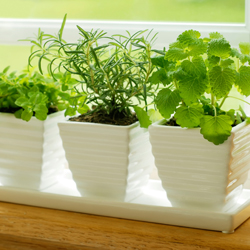
Spice Up Your Herb Garden With Horseradish

Used in dips, sauces, spreads, relishes and dressings, horseradish has a notable pungent flavor that quickly clears the sinuses. Although generally grown for its root, the young, tender leaves of this plant are delicious in a salad. How much more do you know about horseradish?

About Horseradish

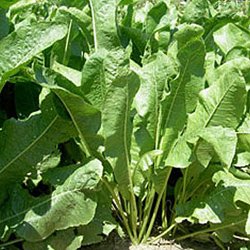
Horseradish (Armoracia rusticana) is a perennial related to wasabi, mustard and cabbage. Believed native to southeastern Europe and western Asia, it is now a popular plant around the world. It has been cultivated for millennia, from the ancient Egyptians and Greeks to modern horticulturalists. In addition to its popular food uses, enzymes found in horseradish are useful in biochemistry applications. The root has even had a variety of medicinal uses, both as an ingested medicine as well as part of poultices and washes. Horseradish has been used to treat urinary tract infections, coughs, arthritis, gout, swollen joints and more.

Horseradish in the Garden

If you are interested in growing horseradish, it is best to know this plant’s needs to encourage the best possible plants with rich, flavorful roots.

  • Planting
    Plant roots of this hardy perennial in early spring in full sun in a well-turned garden bed or container. One or two roots are more than enough to start with, as this plant self-propagates readily from side root shoots. Water plants as necessary to keep soil from drying out.
  • Harvest
    Horseradish planted this spring will be ready to harvest in October or November but roots may be harvested, as needed, any time of the year. Harvest large roots leaving smaller ones in the soil to fully develop.
  • Storing
    Dug roots can be stored in the refrigerator for several months.
  • Processing
    For basic horseradish, scrub and peel the root, chop into small pieces and grind in a food processor adding a small amount of white vinegar and salt. Place in clean jars, seal and refrigerate for up to six months. Other spices may be added if desired for different flavors.

Horseradish in the Kitchen

Fresh horseradish will have a more pungent, richer flavor. There are many delicious ways to experiment with this root and its mash, including using it for…

  • Marinades and wet rubs
  • Dips
  • Salad dressings
  • Condiments and spreads
  • Adding to soups or stews
  • Spicing up a Bloody Mary
  • Spicy deviled eggs

With so many tasty ways to use horseradish, you’ll wish you’d added it to your garden years ago!

Vegetable Gardening With The Seasons

Want to grow vegetables in every season? Generally, vegetables can be divided into cool-season, warm-season and hot-season crops. The key to extending your gardening season to the limits is successive garden planting and planning. Planting cool-season crops in early spring, followed by warm-season plants, then ending in the fall with cool-season crops again will help you make the most of your growing season. At the same time, your planting should include staggering plantings every two weeks along with selecting early, mid-season and late varieties so the harvest is equally distributed.

Cool-Season Crops

To begin, you will want to plant your cool-season crops: broccoli, cauliflower, cabbage (early and late varieties), Brussels sprouts, and others (see list below). Many of these crops can be started indoors, then transplanted out to the garden when the conditions are best. To extend the season even more or to get an early start, you can try some season-stretching devices that protect plants until the weather warms up, such as Wall-O-Water, cold frames and row covers.

  • Wall-O-Water is an innovated, insulated frame fits over top of the plants to form mini-greenhouses.
  • Cold frames are boxes with translucent tops that allow sunlight in, but keep the cold winds out.
  • Row covers, like remay fabric, are put over top of the plants to keep them protected.

Warm-Season Crops

After getting your cool-season crops planted and transplanted into the garden, you may want to start seeds indoors for your warm-season crops such as cantaloupes, squash, tomatoes, peppers, cucumbers and pumpkins. Starting the seeds indoors will extend the growing season, letting you enjoy these crops even if the “warm” part of your season may not be long enough for them to fully  mature. Set out warm-season crops just after the last spring frost. These types of starter plants will also be available in late April and May.

Hot-Season Crops

Hot-season plants like lima beans, okra, snap beans, sweet potatoes, watermelon, corn and eggplant cannot tolerate frost or cold soil. These crops should not be planted until three weeks after the warm-season plants. Season extenders can make conditions more favorable to plant these crops slightly earlier, but they can be more delicate if planted too early. Like warm-season crops, however, it is possible to start these seeds indoors so the plants are more mature and more resilient to be planted outdoors as soon as possible.

Back to Cool-Season Crops

In early fall, cool-season crops can be planted again so they grow into fall and winter. Brussels sprouts, cabbage, some varieties of lettuce, parsley and spinach tend to be the most cold-hardy vegetables and can even recover from a hard frost late in the season.

With care and planning, it is possible to enjoy your growing season for far longer than the weather may dictate, and you’ll have a much more bountiful, varied harvest to show for it!

Sow & Grow In Cool Spring and Fall Soil:

  • Artichoke
  • Arugula
  • Beets
  • Bok Choy
  • Broccoli
  • Cabbage (early & late varieties)
  • Carrots
  • Chard
  • Collards
  • Endive
  • Escarole
  • Garlic
  • Kale
  • Kohlrabi
  • Leeks
  • Lettuce (head and leaf varieties)
  • Mesclun
  • Mustard
  • Onions
  • Parsley
  • Parsnip
  • Peas
  • Potato
  • Radicchio
  • Radish
  • Spinach

Start Indoors & Transplant or Sow Seeds In Late Spring:

  • Beans
  • Cantelope
  • Corn
  • Celery
  • Chinese Cabbage
  • Cucumbers
  • Eggplant
  • Onions
  • Peppers
  • Pumpkins
  • Squash
  • Tomatoes
  • Watermelon

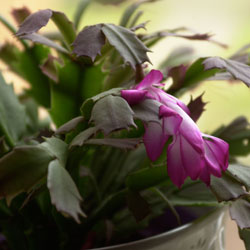
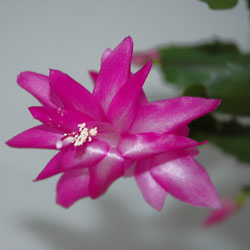
Holiday “Cactus” (Schlumbergera varieties)

Have you noticed the odd-looking plants with neon bright flowers blooming since Halloween? You may know them as Thanksgiving cactus, Christmas cactus or Crab Cactus. Whatever you call them, they’re certainly bright and cheerful, and bring a bold bloom of color indoors during the winter months.

These plants don’t resemble their cactus cousins. Native to forests and jungles rather than desert regions, these plants are generally epiphytic, growing on trees or rocks. Distinctly flattened claw-like joints approximately 1″ long form the arched and hanging stems. The 2 ½ – 3″ tubular blossoms emerge from the stem tips.

In case you’re wondering, the Easter cactus is a close relative but a different genus. However, in addition to blooming in the spring, another difference is the blossoms also form at the stem joints. Hybrids now bloom at different times of the year and new introductions create a wider variety of colors including pink, reddish, white, orange, purple and even multicolored blooms on the same plant. You can actually create a blooming rainbow effect over the entire year, with proper care and diligent upkeep.

The Christmas cactus usually begins flowering when night temperatures are around 55° Fahrenheit. After the buds are set, night temperatures of 60-70° Fahrenheit and slightly higher during the day are ideal. Many people summer their plants outdoors in a shady location and bring them indoors after bud set to enjoy during the holidays.
Caring for Holiday Cacti

Holiday cacti are as easy to grow as most houseplants. These easy instructions can help your Christmas cactus become part of your holiday traditions for years to come.

  1. Use general all-purpose container potting soil and a pot with sufficient drainage to protect the roots.
  2. Keep the soil moist while the cactus is blooming and allow it to become mostly dry while resting before watering again.
  3. Fertilize “weakly, weekly” while flowering. Otherwise, water every other month without fertilization.
  4. Place the cactus where it will receive bright indirect light for 6-8 hours a day. Avoid direct sunlight that can burn the plant.
  5. Transplant the cactus to a larger container when roots are very tight and blooming is less vigorous.

A holiday cactus can be a fine addition to any winter decorations, or by itself it will brighten any room for weeks with its bold, colorful blooms. With proper care, you’ll enjoy your cactus for many holiday seasons.

cactus-2cactus-1

Gardener’s Calendar (November & December)

Winter is upon us. Depending upon the temperatures, there may still be time to finish remaining chores. If you have any questions about the following procedures or products, please come in and see us. We can help you select the correct dormant oil, fertilizer, selective herbicide and frost protection method. We’re always here to help.

General Landscape

  • Mulch with bark, compost or other local materials to enrich soil, protect plant roots and prevent erosion.
  • Protect plants from frost and wind.

Houseplants

  • Perk up tired houseplants by removing dead and dying leaves. Wash under a soft shower in the sink or tub.
  • Spider mites proliferate in warm dry winter homes. Check for mites by looking for tiny speckles on leaves.
  • Transplant if roots are growing through the drainage holes or over the pot edge. If you don’t want to move into a larger pot, untangle the roots and cut back by 1/3, scour the pots and replant with new soil.
  • Remember to turn your plants each week as they begin to grow towards the weaker window light.
  • For indoor bloom, plant amaryllis, paper white narcissus, hyacinth, crocus and indoor cyclamen.
  • Popular holiday plants such as poinsettias, chrysanthemums and orchids fill the stores. Check them thoroughly for “hitchhikers” before bringing into the home or spray with household plant insecticide or soap.
  • Be creative in your arrangements and combine them with metallic painted twigs, pinecones or seashells.
  • If using a live tree for a “living Christmas tree”, prolong its time indoors by using Wilt-Pruf to reduce the loss of moisture from the needles.

Lawn:

  • Remove leaves, toys, hoses, etc, from lawns to prevent dead spots.
  • Apply winter fertilizer, if not already done. The middle number, phosphorus, aids root growth during the winter.
  • If you have weeds in your lawn, consider using a winter fertilizer with weed control.
  • Mow one time after lawn goes dormant and before freezing. This last mowing should be 2 ½” tall.
  • When temps are freezing, stay off the lawn as much as possible to reduce blade breakage.

Vegetables:

  • Protect cool season vegetables with row covers, leaf or mulch cover.
  • Mulch beds to enrich and protect from rain/snow erosion.
  • Review gardening notes and plan next year’s garden.
  • Test germination rate of leftover seeds, if wanting to use again.
  • If gardening under lights or in heated greenhouse, start seeds of early spring crops: lettuce, kale, mustard, spinach, and other greens.
  • Harvest carrots, lettuce, greens and over-wintering crops.

Trees and Shrubs

  • Stake young trees and vines if needed. In case of a heavy freeze, use Wilt-Pruf or similar product to reduce transpiration of moisture.
  • Prevent southeast trunk injury, a form of winter freeze damage. Use light-colored tree guards to protect the trunks of young trees for at least two years after planting. After two years, paint the trunks with white latex paint. These two methods prevent the tree trunk from splitting when sunlight warms the bark on side of the trunk.
  • Fertilize shrubs and trees, if not done already, and the ground is not frozen. This allows roots to absorb when temperatures are above 40⁰ and when spring returns. Granules and spikes provide nutrients effectively and easily.
  • Prune out dead and diseased tree branches to prevent from falling on roof or pedestrians.
calendar-2

calendar-3

calendar-4

calendar-5

calendar-6

calendar-1

Shade Gardening With Perennials

Many gardeners with shady, low-light landscapes mistakenly believe they can’t enjoy beautiful gardens and flowerbeds because of the lack of sunlight. In reality, however, many stunning perennials thrive in shady spots and can bring elegance, color and beauty to what was formerly a drab corner of the yard. Some include stunning foliage, even variegated options or unusual shapes, while others have subtle yet beautiful blooms as well. Some even have dramatic stems and arching branches that can be lovely all year long.

Try some of these shade-loving perennials to brighten up your darker spots, whether they are beneath mature trees, tucked into hidden corners or just in less sunlit areas.

Perennials for Dry Shade…

  • Lily of the Valley (Convallaria majalis)
  • Bleeding Heart (Dicentra ‘Luxuriant’)*
  • Bishop’s Hat (Epimedium perralchicum, pinnatum, pubigerum)*
  • Cranesbill (Geranium maculatum, endressii, nodosum)*
  • Stinking Hellebore (Helleborus foetidus)*
  • Deadnettle (Lamium maculaturm)*
  • Soloman’s Seal (Polygonatum multiflorum)*

Perennials for Cool, Moist Soils in Shade…

  • Maidenhair Fern (Adiantum pedatum)**
  • Japanese Painted Fern (Athyrium nipponicum ‘Pictum’)**
  • Japanese Holly Fern (Cyrtomium)**
  • Autumn Fern (Dryopteris erythrosora)**
  • Marginal Shield Fern (Dryopteris marginalis)**
  • Epimedium grandiflorum, warleyense*
  • Lenten Rose (Helleborus viridus, orientalis)*
  • Virginia Bluebell (Mertensia virginica)**
  • Christmas Fern (Polystichum acrostichoides)**
  • Soft-Shield Fern (Polystichum setiferum ‘Divisilobum’)**
  • Foam Flower (Tiarella cordifolia)*
  • Toad Lily (Tricyrtis formosana)*
  • Toadshade (Trillium sessile, grandiflorum)**
  • Globeflower (Trollius europaeus)*

Perennials Groundcovers in Shade…

  • Bear’s Breech (Acanthus mollis)*
  • Goutweed (Aegopodium podagraria ‘Variegatum’)*
  • European Wild Ginger (Asarum europaeum)*
  • Sweet Woodruff (Galium odoratum)*
  • Variegated Archangel (Lamiastrum galeobdolon ‘Florentinum’)*
  • Dead Nettle (Lamium maculatum ‘Beacon Silver’)*
  • Variegated Wood Rush (Luzula sylvatica ‘Marginata’)*
  • Foam Flower (Tiarella cordifolia)*
  • Dwarf Periwinkle (Vinca minor)*
  • Barren Strawberry (Waldsteinia ternata)*

Climbers for Shady Walls & Fences…

  • Akebia (Akebia quinata, trifoliata)
  • Clematis ‘Nelly Moser’
  • Wintercreeper (Euonymus fortunei ‘Coloradus’)
  • English Ivy (Hedera helix)
  • Golden Hops (Humulus lupulus)
  • Japanese Honeysuckle (Lonicera japonica ‘Halliana’)
  • Virginia Creeper (Parthenosis henryana, quinquefolia, tricuspidata)

*light shade
**medium to dense shade

When choosing your shade-loving perennials, be sure to take into consideration the size of the space you’re hoping to fill, the soil quality, moisture levels and whatever sunlight the area does receive. Plant them gently and care for them thoughtfully until the plants are well established and they will thrive. Carefully selected shade perennials can do well if they are well-matched to their location, and you’ll love the beauty and ease they add to your yard.

shadeperennials1shadeperennials3

shadeperennials2

Shrubs for Summer Color

Many gardeners assume that the brightest flowers are only seen in spring, but there are many stunning shrubs that have great color all through the summer. Some feature outstanding blooms while others have equally showy foliage and can brighten up any yard. But which will look best in your yard?

Top Summer Color Shrubs

There are a number of tried-and-true summer-flowering shrubs that never fail to be impressive. Consider these favorites to enhance your landscape all summer long.

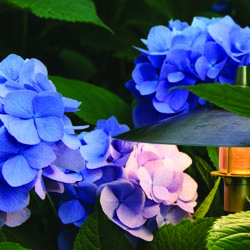
  • Hydrangea
    This very popular mounding shrub is an old-fashioned favorite, but it doesn’t have to be just your grandmother’s shrub – there are hydrangeas for every situation and taste. Flowers appear in early summer and can last for several weeks. Choose from pink, blue (use an acidic fertilizer to maintain this unusual color) or white blooms. Large flower heads great for drying or make outstanding arrangements and bouquets when cut. These shrubs do best in light shade or sun. One of the easiest hydrangeas to grow is the native American oak-leafed hydrangea has lobed leaves with fragrant, conical-shaped flower heads.
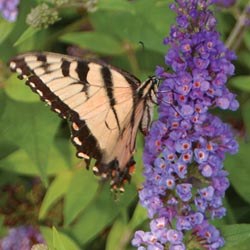
  • Butterfly Bush (Buddleia)
    This dramatic shrub is truly a butterfly magnet, and hummingbirds love it as well. One of the most fragrant flowering shrubs, butterfly bush blooms from early summer to autumn frost, and different varieties can thrive in a wide range of growing zones. The flowers can be pink, purple, blue, yellow or white, and often feature elegant spiked panicles, arching branches and interesting foliage. These shrubs do best in full sun and come in different sizes to suit different landscaping areas.
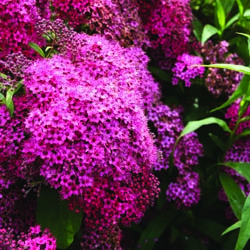
  • Spirea
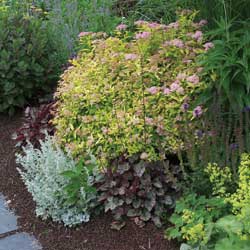
    A generally low-maintenance choice, this shrub features golden yellow to lime-colored foliage all summer with pink or lavender blooms in late spring through summer. Goldmound, Gold Flame and Anthony Waterer are all great cultivars and easy care shrubs growing to about 2-4’ by 3-5’. This truly is the perfect shrub to use anywhere in the landscape, and it can tolerate sun to part shade growing conditions.
  • Rose of Sharon (Hibiscus)
    This is one of the showiest plants of the summer, and Rose of Sharon is also one of the easiest to grow. Dense growing and upright when young these shrubs will spread with age, so take care to plant them in appropriate spaces to avoid overcrowding. The dark green foliage contrasts nicely with large, showy flowers that can be up to 4” across. Flowers open in July and will continue blooming through late summer and into fall. Flowers are sterile, eliminating seed problems. This shrub is ideal to plant as a screen, hedge or focal point in full sun.
  • Blue Mist Spirea (Caryopteris)
    This shrub is a great plant for late summer color with bursts of purple-blue flowers just when many other plants are growing dull. Its low-growing, mounding habit reaches 2-3’ wide by 2-3’ tall. Blue Mist Spirea is easy to grow and can tolerate some neglect. It should be planted in full sun, and will bloom from summer to fall.

With any of these shrubs in your yard, your summer landscape can be just as colorful and eye-catching as any spring flowers or autumn foliage.

summershrub2summershrub3

summershrub1

Tools for Holiday Gift Giving

It’s easy to shop for gifts for the gardeners on our holiday list. There are always new tools available for the serious, and not so serious, gardeners in our lives. In fact, there may be too many to pick from, but we can help you narrow down the selection to find the perfect gift.

  • Pruners
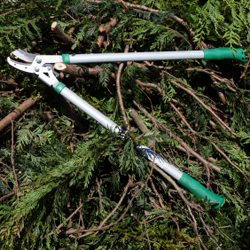
    Every gardener faces the need to prune or deadhead flowers at some time. From hand pruning a wayward twig to removing a branch 10′ overhead, there is a pruning tool to make any job easier.Because everyone’s hands and hand strengths are different (and some folks are left-handed), hand pruners are the most personal of garden tools. Two well-known companies, Corona and Felco, produce hand pruners and saws. Hand pruners come in two basic styles: by-pass pruners have two sharp blades that pass each other when cutting, while anvil pruners have one sharp blade cutting the material against the other flat blade. Both companies offer several models of these styles to accommodate different pruning needs, sizes of hands, hand strengths and orientations. New ergonomic models optimize hand strength and minimize discomfort.Another option is a pruning saw, which is different from any old saw. A larger sheath model saw makes short work of removing a large branch. A smaller fold-up model is great to have in a gardener’s pocket while making the daily rounds. Different models, with different lengths and teeth sizes, ease sawing effort. Check out our gift shop to see all the options.When an overhead branch requires removal, a gardener appreciates a pole pruner. Not only is it a hassle to get out the ladder, it’s dangerous to perform the sawing and pruning motions when balancing. The redesigned Fiskars pole pruners are powerful, with a telescoping pole to 12′ extension. If the branch is too large for the pruner, the detachable saw blade cuts through it. Unlike the old style pole pruners, there are no ropes to pull (and tangle in the tree!). Pruning heads even swivel to get a closer and cleaner cut. The Fiskars pole pruner, or Pruning Stik®, won’t fit in your gardener’s stocking, but it’s certain to be a winner!
  • Shovels and Spades
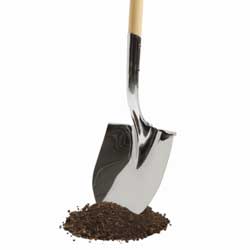
    Shovels and spades are other key gardening tools. While many shovel versions exist, the round point shovel is the most common. The heavy-duty blade point pushes through the soil and the rounded blade scoops the soil. Square-edged shovels also scoop soil and other materials in addition to digging but don’t have the point. Spades, basically a smaller version of a shovel, are usually flatter. Most shovels have a rolled lip, or rim, on the top of the blade. This is where the user puts their foot to push the tool into the soil. The larger the rim, the more comfortable for the foot when doing a lot of digging.Better quality shovels and spades are powder coated to prevent rust, are pre-sharpened, and the blade is welded or forged to the shaft. Shafts vary in style and material. Wood, plastic or fiberglass shafts may be straight or end with a handle. A fiberglass shaft lasts longer than wooden shafts and doesn’t require annual maintenance and cleaning. Ergonomic designs reduce the chance of wrist injury. Other shovel/spade specialties include the trenching shovels to dig deeper than the standard 12 inches, border spades and smaller sized round point shovels to dig smaller holes or working around existing landscape. And don’t forget trowels and other hand digging tools. If your gardener has a special digging or scooping need, there’s a shovel or spade for it.
  • Hoes
    Hoes may seem old-fashioned, but there are new designs every gardener can appreciate. Used since ancient times, the hoe performs many functions in the garden depending upon its configuration. The regular hoe’s rectangular shaped blade, positioned at a right angle to the shaft, weeds and shallowly cultivates. The V-shaped version, also called the Warren hoe, has a point to dig furrows for seed planting. The other side closes the furrows after planting. The “weeding” and “action” style hoes make short work of removing weeds.
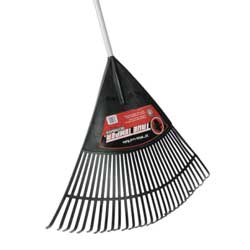
  • Rakes
    A rake is another essential tool. Think of a leaf rake as a large hand – it allows the user to gather a large amount of material such as leaves and debris. Rakes may be metal or plastic, quite large to cover a large area quickly or quite small to get under plants without damage. Rakes are practical and save time and energy. Specialized rakes include the two styles of garden rakes, flat and bow, and thatch rakes to remove thatch from lawns to keep turf lush and thick.

There’s just one problem with giving these larger tools as gifts – they’re very difficult to wrap- just let us make a beautiful big red bow for them.

Gifts from the Greenhouse

Living gifts are wonderful for any holiday, and they are particularly popular in winter when they bring a lovely touch of nature indoors for us to enjoy until spring. Fortunately, there are many popular plants that make stunning holiday gifts.

Poinsettias

Available in shades of white, pink, red, gold, plum and variegated combinations, poinsettias are great for decorating your home as well as the perfect holiday gift. We sleeve your plants to protect them as you take them to your car. Do not leave these plants in an unheated car, and take them indoors quickly when you get home. Poinsettias’ colorful bracts last well beyond all the holidays and even into the spring if properly cared for. These easy-care plants prefer bright, filtered light in a spot free from drafts. Let the plant become moderately dry between waterings, and don’t fertilize while in bloom. Ask for our re-blooming guide if you want to try your hand at re-flowering your poinsettia next year.

Christmas Cactus

With colorful flowers in red, pink, salmon, orange, lavender or white, Christmas cactus will do best in a sunny south, east or west window. Keep the soil evenly moist but not too wet or else the roots may rot. To encourage your cactus to bloom, avoid any artificial light at night starting in September. You will also need to keep the plant in a cool location, allow the soil to dry well between waterings and don’t fertilize. Over time, these plants can grow to tremendous proportions and will have dozens of blooms just when their colors are most welcome.

Cyclamen

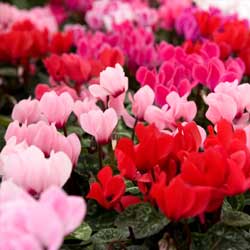
Cyclamen is a popular perennial plant with generous colorful flowers that bloom for a long time. Keep cyclamen evenly moist from September through May. Let them dry from June to August so the tuber can rest. Ideal light is a sunny east or west window, but do not allow the foliage to touch the glass or it may freeze or burn with the temperature changes. Cyclamen prefer a cool room (60-70 degrees). Feed them from September to May, then stop for the summer months to encourage winter blooming.

Amaryllis

This plant never fails to break the gloom of winter and provides enormous pleasure with its large, gorgeous blooms. If you want an amaryllis to bloom for Christmas, it must be started in the fall. Plant your amaryllis in a container not much larger than the bulb itself with a third of the bulb above the soil. Place in a warm, sunny spot, watering when the soil is dry. As the bulb grows more actively, increase the frequency of watering. Your plant will flower in brilliant red, white or a variegated pattern of the two. After flowering, you can save the bulb for next year. Ask one of our staff for instructions or pick up our free guide about amaryllis.

Azaleas

Florist azaleas normally bloom in spring, but they can be forced into bloom anytime. Azaleas are available in many colors, with the most popular shades including pink, white and peach. These flowers come in both single and double blooms and they can last for up to a month, ideal for a holiday gift or winter decoration. When an azalea is blooming, do not allow it to dry completely.

Norfolk Island Pine

These little trees are native to Norfolk Island in the Pacific, where they will grow as high as 200 feet with trunks 10 feet in diameter. Smaller versions are easy-to-please houseplants. A slow grower, Norfolk Island Pines will send out about 6 inches of new growth each year. Bright, indirect light is fine although in the winter the plants can stand full sun. Keep the plant moist, but never sodden. Feed your plant every 2 months. Repotting is best done in spring but needs to be done infrequently, since the plants are slow growers. These trees lose their lower branches as they grow.

Paperwhite Narcissus

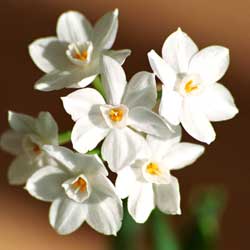
Of all flower bulbs, paperwhite narcissus are one of the easiest to bring into flower in the indoor garden. Paperwhites are the delicate white flowering, notoriously fragrant narcissus that reliably bloom indoors about 4-6 weeks after planting. Paperwhites are grown in a dish with stones (or in a pot with soil). Fill the dish halfway with stones and place bulbs on top. Place bulbs close together, but not touching. Add water up to the base of the bulbs. Pack more stones around the bulbs until just the tips of the bulbs are visible. Place in a bright, cool area (60-65¡ F) and water regularly.

No matter which plant you choose, these gifts from the greenhouse add a fresh touch to any home throughout the winter.

greenhouse-gifts-3greenhouse-gifts-1

greenhouse-gifts-2

Care of Christmas Greens

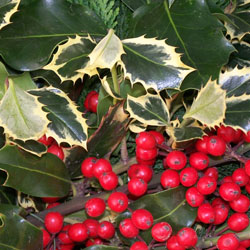
Fresh cut greens – pine boughs, holly sprigs, mistletoe, etc. – are wonderful for winter and holiday décor, both indoors and out. Extend the life and enjoyment of your fresh greens by following these easy steps:

  • SOAK – Immerse greens in cold water overnight or up to 24 hours. The needles will soak up moisture to stay plump and firm. A good location for accomplishing this task is in a utility sink or bath tub, but be sure the water won’t freeze while the greens are soaking. Use only fresh, plain water without any additives or chemicals.
  • DRY – Allow greens to drip dry for an hour or so in a well-ventilated area out of direct sunlight. This will remove excess water from the branch ends so they do not leak.
  • SPRAY – If desired, spray Wilt-Pruf, an anti-transpirant, on greens when they are finished dripping. This will seal moisture into the needles extending the life of your greens. Do not use this on Princess Pine, and note that this product may change the color of blue-colored cut greens like Colorado Blue Spruce and Blue Juniper. Test the spray on an inconspicuous area first to be sure you don’t mind any changes.
  • DRY – Allow the greens to dry thoroughly after spraying and before decorating and hanging or arranging. This will be sure there are no water spots on any of your bows, accent pieces or ornaments that are part of your fresh arrangements.
  • COOL – Keep greens in as cool a location as possible, out of direct sunlight and away from any heat source, including heating vents, ceiling fans and air ducts. Moving arrangements of fresh greens onto a cool porch or into a garage each night can help extend their vibrancy.
  • BUNDLE – Arrange your fresh greens in dense bundles and bunches, either as wreaths, vase arrangements or swags. As a group, they will help keep each other fresh with slightly higher humidity between each green.
  • WATER – You can mist the greens 3 times a week. Keep centerpieces filled with water when possible. Some will store greens outside during the cold night so they aren’t drying out as fast.

With proper care, your fresh cut greens can be stunning holiday decorations for several days or weeks, bringing a touch of nature into your home even when the world is cased in ice and snow.

Considering Light when Choosing Houseplants

Bring the bright atmosphere of a tropical vacation into your home this season with houseplants. An integral part of your home décor, houseplants not only artistically improve your home, they also cleanse and freshen your indoor air quality. Plants take in carbon dioxide and release clean, pure oxygen. Some plants even absorb certain air toxins, potentially harmful radiation or unpleasant smells. Houseplants also add welcome humidity to the air we breathe, and filter dust particles for a cleaner environment. While houseplants can improve your life in many ways, they must be selected to fit successfully into your lifestyle.

Don’t Consider Light Lightly

When selecting a foliage plant, first determine what type of light you have – this will be the best key to the plant’s health and survival. Look at the area where you would like to keep the plant through the entire day to determine if the light changes. You will also want to keep in mind the time of year – the light will change with different seasons as well as the angle of the sun.

  • Low Light – 3-4 hours of indirect light. Don’t confuse this type of light with no light. If you can sit in the room and read comfortably without turning on a light, it is low light. If you must turn a light on, then it’s considered no light. Plants in Low light need to be watered way less frequently.
  • Medium Light – 4-6 hours of indirect or direct morning sun.
  • High Light – Direct or indirect sun for 6-8 hours a day. Direct afternoon sun in the winter can be too hot for many houseplants. Be careful this time of year because many plants can get sunscald.

No matter what the light levels in different rooms of your home, there are plants that can be comfortable there. If you aren’t sure what your light may be or which plants may thrive, we also recommend you talk to one of our experts about your particular situation for best results.

Low Light Plants

  • Aglaonema
  • Dracaena Warneckii
  • Homolomena
  • Dracaena Janet Craig
  • Pothos
  • Philodendron
  • Spathiphyllum
  • Philodendron Xanadu

Medium Light Plants

  • Corn Plant
  • Norfolk Island Pine
  • Bamboo Palm
  • Ming Aralia
  • Podocarpus
  • Schefflera Amate
  • Spathiphyllum Domino
  • Arboricola
  • Anthirium
  • Ficus Alii
  • Lubersii

High Light Plants

  • Palms
  • Yucca Cane
  • Sago Palm
  • Crotons
  • Fishtail Palm
  • Banana
  • Zamia

A Word About Watering

The smaller the pot, the more frequently you will need to water your houseplant. Small pots (2-3 inches) might need water every day depending on the plant’s needs and the richness of the soil. A 4-6 inch pot may need water every 3-4 days, whereas a 10-inch pot (or larger) usually only requires water every 4-6 days. These guidelines can change depending upon the location of the plant, the type of pot, variety of plant, soil condition, general humidity, time of year and weather conditions. Plants don’t utilize as much moisture on gray days as they do on sunny days.

Because so many factors can impact houseplant watering, determining the watering schedule for large pots (over 10 inches) can be difficult. To help, take a natural wooden dowel and push it into the soil until it reaches the bottom of the pot. After you pull the dowel out, you will be able to see the wetness on the bottom of the stick (if there is any). Also, remember that the larger the pot, the more water will be held in the soil at the bottom – even if there are drainage holes.

Fertilizing

Most foliage or non-flowering houseplants prefer 15-30-15 Houseplant Special fertilizer by Jacks used once a month, year-round. You can increase the feeding to twice a month during the growing season. Flowering plants have different fertilizing needs depending on their bloom schedules and growth productivity. Investigate the needs of your individual plants and feed them appropriately.

Houseplants can add great beauty and many benefits to your home. Once you begin choosing houseplants, you’ll soon be enjoying them in every room and every season.