Author Archives: GCS Dev

7 Top Trees for Multi-Season Interest

7trees_2What’s not to love about a tree? As they grow, their photosynthesis removes and stores carbon dioxide, maintaining a safe oxygen level for us to breathe and cleaning pollutants out of the air. They provide beauty in our gardens and parks. Many provide shade, fruit, syrup, nesting places and animal refuges. They can be a windbreak or a privacy screen. They can be ornamental and practical all at once, and can thrive with little or no care.

We want you to get the most enjoyment out of your trees. Therefore, we have selected seven underused but special trees for you to consider in your landscape. Very hardy, these trees provide all-year interest in mid-Atlantic gardens.

TreeChart

Of course, these aren’t the only trees with year-round interest. Harry Lauder’s Walkingstick, paperbark maple, tri-colored beech, ‘JN Strain’ musclewood and the various cherries are just a few others that can be showstoppers in your landscape throughout the year.

Come on in to see our diverse and incredible selection of beautiful trees. We’ll help you select the perfect one for your landscaping needs and ensure you enjoy it throughout the year.

Creating Humidity for Houseplant Health

Have your houseplants been looking dingy and dry no matter how much you may water them? Have they lost the lustrous glow their foliage first had when you got them? Poor humidity may be the cause. Many of our houseplants hail from the tropics and grow in humidity of 50-80 percent, considerably more humid than typical homes. The trick is to know your plant’s preferences and be able satisfy it. Putting a cactus in the shower will cause it to rot, while a fern is perfectly happy.

But what can you do if you really want that fern in the family room where the humidity may only be 20 percent in the winter? If your plant has brown leaf tips or margins it probably needs more humidity and is asking you to increase it. Luckily, it’s easier to add humidity than it is to take it away.

Easy Ways to Increase Humidity

There are several ways you can easily increase the humidity around your houseplants. If they only need the air a little more humid, just one technique may be sufficient, but if they are humidity-loving plants, you may want to try several options at once to really give them a humidity boost.

  • Pebble Tray
    Place an inch of small pebbles, marbles, shells or gravel in a 2″ deep tray, half fill the tray with water and set your plant on the pebbles. Don’t set the pot in the water, as the wicking action will saturate the pot soil and could lead to rotting roots and overwatering. As the water in the tray evaporates, it increases the humidity immediately around the plant. When you water the plant, pour out the water from the tray to prevent mineral buildup, algae and insect growth.
  • Plant Grouping
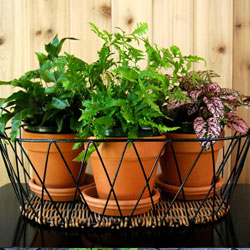
    Rather than spacing plants throughout the room, group them together to take advantage of the moisture each plant produces through transpiration. Grouping plants can increase humidity by as much as 15 percent. Place the entire group on a pebble tray if additional humidity is required. Allow air circulation between the plants by ensuring the plants are not touching each other, and rotate individual plants periodically to encourage straight growth and distribute humidity absorption.
  • Misting
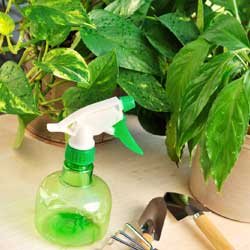
    Use a misting bottle daily to increase humidity and cleanse leaf pores, which tend to clog with dust. However, to prevent leaf rot, do not mist plants with “velvety” leaves such as African violets. Do not over-mist plants to the point where their leaves are dripping wet, or else they may suffer from overwatering.
  • Humidifiers
    Available in a variety of sizes, humidifiers increase the humidity in a larger space. You may also find yourself breathing better when using a humidifier. Our houses become very dry in the winter because of furnaces, heat pumps and fireplaces, and humidifiers can not only help houseplants, but can also help alleviate dry skin, limp hair, chapped lips and hacking coughs.
  • Terrariums
    If your house is just too dry for the plants you would like to grow, try planting them in a terrarium. These nearly enclosed vessels create miniature environments perfect for humidity-loving tropical plants such as ferns, orchids and mosses. You will still need to water your terrarium, but because much of the moisture is trapped, the humidity in the enclosure is much higher.

Keeping your humidity-loving houseplants happy in the winter isn’t difficult. Come in and see us to ask questions, get answers and pick up the simple supplies to make your home a houseplant haven.

HumidityforHouseplant_1

A Kitchen Herb Garden

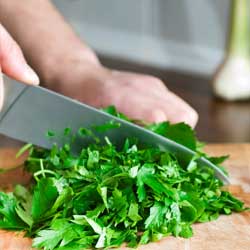
Fresh cut herbs are a delight for any cook, and when they are within arm’s reach, fresh herbs are a delight and dream come true! During the coldest months of the year, potted herbs not only offer convenient, fresh seasonings, but also fragrance, color and flowers to truly spice up the kitchen.

Growing Tips for a Kitchen Herb Garden

Growing herbs in your kitchen isn’t much more difficult than growing them in your garden. To make the transition and bring herbs to your kitchen year-round…

  • When transplanting, use a soil-less potting mix such as Pro-Mix (remember to pre-moisten the soil mix) to ensure proper drainage in small pots.
  • Place on a window sill that gets direct morning sun until noon. If that isn’t possible, opt for another well-lit, sunny window with at least 4-6 hours of bright light.
  • Provide adequate air circulation, but avoid a direct draft or chilling breeze. Do not overcrowd plants which would limit air circulation.
  • Keep temperatures between 60 and 70 degrees. Bear in mind that oven and stove use will heat up the immediate area in the kitchen.
  • Soil should be allowed to dry slightly between watering. Never leave herbs in soggy or wet soil, and drain excess water to prevent rot.
  • Group pots on a tray of moist pebbles for increased humidity to keep foliage (the tastiest part of the herbs!) lush.
  • Feed with a 20-20-20 fertilizer, but adjust the feeding schedule as needed for individual plants.

Choosing Kitchen Herbs

Many different herbs are actually easy to grow inside on the sill. You might choose the herbs you use most often, or those that are featured in your favorite recipes for more flavorful results. You can even consider a specialized garden, such as a salad garden with chives, small Bibb lettuce and even pansies (colorful and edible, too!). An Italian garden might include basil, garlic chives, Italian flat parsley and oregano. Customize your kitchen herb garden to any taste!

The most popular, easiest-to-grow-indoors herbs include…

  • Basil
  • Borage
  • Catnip (for your feline friend)
  • Chives
  • Lemon Balm
  • Mint (best choices include apple, wooly, Corsican, curly, orange, peppermint, pineapple, silver and spearmint)
  • Oregano
  • Parsley
  • Rosemary
  • Sage
  • Bay Laurel
  • Sweet Marjoram
  • Thyme
  • Winter Savory

No matter which herbs you choose, they’re sure to brighten not only your kitchen with their lovely foliage and aromatic fragrances, but they’ll add delectable depth of flavor to all your winter dishes, from soups and stews to roasts, marinades, breads, salads and even desserts. Enjoy those winter herbs, right in your kitchen!

kitchen-herb-2

kitchen-herb-3

kitchen-herb

Spice Up Your Herb Garden With Horseradish

Used in dips, sauces, spreads, relishes and dressings, horseradish has a notable pungent flavor that quickly clears the sinuses. Although generally grown for its root, the young, tender leaves of this plant are delicious in a salad. How much more do you know about horseradish?

About Horseradish

Horseradish (Armoracia rusticana) is a perennial related to wasabi, mustard and cabbage. Believed native to southeastern Europe and western Asia, it is now a popular plant around the world. It has been cultivated for millennia, from the ancient Egyptians and Greeks to modern horticulturalists. In addition to its popular food uses, enzymes found in horseradish are useful in biochemistry applications. The root has even had a variety of medicinal uses, both as an ingested medicine as well as part of poultices and washes. Horseradish has been used to treat urinary tract infections, coughs, arthritis, gout, swollen joints and more.

Horseradish in the Garden

If you are interested in growing horseradish, it is best to know this plant’s needs to encourage the best possible plants with rich, flavorful roots.

  • Planting
    Plant roots of this hardy perennial in early spring in full sun in a well-turned garden bed or container. One or two roots are more than enough to start with, as this plant self-propagates readily from side root shoots. Water plants as necessary to keep soil from drying out.
  • Harvest
    Horseradish planted this spring will be ready to harvest in October or November but roots may be harvested, as needed, any time of the year. Harvest large roots leaving smaller ones in the soil to fully develop.
  • Storing
    Dug roots can be stored in the refrigerator for several months.
  • Processing
    For basic horseradish, scrub and peel the root, chop into small pieces and grind in a food processor adding a small amount of white vinegar and salt. Place in clean jars, seal and refrigerate for up to six months. Other spices may be added if desired for different flavors.

Horseradish in the Kitchen

Fresh horseradish will have a more pungent, richer flavor. There are many delicious ways to experiment with this root and its mash, including using it for…

  • Marinades and wet rubs
  • Dips
  • Salad dressings
  • Condiments and spreads
  • Adding to soups or stews
  • Spicing up a Bloody Mary
  • Spicy deviled eggs

With so many tasty ways to use horseradish, you’ll wish you’d added it to your garden years ago!

Vegetable Gardening With The Seasons

Want to grow vegetables in every season? Generally, vegetables can be divided into cool-season, warm-season and hot-season crops. The key to extending your gardening season to the limits is successive garden planting and planning. Planting cool-season crops in early spring, followed by warm-season plants, then ending in the fall with cool-season crops again will help you make the most of your growing season. At the same time, your planting should include staggering plantings every two weeks along with selecting early, mid-season and late varieties so the harvest is equally distributed.

Cool-Season Crops

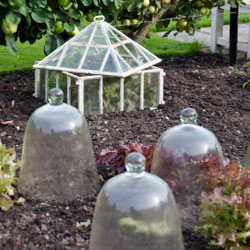
To begin, you will want to plant your cool-season crops: broccoli, cauliflower, cabbage (early and late varieties), Brussels sprouts, and others (see list below). Many of these crops can be started indoors, then transplanted out to the garden when the conditions are best. To extend the season even more or to get an early start, you can try some season-stretching devices that protect plants until the weather warms up, such as Wall-O-Water, cold frames and row covers.

  • Wall-O-Water is an innovated, insulated frame fits over top of the plants to form mini-greenhouses.
  • Cold frames are boxes with translucent tops that allow sunlight in, but keep the cold winds out.
  • Row covers, like remay fabric, are put over top of the plants to keep them protected.

Warm-Season Crops

After getting your cool-season crops planted and transplanted into the garden, you may want to start seeds indoors for your warm-season crops such as cantaloupes, squash, tomatoes, peppers, cucumbers and pumpkins. Starting the seeds indoors will extend the growing season, letting you enjoy these crops even if the “warm” part of your season may not be long enough for them to fully  mature. Set out warm-season crops just after the last spring frost. These types of starter plants will also be available in late April and May.

Hot-Season Crops

Hot-season plants like lima beans, okra, snap beans, sweet potatoes, watermelon, corn and eggplant cannot tolerate frost or cold soil. These crops should not be planted until three weeks after the warm-season plants. Season extenders can make conditions more favorable to plant these crops slightly earlier, but they can be more delicate if planted too early. Like warm-season crops, however, it is possible to start these seeds indoors so the plants are more mature and more resilient to be planted outdoors as soon as possible.

Back to Cool-Season Crops

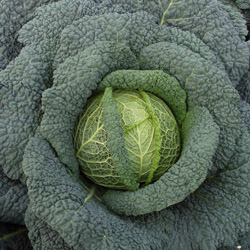
In early fall, cool-season crops can be planted again so they grow into fall and winter. Brussels sprouts, cabbage, some varieties of lettuce, parsley and spinach tend to be the most cold-hardy vegetables and can even recover from a hard frost late in the season.

With care and planning, it is possible to enjoy your growing season for far longer than the weather may dictate, and you’ll have a much more bountiful, varied harvest to show for it!

Sow & Grow In Cool Spring and Fall Soil:

  • Artichoke
  • Arugula
  • Beets
  • Bok Choy
  • Broccoli
  • Cabbage (early & late varieties)
  • Carrots
  • Chard
  • Collards
  • Endive
  • Escarole
  • Garlic
  • Kale
  • Kohlrabi
  • Leeks
  • Lettuce (head and leaf varieties)
  • Mesclun
  • Mustard
  • Onions
  • Parsley
  • Parsnip
  • Peas
  • Potato
  • Radicchio
  • Radish
  • Spinach

Start Indoors & Transplant or Sow Seeds In Late Spring:

  • Beans
  • Cantelope
  • Corn
  • Celery
  • Chinese Cabbage
  • Cucumbers
  • Eggplant
  • Onions
  • Peppers
  • Pumpkins
  • Squash
  • Tomatoes
  • Watermelon

Holiday “Cactus” (Schlumbergera varieties)

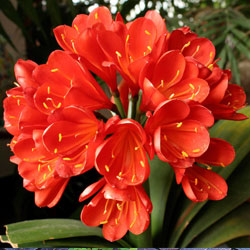
Have you noticed the odd-looking plants with neon bright flowers blooming since Halloween? You may know them as Thanksgiving cactus, Christmas cactus or Crab Cactus. Whatever you call them, they’re certainly bright and cheerful, and bring a bold bloom of color indoors during the winter months.

These plants don’t resemble their cactus cousins. Native to forests and jungles rather than desert regions, these plants are generally epiphytic, growing on trees or rocks. Distinctly flattened claw-like joints approximately 1″ long form the arched and hanging stems. The 2 ½ – 3″ tubular blossoms emerge from the stem tips.

In case you’re wondering, the Easter cactus is a close relative but a different genus. However, in addition to blooming in the spring, another difference is the blossoms also form at the stem joints. Hybrids now bloom at different times of the year and new introductions create a wider variety of colors including pink, reddish, white, orange, purple and even multicolored blooms on the same plant. You can actually create a blooming rainbow effect over the entire year, with proper care and diligent upkeep.

The Christmas cactus usually begins flowering when night temperatures are around 55° Fahrenheit. After the buds are set, night temperatures of 60-70° Fahrenheit and slightly higher during the day are ideal. Many people summer their plants outdoors in a shady location and bring them indoors after bud set to enjoy during the holidays.
Caring for Holiday Cacti

Holiday cacti are as easy to grow as most houseplants. These easy instructions can help your Christmas cactus become part of your holiday traditions for years to come.

  1. Use general all-purpose container potting soil and a pot with sufficient drainage to protect the roots.
  2. Keep the soil moist while the cactus is blooming and allow it to become mostly dry while resting before watering again.
  3. Fertilize “weakly, weekly” while flowering. Otherwise, water every other month without fertilization.
  4. Place the cactus where it will receive bright indirect light for 6-8 hours a day. Avoid direct sunlight that can burn the plant.
  5. Transplant the cactus to a larger container when roots are very tight and blooming is less vigorous.

A holiday cactus can be a fine addition to any winter decorations, or by itself it will brighten any room for weeks with its bold, colorful blooms. With proper care, you’ll enjoy your cactus for many holiday seasons.

cactus-2cactus-1

Gardener’s Calendar (November & December)

Winter is upon us. Depending upon the temperatures, there may still be time to finish remaining chores. If you have any questions about the following procedures or products, please come in and see us. We can help you select the correct dormant oil, fertilizer, selective herbicide and frost protection method. We’re always here to help.

General Landscape

  • Mulch with bark, compost or other local materials to enrich soil, protect plant roots and prevent erosion.
  • Protect plants from frost and wind.

Houseplants

  • Perk up tired houseplants by removing dead and dying leaves. Wash under a soft shower in the sink or tub.
  • Spider mites proliferate in warm dry winter homes. Check for mites by looking for tiny speckles on leaves.
  • Transplant if roots are growing through the drainage holes or over the pot edge. If you don’t want to move into a larger pot, untangle the roots and cut back by 1/3, scour the pots and replant with new soil.
  • Remember to turn your plants each week as they begin to grow towards the weaker window light.
  • For indoor bloom, plant amaryllis, paper white narcissus, hyacinth, crocus and indoor cyclamen.
  • Popular holiday plants such as poinsettias, chrysanthemums and orchids fill the stores. Check them thoroughly for “hitchhikers” before bringing into the home or spray with household plant insecticide or soap.
  • Be creative in your arrangements and combine them with metallic painted twigs, pinecones or seashells.
  • If using a live tree for a “living Christmas tree”, prolong its time indoors by using Wilt-Pruf to reduce the loss of moisture from the needles.

Lawn:

  • Remove leaves, toys, hoses, etc, from lawns to prevent dead spots.
  • Apply winter fertilizer, if not already done. The middle number, phosphorus, aids root growth during the winter.
  • If you have weeds in your lawn, consider using a winter fertilizer with weed control.
  • Mow one time after lawn goes dormant and before freezing. This last mowing should be 2 ½” tall.
  • When temps are freezing, stay off the lawn as much as possible to reduce blade breakage.

Vegetables:

  • Protect cool season vegetables with row covers, leaf or mulch cover.
  • Mulch beds to enrich and protect from rain/snow erosion.
  • Review gardening notes and plan next year’s garden.
  • Test germination rate of leftover seeds, if wanting to use again.
  • If gardening under lights or in heated greenhouse, start seeds of early spring crops: lettuce, kale, mustard, spinach, and other greens.
  • Harvest carrots, lettuce, greens and over-wintering crops.

Trees and Shrubs

  • Stake young trees and vines if needed. In case of a heavy freeze, use Wilt-Pruf or similar product to reduce transpiration of moisture.
  • Prevent southeast trunk injury, a form of winter freeze damage. Use light-colored tree guards to protect the trunks of young trees for at least two years after planting. After two years, paint the trunks with white latex paint. These two methods prevent the tree trunk from splitting when sunlight warms the bark on side of the trunk.
  • Fertilize shrubs and trees, if not done already, and the ground is not frozen. This allows roots to absorb when temperatures are above 40⁰ and when spring returns. Granules and spikes provide nutrients effectively and easily.
  • Prune out dead and diseased tree branches to prevent from falling on roof or pedestrians.
calendar-2

calendar-3

calendar-4

calendar-5

calendar-6

calendar-1

Vegetable Gardening Tidbits

Are you ready to make the most of your vegetable garden? Try these tips and tidbits for everything from easier weeding to stopping pests to enjoying a hearty harvest!

  • Reducing Weeds
    Minimize weeds in your garden by covering the soil between planting rows with mulch. Several sheets of moistened newspaper topped with hay or straw works very well, especially if you move your planting areas around a bit from year to year. You can even use carpet scraps placed upside-down. Landscape fabric topped with wood chips or gravel is a good choice if the walkways are permanent. Try to avoid the habit of tilling to remove weeds because this process brings up weed seeds from deeper in the soil and exposes them to the light they need to grow.
  • Increase Tomato and Pepper Production
    Fruiting of your tomatoes and peppers may be improved by applying organic tomato-tone, which contain calcium and other micronutrients. Mix 3 tablespoons of Tomato-tone into the soil when planting. Top dress every 14 day in a narrow band around single plants or along each side of a row. Keep Tomato-tone at least 3″ from stem. Water after top dressing.
  • Supporting Tomato Plants
    Set your tomato supports in place before plants get too large. Smaller determinate (bushy) varieties can be supported with small cages, but larger indeterminate (vining) varieties need large cages or tall stakes. Secure cages with stakes so they don’t fall over as plants grow larger and heavier.
  • Growing Larger Tomatoes
    Indeterminate tomato plants, such as ‘Better Boy’, will produce many suckers. A sucker is a new shoot that starts where a branch connects with the main trunk. Removing suckers will decrease the number of fruits produced, but the remaining tomatoes will be larger and will ripen sooner.
  • Ending Blossom End Rot
    To minimize blossom end rot, keep soil evenly moist, apply a layer of mulch to conserve moisture, don’t over-fertilize (especially avoid high-nitrogen fertilizer) and avoid damaging plant roots while cultivating. Blossom end rot shows up as dark sunken spots on the blossom or non-stem end of tomatoes, peppers and squash. It’s caused by a calcium imbalance in the plant. The soil may have adequate calcium, but the plant isn’t able to take up enough to supply the rapidly developing fruit.
  • Stop Slugs and Snails
    Slugs and snails may be deterred with coffee grounds, diatomaceous earth and even sharp gravel. Spread any of these materials in a ring around individual plants. Wrap pots with copper tape to keep slugs from crawling up. Inspect foliage and pick off any insects that have already passed the barriers.
  • Keep Cucumber Beetles at Bay
    Young cucumber, melon and squash plants are easy prey for cucumber beetles. As the seedlings grow, these yellow-striped or spotted beetles emerge to feed on their foliage. The beetles also spread bacterial wilt disease. To control cucumber beetles use a portable vacuum cleaner to suck up them up in early evening, spray beneficial nematodes on the soil or try planting broccoli, calendula, catnip, nasturtium, radish, rue or tansy, which naturally repel these insects. If you want to try marigolds to repel them use the more pungent varieties like African, French or Mexican marigolds. The more common marigolds may actually attract these pests.
  • Plan for Late Summer Harvests
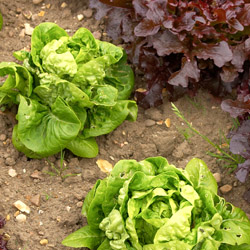
    It’s not too late to sow lettuce, beets, carrots, radishes and other short-season crops for a late summer harvest. Shade lettuce, if possible, during late afternoon to keep young plants cooler, or grow them next to larger plants that provide some shade. You’ll need to water more often on these hot days than you did in spring and early summer, but you can easily extend their growing season for later harvesting.
  • Grow More Tomatoes, Zucchini and Beans
    Harvest tomatoes, zucchini, beans and other fruiting crops frequently to encourage continued production. Don’t allow any fruits that you won’t be harvesting to remain on your plants, because when mature seeds are produced it’s a signal for the plant to slow down fruit production. Instead, consider sharing, selling, preserving or trading extra produce so you can continue to harvest and extend the growing season.
  • When to Harvest Herbs
    Herbs are best harvested just as they are beginning to flower. That’s when they have the highest concentration of essential oils and flavor in their leaves. Harvest entire branches back to within a few inches of the main stem to encourage new, bushy growth.
  • Harvesting and Storing Onions
    Begin harvesting onions when about half to three-quarters of the leaves have died back. Then gently dig or pull the onions and store them in a dry, shady place with good ventilation, such as an outdoor shed or barn, for 10-14 days. After the onions have cured, put them in slatted crates or mesh bags and store them indoors in an area with low humidity and temperatures between 33-45 degrees F.
  • Enjoying Green Tomatoes
    When daytime temperatures no longer rise above 65 degrees F in late summer and early fall, it’s time to pick the green tomatoes. Wrap them individually in newspaper and let them ripen indoors, or try some fried or in other recipes that call for under-ripe tomatoes.
Tomato plant and garden toolsveggietidbits3

Gardening


Gifts from the Greenhouse

Living gifts are wonderful for any holiday, and they are particularly popular in winter when they bring a lovely touch of nature indoors for us to enjoy until spring. Fortunately, there are many popular plants that make stunning holiday gifts.

Poinsettias

Available in shades of white, pink, red, gold, plum and variegated combinations, poinsettias are great for decorating your home as well as the perfect holiday gift. We sleeve your plants to protect them as you take them to your car. Do not leave these plants in an unheated car, and take them indoors quickly when you get home. Poinsettias’ colorful bracts last well beyond all the holidays and even into the spring if properly cared for. These easy-care plants prefer bright, filtered light in a spot free from drafts. Let the plant become moderately dry between waterings, and don’t fertilize while in bloom. Ask for our re-blooming guide if you want to try your hand at re-flowering your poinsettia next year.

Christmas Cactus

With colorful flowers in red, pink, salmon, orange, lavender or white, Christmas cactus will do best in a sunny south, east or west window. Keep the soil evenly moist but not too wet or else the roots may rot. To encourage your cactus to bloom, avoid any artificial light at night starting in September. You will also need to keep the plant in a cool location, allow the soil to dry well between waterings and don’t fertilize. Over time, these plants can grow to tremendous proportions and will have dozens of blooms just when their colors are most welcome.

Cyclamen

Cyclamen is a popular perennial plant with generous colorful flowers that bloom for a long time. Keep cyclamen evenly moist from September through May. Let them dry from June to August so the tuber can rest. Ideal light is a sunny east or west window, but do not allow the foliage to touch the glass or it may freeze or burn with the temperature changes. Cyclamen prefer a cool room (60-70 degrees). Feed them from September to May, then stop for the summer months to encourage winter blooming.

Amaryllis

This plant never fails to break the gloom of winter and provides enormous pleasure with its large, gorgeous blooms. If you want an amaryllis to bloom for Christmas, it must be started in the fall. Plant your amaryllis in a container not much larger than the bulb itself with a third of the bulb above the soil. Place in a warm, sunny spot, watering when the soil is dry. As the bulb grows more actively, increase the frequency of watering. Your plant will flower in brilliant red, white or a variegated pattern of the two. After flowering, you can save the bulb for next year. Ask one of our staff for instructions or pick up our free guide about amaryllis.

Azaleas

Florist azaleas normally bloom in spring, but they can be forced into bloom anytime. Azaleas are available in many colors, with the most popular shades including pink, white and peach. These flowers come in both single and double blooms and they can last for up to a month, ideal for a holiday gift or winter decoration. When an azalea is blooming, do not allow it to dry completely.

Norfolk Island Pine

These little trees are native to Norfolk Island in the Pacific, where they will grow as high as 200 feet with trunks 10 feet in diameter. Smaller versions are easy-to-please houseplants. A slow grower, Norfolk Island Pines will send out about 6 inches of new growth each year. Bright, indirect light is fine although in the winter the plants can stand full sun. Keep the plant moist, but never sodden. Feed your plant every 2 months. Repotting is best done in spring but needs to be done infrequently, since the plants are slow growers. These trees lose their lower branches as they grow.

Paperwhite Narcissus

Of all flower bulbs, paperwhite narcissus are one of the easiest to bring into flower in the indoor garden. Paperwhites are the delicate white flowering, notoriously fragrant narcissus that reliably bloom indoors about 4-6 weeks after planting. Paperwhites are grown in a dish with stones (or in a pot with soil). Fill the dish halfway with stones and place bulbs on top. Place bulbs close together, but not touching. Add water up to the base of the bulbs. Pack more stones around the bulbs until just the tips of the bulbs are visible. Place in a bright, cool area (60-65¡ F) and water regularly.

No matter which plant you choose, these gifts from the greenhouse add a fresh touch to any home throughout the winter.

greenhouse-gifts-3greenhouse-gifts-1

greenhouse-gifts-2

Considering Light when Choosing Houseplants

Bring the bright atmosphere of a tropical vacation into your home this season with houseplants. An integral part of your home décor, houseplants not only artistically improve your home, they also cleanse and freshen your indoor air quality. Plants take in carbon dioxide and release clean, pure oxygen. Some plants even absorb certain air toxins, potentially harmful radiation or unpleasant smells. Houseplants also add welcome humidity to the air we breathe, and filter dust particles for a cleaner environment. While houseplants can improve your life in many ways, they must be selected to fit successfully into your lifestyle.

Don’t Consider Light Lightly

When selecting a foliage plant, first determine what type of light you have – this will be the best key to the plant’s health and survival. Look at the area where you would like to keep the plant through the entire day to determine if the light changes. You will also want to keep in mind the time of year – the light will change with different seasons as well as the angle of the sun.

  • Low Light – 3-4 hours of indirect light. Don’t confuse this type of light with no light. If you can sit in the room and read comfortably without turning on a light, it is low light. If you must turn a light on, then it’s considered no light. Plants in Low light need to be watered way less frequently.
  • Medium Light – 4-6 hours of indirect or direct morning sun.
  • High Light – Direct or indirect sun for 6-8 hours a day. Direct afternoon sun in the winter can be too hot for many houseplants. Be careful this time of year because many plants can get sunscald.

No matter what the light levels in different rooms of your home, there are plants that can be comfortable there. If you aren’t sure what your light may be or which plants may thrive, we also recommend you talk to one of our experts about your particular situation for best results.

Low Light Plants

  • Aglaonema
  • Dracaena Warneckii
  • Homolomena
  • Dracaena Janet Craig
  • Pothos
  • Philodendron
  • Spathiphyllum
  • Philodendron Xanadu

Medium Light Plants

  • Corn Plant
  • Norfolk Island Pine
  • Bamboo Palm
  • Ming Aralia
  • Podocarpus
  • Schefflera Amate
  • Spathiphyllum Domino
  • Arboricola
  • Anthirium
  • Ficus Alii
  • Lubersii

High Light Plants

  • Palms
  • Yucca Cane
  • Sago Palm
  • Crotons
  • Fishtail Palm
  • Banana
  • Zamia

A Word About Watering

The smaller the pot, the more frequently you will need to water your houseplant. Small pots (2-3 inches) might need water every day depending on the plant’s needs and the richness of the soil. A 4-6 inch pot may need water every 3-4 days, whereas a 10-inch pot (or larger) usually only requires water every 4-6 days. These guidelines can change depending upon the location of the plant, the type of pot, variety of plant, soil condition, general humidity, time of year and weather conditions. Plants don’t utilize as much moisture on gray days as they do on sunny days.

Because so many factors can impact houseplant watering, determining the watering schedule for large pots (over 10 inches) can be difficult. To help, take a natural wooden dowel and push it into the soil until it reaches the bottom of the pot. After you pull the dowel out, you will be able to see the wetness on the bottom of the stick (if there is any). Also, remember that the larger the pot, the more water will be held in the soil at the bottom – even if there are drainage holes.

Fertilizing

Most foliage or non-flowering houseplants prefer 15-30-15 Houseplant Special fertilizer by Jacks used once a month, year-round. You can increase the feeding to twice a month during the growing season. Flowering plants have different fertilizing needs depending on their bloom schedules and growth productivity. Investigate the needs of your individual plants and feed them appropriately.

Houseplants can add great beauty and many benefits to your home. Once you begin choosing houseplants, you’ll soon be enjoying them in every room and every season.