Author Archives: D.R. Snell Nursery

Aphids

One of the most common insects, and one of the most potentially plant-threatening, is the aphid. There are actually many types of aphids – more than 4,000 in all. Some feed on specific plants and others are not so choosy. They all attack the newer plant growth and suck sap from a plant’s internal circulation system, the phloem, in stems and leaves. This can decrease the plant’s growth rate, discolor or disfigure leaves, cause galls to form and transmit plant diseases. Strong aphid infestations can lower produce yields and eventually kill plants altogether.

Recognizing Aphids

Aphids – also called plant lice, blackflies and greenflies – are easy to recognize. They’re about one-eighth to one-third of an inch long, usually pale green but can be almost colorless, pink, black or brown. Their pear-shaped bodies have six legs, small tail-like structures and long, jointed antennae. Aphids are soft-bodied and are mainly found in dense groups on the underside of new plant growth, where they leave behind a sticky residue called honeydew. Ants are attracted to aphid honeydew, so a nearby ant infestation or very active ant colonies may also indicate that aphids are present. Aphids are most common in spring, and die off rapidly in the hot temperatures of summer.

Controlling Aphids

Fortunately, controlling aphids is fairly easy. Most full-spectrum chemical insecticides kill aphids. Other, less strenuous products include plant extracts, neem oil, plant oils and insecticidal soap water sprays. A regular spraying with strong blasts of water or hand picking will control many infestations, especially when just a few aphids have been noticed. Many gardeners release ladybugs (lady beetles) to eat the aphids or parasitic wasps to lay their eggs in the aphid, but because these natural predators will quickly spread out, large applications of hundreds of predators may be needed to effectively control an aphid infestation. Another option is to encourage insect-eating birds to visit the yard – chickadees, titmice and warblers all especially love aphids and can provide superior natural pest control. Even hummingbirds will happily munch on aphids.

It’s best to control aphids early. As their numbers increase, the drying leaves begin to roll over them, thus protecting the aphids from controls such as soaps, oil and water sprays, and making it harder to effectively eliminate these pests. If you think you have aphids or you’re not sure what you have, bring in a sample. We’ll take a look and suggest the best way to eliminate the problem and help you protect your plants.

aphids_3

aphids_1

aphids_2

What is “pH?” Why Is It Important?

Devised in 1909, the pH scale measures the concentration of hydrogen ions in a solution. The scale ranges from 0-14. Pure water is “neutral” and has a pH of 7, midway between 0 and 14. If a solution has a low concentration of hydrogen ions, the rating will be a higher number and is considered basic or alkaline. Likewise, a high concentration of hydrogen ions rates a lower number and is considered acidic.

What pH Means to Your Garden

There are four important reasons to monitor your soil’s pH level:

  1. pH affects the availability of other nutrients in the soil. If the nutrients are not available because they are chemically bound to something else, plants can’t use that nutrient.
  2. A high or low pH level in the soil allows some plant diseases to multiply more quickly, infecting an entire landscape or garden.
  3. Most organisms living in the soil have pH preferences. For example, earthworms are not as plentiful in acidic soil.
  4. Most plants have specific pH requirements to flourish. Those specific requirements are what the plants need to absorb nutrients more efficiently and resist pests more effectively.

Where Soil pH Occurs

Acidic soil generally occurs in heavy rainfall areas, as the rain will pull acidic compounds from the air and allow them to leach into the soil. Alkaline soil, then, is more common where there is less rain. However, this is just a generalization and neighbors across the street from each other may have a large pH difference. Reasons could include the origin of topsoil brought in, the tillage done in the area and prior occupants’ gardening habits. Even simple changes like how drain spouts are positioned or a watering schedule can impact pH.

The pH Your Plants Need

Most plants will grow well in the neutral zone of 6.5-7.0. However, some plants grow best in specific soil pH conditions. Interestingly, hydrangeas grow well in both slightly acidic and slightly alkaline soils, but the flowers will be blue in acidic soil or pink in alkaline soil. The colors and flavors of fruits and vegetables may also vary somewhat depending on the soil’s pH, even if the plant will thrive in a wider range.

This chart illustrates how slight pH changes can dramatically impact which plants will thrive in certain soils…

Highly Acidic Conditions

(pH between 5 and 6)

Slightly Acidic Conditions

(pH between 6 and 6.5)

Slightly Alkaline Conditions

(pH between 7 and 7.5)

Rhododendrons Blueberries Arrowwood Viburnum
Azaleas Magnolias Box Elder
Camellias Ferns Locust
Pieris Firs Philadelphus
Astilbe Viburnum davidii Hellebores

As you see, pH can influence your gardening choices. Knowing the pH of your soil is the first step towards understanding your soil and improving your garden. By knowing the pH, you may choose the best plants for your site. You may also decide to amend your soil to increase or decrease the pH to grow a wider variety of plants.

We offer several inexpensive and easy-to-use pH test kits. We also offer amendment advice and can help you choose the best plants for your soil’s condition. Stop in for pH help today and we’ll help you make the most of the natural acidity or alkalinity of your soil, or else help you turn that soil into just the pH you desire!

ph_4
ph_1
ph_2
ph_3

Soil 101

How well do you understand your soil? It’s more than just dirt, and the more you learn about soil, the better you’ll be able to care for it to ensure a stunning landscape, healthy lawn and productive garden.

All About Soil

The four elements of soil are minerals, water, air and organic matter. Different combinations of the four elements create the four main categories of soil: sand, silt, clay and loam. Of course, we all want loam – that rich, vibrant soil thriving with beneficial bacteria and with a smooth but crumbly texture ideal for root growth. Unfortunately, true loam soils are rare, especially around homes where topsoil was removed and heavy machines compacted the remaining soil during construction or renovation. Most of us have clay soil, which has finer particles that compact easily into a dense mass. Clay soils also retain more water and can easily become too soggy or waterlogged for healthy plants. But just because your soil may be clay, it doesn’t have to stay that way!

Improving Soil

Improving soil is actually quite easy. All soils are improved by adding minerals and organic material that help balance out the overall components of the soil’s structure.

Before adding minerals, test the soil to determine its pH (acidity or alkalinity) and determine any mineral deficiencies. Lime decreases soil acidity, gypsum adds calcium and helps break up heavy clay and sulfur increases acidity. Other soil amendments to add to a clay soil include sand, cottonseed meal and peat moss, all of which will help improve the drainage and structure.

Organic matter refers to plant or animal materials decomposed into compost or “humus.” This residue comes from leaves and other plant materials, as well as certain animal wastes. Grass clippings, paper and certain types of decomposing food can also be ideal compost. The quality depends on the origin of the original biodegradable matter. Many people make their own compost using bins in which materials are mixed until they decompose. Others purchase finished compost. When compost is added to soil, it releases nutrients that are vital for healthy plants, and healthy bacteria and microbes will thrive in organically-rich soil.

The Magic of Mulch

Mulching is a simple way to add biodegradable materials to the soil. Evergreen needles, tree leaves, lawn clippings, chicken manure, etc., can be worked into the soil to decompose. This process improves the air spaces between the soil particles and rearranges the sand, silt and clay to produce optimum soil structure, improving the water retention and drainage balance and making nutrients available to plants.

When soil has proper structure and sufficient nutrients for healthy plants, optimum health has been achieved, and great soil will lead to great landscaping, turf and gardens. Congratulations and keep on growing!

soil_4
soil_1
soil_2
soil_3

Blooming Plants: Brighten Your Home & Office

It is no secret that houseplants can beautify your home and office as well as freshen the air, promote relaxation and improve concentration. But if you’re tired of plain foliage and miss the colorful bursts of your annual and perennial flowerbeds, why not opt for flowering plants indoors as well? There are many beautiful bloomers that can brighten up your home and office throughout the year.

Orchids

Orchids are favorite flowers that add an exotic touch to any décor. The most popular varieties for indoor blooming include…

  • Phalenopsis (Moth Orchid) – This favorite selection can continue to spike up to 9 months during the year and is considered the easiest to bloom
  • Dendrobium – Many fragrant varieties in lots of colors, can rebloom 1-4 times per year
  • Cattleya – Large standard variety blooms once per year, miniature varieties can bloom 2-3 times per year, many fragrant varieties, colors and sizes of flowers
  • Oncidium (Dancing Lady Orchid) – Blooms once per year and lasts 6-8 weeks
  • Paphiopedilum (Lady Slipper Orchid) – Blooms once per year with blooms lasting 6-8 weeks, very exotic.

Cyclamen

This popular plant produces a profusion of colorful flowers that bloom for a long time, ideal for adding reliable color and life indoors. Keep cyclamen evenly moist from September through May. Let them dry from June to August, so the tuber can rest and recover from the intense effort of the prolonged bloom cycle. Ideal light is a sunny east or west window. Cyclamen prefer a cool room (60-70 degrees). Feed them from September to May, then stop for the summer months.

African Violets

These small, robust plants are by far the most popular houseplant and among the easiest flowering houseplant that blooms all year long. Choose from a wide selection of pink, purple, magenta, white and blue options in both double and single blooms. African violets prefer bright, diffused or artificial light. Feed regularly and water from the bottom so as not to get water on the leaves, which could promote diseases and fungus. Be sure to empty any excess water so the roots do not rot.

Kalanchoe

These blooming plants’ flowers last for many weeks. Kalanchoes grow 8-12 inches tall with masses of small four-petaled leaves that are red, orange, coral, gold, yellow and purple. They have thick, waxy leaves with a succulent appearance and can withstand periods of dry soil, making them a good option for beginners or in offices that may be closed for holidays or other periods when the plants may be somewhat neglected. Water when soil feels dry to the touch and drain excess water from tray. Maintain flower color with bright, indirect sunlight daily for at least four hours.

Bonsai

If you haven’t tried it, the art of training a dwarf potted tree is a fascinating hobby. Because the soil around the bonsai plant is limited, these plants need watering almost every day, and sometimes twice a day during the hot summer. We carry a wide selection of starter plants and mature specimens from evergreen selections to tropical varieties. Some will bloom with true flowers, while others – though they don’t produce flowers – have such delicate and pleasing structures that their appearance is every bit as lovely as the most gorgeous bloom.

Not sure which blooming plant will be best for your home or office? Stop in and we’ll be happy to help you choose just the right plant to brighten your space!

blooming-ho-2

blooming-ho-3

blooming-ho

Feeding the Birds

When a bird’s natural plant food has waned or withered away in late winter, a few well-placed feeders can entice a feathered friend to stay nearby. There are four basic types of feeders, but the type of feeder and food it’s filled with will determine which birds will visit. Which do you want in your yard?

Feeder Types and the Birds They Attract

While birds will visit a variety of different feeders, the best options for winter birds are…

  • Tray / Platform Feeders
    A tray or platform feeder with low sides and a wide, open base placed one to three feet above the ground will lure ground-feeding birds like juncos, towhees and mourning doves. Grouse and quail may also visit this type of feeder, and these feeders are ideal for offering food to large flocks of birds.
  • House Hopper Feeders
    Hung from a tree or hook or mounted on a pole, “house” style feeders with seed hoppers and perches on the side will usually entice grosbeaks, cardinals and jays, as well as sparrows and finches. These feeders help keep seed dry and can hold a larger quantity of seed so refills are not as frequent.
  • Tube Feeders
    Long, cylindrical tube feeders suspended in air will bring in an array of small birds, including finches, titmice, nuthatches, siskins, redpolls and chickadees. These feeders may have either mesh-like sides where birds can easily cling, or they may have multiple perches to accommodate more birds. Sock-style feeders are also popular.
  • Suet Feeders
    A cage-like feeder that holds a cake of rich, fatty suet is a bird magnet for woodpeckers, wrens, titmice, nuthatches, titmice, mockingbirds and jays. A standard suet cage can hold just one cake and can be hung from a pole or branch. Larger suet feeders may hold multiple cakes, and some suet feeders are even designed as logs or other shapes to hold suet plugs or balls.

Best Winter Bird Foods

Birds will seldom drop or pick out unwanted seeds if you fill your feeder with only one type of seed rather than a generic mix. Black oil sunflower seeds are the most widely preferred, though white millet is popular for smaller finches, sparrows and ground-feeding birds. A tube feeder containing Nyjer (thistle) seeds will whet the appetite of goldfinches, siskins or redpolls. Jays, chickadees and juncos love peanuts or cracked corn as a treat in a tray feeder. Suet is another fine treat that offers great calories to keep winter birds healthy.

No matter which type of bird feeder you offer or how you fill it, you are sure to enjoy the company of a hungry winter flock. Keep the feeder filled and clean, and the birds will continue to visit all winter long.

Insect Control Begins Now

It’s hard to think of insects in winter, but don’t forget the havoc these tiny creatures can bring to your garden – defoliating leaves, contaminating produce, even destroying complete plants. Before these pests begin to be a problem is the perfect time to take steps to control them.

Why Winter Control?

Late winter is the right time to control insects for two reasons. First, the insects and their eggs are just coming out of dormancy. The shells and protective coverings are softer and more porous in late winter, and so are more vulnerable to the effects of oils and sprays. Second, the oil-water mixture should not freeze on the tree or plants, which could damage the plant and make the spray far less effective. When you spray, the temperature should be above 40 degrees. Delay spraying if freezing night temperatures are predicted. Choose a calm day for spraying to be sure stray breezes and cross winds do not spread the spray to plants you don’t want covered.

Insects to Control

In late winter, before any leaf buds begin to open, spray Bonide All-Season Oil or Dormant Oil Spray on fruit trees or other ornamental trees or shrubs to suffocate over-wintering aphids, thrips, mealybugs, whitefly, pear psylla, scale and spider mites that cling to the bark. The treatment will also destroy the eggs of codling moths, Oriental fruit moths and assorted leaf rollers and cankerworms. Don’t wait until the buds have burst in early spring, as the coating of oil will also smother the emerging plant tissue.

Tree Spraying Tips

While small shrubs can be easy to treat, larger trees are more challenging to be sure you don’t leave any area untreated where insects can thrive. Spray the whole tree at one time, concentrating on the trunk, large branches and crotches, rather than spraying down a whole row of trees at one pass. If you’ve experienced extremely bad infestations of insects, you might treat your trees a second time. But be sure to spray before the buds are near the bursting point. Dormant oil can also be used after the leaves have dropped in the fall. Never spray when any foliage or fruit is on the trees or you risk unwanted pesticide contamination.

After you spray, be sure to store any remaining oil properly and out of reach of children and pets. Containers should be labeled clearly and kept in cool, dark spaces to preserve their usefulness. Avoid reusing any sprayers to minimize the risk of cross contamination or inadvertent use.

Spraying for insects in winter may not be the most glamorous job, but you’ll appreciate the improvement in your trees through the spring and summer when you’ve nipped your insect problems in the bud.


insect-control-begins

Preserving the Harvest

Was it a bumper crop this year? Do you have tasty fruits, vegetables and herbs overflowing your storage? Now that the harvest is in, the decision needs to be made as to what to do with the abundance.

Years ago, homes had root cellars to store winter squash and root vegetables such as onions, potatoes and carrots to keep them cool and dry for several weeks. As more homes refinish basements into living spaces and more urban gardeners expand their harvest, however, it may be difficult for gardeners to store their harvest this way. So, what can they do?

Here’s a quick little table to help:

Vegetable Store Freeze/Blanching Time Can Dry Pickle
Beets X (2 min) X X X
Broccoli (3 min) X X X
Brussels sprouts (3 min) X X X
Cabbage (90 sec for wedges) Pickle first X X
Carrots X (5 min) X X X
Cauliflower (3 min) X X X
Celery (3 min) X X
Fennel (1/2 min) Pickle first X
Horseradish X (shred) Prepare as sauce X X
Kohlrabi (3 min) Pickle first X X
Onions X (raw) Pickle first X X
Parsnips X (2 min) X X X
Potatoes X (cooked) X X X
Rutabagas X (2 min) X X X
Sweet Potatoes/Yams X (cooked) X X X
Turnip X (2 min) X X X
Winter Squash X (cooked) X X X
  • Storing: Only store mature and perfect vegetables. If there are soft spots or bruises, eat immediately or preserve. Leave several inches of stems on winter squash. It’s important to maintain temperatures between 32-40⁰ Fahrenheit with good air circulation and ventilation. To reduce spoilage, the humidity should be between 85-95 percent.
  • Freezing: Freezing maintains nutrients, flavor and texture. Most vegetables require blanching (cutting into pieces, a boiling water bath [see times above], followed by immersion into very cold water) prior to putting into freezer bags or containers in the freezer. Maintain a temperature of 0⁰ Most vegetables will store well in the freezer for up to 12 weeks.
  • Canning: Best method for vegetables with high water content such as fruits and tomatoes. Hot water baths or pressure cookers seal the contents in sterilized jars. Most vegetables are low acid foods and require using a pressure cooker. Use cleaned, fresh and tender vegetables. Follow all pressure cooker instructions carefully.
  • Drying: No special equipment required. Most people use ovens or dehydrators. It’s important to have good air circulation and all vegetables are cleaned and not bruised. Blanching in a hot water bath increases quality and cleanliness. Adding 1/4 teaspoon of citric acid to each quart of water will reduce darkening and discoloration.
  • Pickling: Used around the world to preserve foods, pickling also includes relishes and fermentation. Examples include Kim-chi, pickles, sauerkraut and chutneys. Follow all recipes carefully. Most use vinegar to stabilize acidity and prevent bacteria. Some recipes will suggest canning to preserve the product, others will recommend refrigerator or crock storage.

Have specific questions? The National Center for Home Food Preservation has many online publications to assist you.


Making a Terrarium

Hold onto your gardening hats, folks! Remember terrariums? A new trend revitalizing this old style is now better than ever. Creating a theme for your terrarium is easier too, with the all the miniatures now available. Remember those skinny-necked bottles and what a hassle they were? New container styles make terrariums easier to plant, simple to maintain and more beautiful in your home.

Style

What is your terrarium’s style? Tropical with ferns, arid with cacti or beach-like with tiny grasses, sand and water-like pebbles? Will you have figures such as fairies or gnomes? To choose the plants, consider the lighting where you plan to place the terrarium. If your gnome home is to be in the corner, consider using a cute fluorescent light or similar illumination to help keep your terrarium’s plants healthy and thriving.

Container Shape and Size

Choose your container and ensure it has enough room for your completed dream. Clear glass allows views of different layers of sand, soil and top dressing, giving your terrarium extra depth. Container shapes include hanging, footed, cylindrical, spherical, even leaning. Multi-sided geometric shapes are popular, as are smooth, curved shapes with a natural flow. If your garden includes tropical plants, consider a container with a smaller opening or a lid to increase humidity for healthier plants.

Don’t forget to consider size – tiny terrariums with just a plant or two are popular and can be hung like ornaments or make great gifts, while larger containers can create an entire microcosm and unique environment for a stunning display.

How to Plant

Planting a terrarium takes a little extra care, but is no more difficult than planting any houseplant.

  1. Put an inch or two of small gravel, pebbles or expanded clay pellets into the container, providing a drainage base. Mixing in several tablespoons of horticultural charcoal prevents odors. If the container is large enough, layer other colors or sizes of pebbles or sands to create visual interest when viewed from the side.
  2. Soil goes in next. Many plants grow well in light soils mixed with peat moss and vermiculite or perlite. Moistened coir is another option. Alternatively, consider special prepared soil mixes for African violets, succulents or cacti.
  3. Create a landscape plan by first arranging the plants on the tabletop to determine where they will be placed in the container, taking into account how the plants may touch the sides or top of the container.
  4. Plant the largest plant first. Dig a small hole, place the plant, and firmly tamp the soil around it. This is very important to stabilize the plants and remove air pockets. If the space is tight, smaller plants may be able to help stabilize larger plants.
  5. After placing the plants, you may want to top-dress with decorative pebbles or bark. Sand looks great around cacti. This is also the time to place fairies, cottages, twigs, larger stones, marbles and other decorative items in your terrarium to create the desired theme.
  6. When everything looks good (look at it from all sides and angles), use a small artist brush to clean any loose dirt or sand away from the sides and leaves.
  7. Use a mister to water the plants. Because the container acts as a small biosphere and much of the moisture is recycled, a little water lasts for quite awhile. Do not overwater your terrarium or the plants may rot, and replacing them can be a challenge.

Place your terrarium in its new location and enjoy its beauty and your accomplishment!

Herbal Delights

No matter how cold the temperatures or how deep the snow, you can enjoy the pleasures of herbs this winter season by growing them in your windowsill. Herbs are great for adding zest to any food and are a delicious substitute for salt and artificial flavors. They can also make dinner a visual delight! Add herbs to breads, soups and stews for flavor or use as a lovely garnish. Here are some great selections to try…

Rosemary is a must for the cook. Fresh rosemary is much richer and more fragrant than dried sprigs. Its needle-like foliage has a piney or resinous aroma and flavor. Rosemary is good with any meat or poultry, with stronger tasting fish, and with pizza, breads and potatoes. It is companionable with garlic and citrus flavors. A pleasing apple jelly can be scented with rosemary for a gourmet touch.

Chives, being a member of the onion family, is one of the few flavoring plants that appreciates some fertilizer. The hollow spears should be cut as needed by clipping a few spears just above the ground. It is used mostly as a garnish or final ingredient wherever a light onion taste is wanted, and it won’t overpower your recipes.

Mints are a necessity for herb windowsill gardens. No one would want to be without spearmint and peppermint, and maybe orange mint, for fresh teas and additions to fruit cups and ice cream. Fragrant and luscious, mints also make delightful garnishes for drinks or can be frozen into ice cubes.

Sage is a standby for poultry, breads and stuffings and combines well with corn or apples. Fried leaves are good to nibble. Experiment with different types of sage to enjoy their subtle variations and different flavors.

Thyme, a huge family of small upright, mounding or creeping plants, comes in a variety of flavors. You will find varieties labeled French, English, Common and Lemon, with leaves that may be all green or silver-edged or even variegated with gold. Every herb garden should have some thyme, and it pairs will with lamb as well as in marinades and salads.

Oregano is the hardier cousin of marjoram. It is a familiar flavoring in Italian and Greek cooking, in meats, sauces and of course in pizza. Oregano can be added to salads, used in marinades or mixed in with breads for rich flavor without any butter needed.

When growing your herbs, be mindful of their sunlight needs and keep them away from heating vents that can dry the soil out too quickly. Use organic fertilizers like fish emulsion and seaweed sparingly. Although fertilizers make the plants beautiful to look at, the less fertilizer used on an herb, the better it will taste. Now is a great time to start growing or to add to your culinary herb collection. Winter is the perfect time to start adding zest and flavor to your cooking!

herbal-delights-1

Winter Vegetables on the Table

Winter marks a seasonal change. Our bodies seem to crave deeper, more tantalizing, richer tastes rather than light, bright, fruity flavors of summer. Harvesting vegetables in the late fall, and sometimes into the winter, presents us with bounty for slow, simple and savory cooking. All winter vegetables may be boiled, roasted, grilled, stewed, sautéed, steamed or eaten raw.

Which Vegetables Are Winter Vegetables?

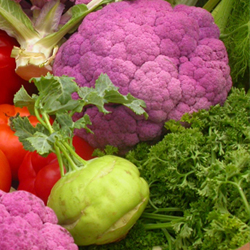
Winter vegetables are generally considered those that are either harvested late in the season or have the capability of being kept for several weeks or months without losing their flavor, texture and nutritional value. Which of these will grace your table?

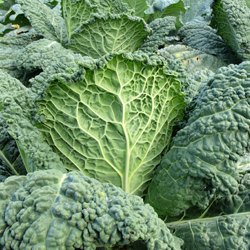
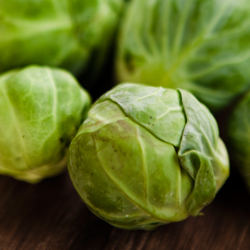
The cole, or cruciferous, vegetables such as broccoli, Brussels sprouts, cabbage, cauliflower, turnips and kohlrabi rank highly for many nutrients including vitamin C, soluble fiber and other nutrients with anticancer properties. Interestingly, boiling seems to reduce the potency of these nutrients, but other cooking methods don’t.

Root crops, including beets and carrots, sustain life around the world. Beets provide folate, nitrates and manganese in dishes such as borscht and pickled beets. Carrots contain diverse vitamins including A, C, K and B6 and antioxidants from carotenoids. Interestingly, recent research suggests many people prefer the flavor of steamed carrots to boiled.

Fennel, with its anise flavor, jazzes up meals throughout the world but is a favorite in Mediterranean and Italian cuisine. It tops nutritional lists with its antioxidant benefits. Try some raw in salads and appetizers.

Celery, related to fennel, adds a distinctive crunch when used in salads as a raw ingredient or a stronger flavor to soups and stews. With a mild taste, celery is versatile in a wide range of dishes, including mashes, stuffings and roasts.

Potatoes and sweet potatoes, long associated with the typical American holiday meal, contain many healthful benefits. According to research, boiling or steaming sweet potato provides the most health benefits; the phytochemicals in them rival that of broccoli. Roasting or baking potatoes is a healthy way to enjoy them, provided you are sparing with the toppings.

Winter squashes, from acorn to pumpkins, also serve as healthy sources of carbohydrates. Because 90 percent of the calories are starch-related, people are surprised at recent studies proving the antioxidant, anti-inflammatory and insulin-regulating effects of winter squash. Additionally, the roasted seeds make a delicious and healthful snack.

Winter Vegetable Recipes to Savor

Have you ever wondered how to roast vegetables? It’s easy! Just wash the vegetables, cut into 1″x1″ cubes, and place in mixing bowl. Drizzle over a few tablespoons extra virgin olive oil and mix to cover all pieces. Place as a single layer in a cookie or roasting pan. Sprinkle with salt and pepper and cook at 375⁰ Fahrenheit for approximately 45 minutes or until the desired texture is reached. Jazz it up with cinnamon, garlic, curry, rosemary or any other favorite spice or seasoning mix.

Here are some other recipes to bring these wonderful winter vegetables to your table. Bon appétit!

Roasted Winter Squash Seed and Cheese Ball Appetizer

Step 1: Roast winter squash seeds by cutting the winter squash in half and removing the seeds and stringy “gunk.” Put into a bowl half filled with water and rub between your hands to separate the seeds from the strings. Rinse the seeds again and spread out on a cookie sheet. Use a hair dryer or place in 150⁰ Fahrenheit oven to dry. Stirring every 10 minutes reduces drying time and ensures even drying.

Step 2: When dry, place seeds in bowl and combine with choice of seasonings. Mix thoroughly. Return to cookie sheet. Place in 275⁰ Fahrenheit oven for 10-20 minutes. Watch closely to prevent burning. When cool, chop finely to coat cheese ball.

Seasoning ideas

  1. Latino: 4 Tbs. melted butter, 2 tsp. chili powder, 1 tsp. oregano
  2. Asian: 4 Tbs. melted butter, 2 tsp. ground ginger, 1 tsp. hot mustard, 1 tsp. honey
  3. Holiday: 4 Tbs. melted butter, 2 tsp. cinnamon, 1 tsp. nutmeg, 2 tsp. sugar
  4. Use your imagination!

Step 3: Make cheese ball.

Ingredients:
2 pkg. (8 oz. each) softened Neufchatel cheese
1/2 cup shredded sharp cheddar cheese (Low fat)

Directions:
Beat Neufchatel and cheddar in small bowl with mixer until well blended. Refrigerate 1 hour. Shape into ball. Press seasoned winter squash seeds onto cheese ball.
Serve with complimentary crackers, tortilla chips, pretzels or flatbread.

Winter Squash Casserole

(serves 2)

Ingredients:
2 Cups winter squash, peeled and cut into 1-inch cubes
3 Tbs. extra virgin olive or macadamia nut oil
1 tsp. orange juice
1 tsp. lemon juice

Directions:
Steam squash chunks, covered, for 7-8 minutes, until just tender
Mix remaining ingredients, pour over squash in bowl
Toss while still warm. Serve.

Other Ideas:

  • Cook 1/2 C chopped onion with squash, or
  • Add fresh herbs such as basil or rosemary to liquid dressing, or
  • Sweeten with 1 tsp. cinnamon and 2 tsp. honey, or
  • For Asian flavoring, add 1 Tbs. minced fresh ginger, 2 tsp. soy sauce

Super Easy Grilled (or Baked) Cauliflower

  1. Remove the leaves. Cut the head in two, core the stem. Place both on large piece of heavy-duty foil.
  2. Melt 1/2 Cup butter with 2 tsp. garlic salt and 2 tsp. lemon pepper.
  3. Drizzle half of butter mixture over each half and sprinkle each with 3 Tbs. parmesan cheese
  4. Rejoin the two halves and drizzle remaining butter mixture on the outside.
  5. Fold foil around, creating a ball.

Cook at 350⁰ Fahrenheit for approximately an hour or until soft. Delicious!

veg5

veg1

veg2

veg8