Monthly Archives: March 2017

More Than Just Mulch

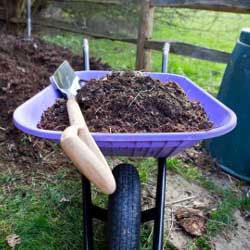
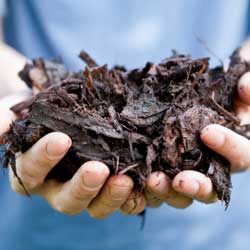
Not only does mulch add a decorative finish to your flower beds, creating a canvas to showcase colorful blooms, it also helps keep soil cool and moist, thus reducing the need for manual watering. The addition of a 3 inch layer of mulch atop your garden soil will also contribute greatly to weed suppression.  Including an application of a pre-emergent herbicide or corn gluten meal will discouraged weed seeds from germinating and growing. And, I’m sure we can all agree, weeding is a chore nobody likes to do!  So, which mulch should you use?

Pine Bark Mulch – Pine mulches is one of the best types of mulch for plants. As it breaks down it enriches the soil with nutrients.

Shredded hardwood – This is by far the most popular mulch. It has a dark color and knits together well so that it does not easily wash away.

Cocoa Mulch – Cocoa mulch provides a nice clean look with a delicious chocolate scent. It is, however, not recommended if you own a dog.

MULCH FACTS:

  • 1 cubic yard of shredded hardwood mulch will cover 150 square feet of area to a depth of 2 inches. We recommend a 2 to 3 inch depth to receive the best results.
  • There are 27 cubic feet in 1 cubic yard.
  • Compost is an excellent soil amendment but is not a replacement for mulch.
  • When applied correctly, mulches improve garden appearance, reduce the growth of weeds, prevent soil moisture evaporation and maintain consistent soil temperatures.
  • When fully decomposed, mulches will improve the soil structure and add nutrients back into the earth.

mulch_1mulch_2

Damping Off Disease

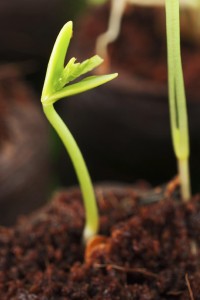
Arguably the most common, and certainly the most frustrating, seedling disease has to be damping off. Damping off is a common term used for several fungal diseases that cause sudden seedling death. Seedlings get very thin where the stem meets the soil. Young seedlings will then fall over, shrivel up and die.

The wisdom of Ben Franklin applies here; “an ounce of prevention is worth a pound of cure”. To prevent damping off you must:

  • Sterilize your containers with a 1:10 bleach solution
  • Use a sterile seed starting mix
  • Plant seeds on the soil surface and top with vermiculite, milled sphagnum peat moss, chicken grit or sand
  • A one time sprinkling of cinnamon or charcoal on the soil surface will act as an anti-fungal agent
  • Water containers from below allowing the surface of the soil to dry slightly between waterings
  • Provide good air circulation around seedlings with a fan
  • Spray seedlings with an ounce of cooled, strongly brewed chamomile tea diluted in a quart of water
iStock_000028335442Medium-200x300

How To Succeed At Seed-Starting

Seedlings can be purchased of course but, for a number of reasons, you may wish to start your own plants. By starting plants from seed, you have a much greater selection of flowers, vegetables and herbs to choose from. Old time favorites and less common varieties might not be available as plants but are readily available in seed. We offer an extensive selection including many hard-to-find, unusual, organic, non gmo and heirloom seed varieties.

CONTAINERS

Traditionally, seeds are started directly in flats or in peat pot and seed starting tray place into the flat. We carry a wide assortment of sizes and styles of these classic items as well as the ever popular Jiffy-7 wafer. When moistened, the Jiffy-7 expands to form a small, self-contained pot of soil into which seed is sown and, later, may be directly planted in the garden. This is an excellent choice for plants that do not like their roots disturbed during transplanting.

SOIL

It is best to use a light, soilless planting medium labeled as a “Seed Starting Mix”. These mixes are sterile and contain adequate nutrients to carry seedlings through until it’s time for transplanting. Never use garden soil, it is too heavy, causing poor germination, and may also introduce a fatal fungal disease called “damping off”.

SOWING

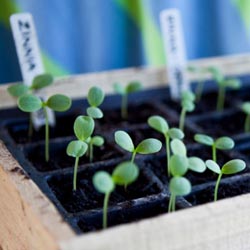
Seeds should be sown 2 to 10 weeks before the last spring frost date. Your seed packet will provide this information. Fill your containers to the top with moist growing medium. Tamp your container gently, but firmly, on the table top to remove air pockets.  Add more mix as needed to bring it the soil back to the top and smooth the surface flat. Larger seeds are generally planted deeper than small seed. Your seed packet will advise the planting depth. Gently press the seeds into the mix or simply set them on the surface of the soil and place milled sphagnum moss over the top to prevent damping off. Cover the flat with a clear humidity dome. Be sure to label your containers with plant markers and include the plant name and date sown.

TEMPERATURE

Many seeds require warm soil in order to germinate. You can accomplish this by using a heat mat, heat tray or heating cable. Flats may also be placed on top of the refrigerator or a hot water heater. Do not place seed-starting trays on a windowsill as early-season nighttime temperatures are frequently too cool to promote good germination. Once green is visible above the soil heating should cease.

MOISTURE

Seeds need to be kept constantly moist in order to germinate. Moisten the soil thoroughly before planting. Water again when the soil surface is dry. Watering from below is the best method. You may also water from above using  superfine nozzle or plastic spray bottle until the soil is saturated. The medium should stay constantly moist but not soggy. It is important not to overwater but also not to permit the flats to dry out. Once seedlings have grown a half-inch or so, you should water less frequently allowing the soil dry slightly between waterings. 

LIGHT

Seedlings will also need light and the best method is to use the traditional fluorescent fixtures or the new energy saving LEDs. Suspend lights just an inch or two away from the plants. Lights must be on at least 14 to 16 hours a day. As your seedlings grow, raise the lights accordingly. If your seedlings do not get enough light, they will become weak and spindly.

FERTILIZING

Fertilize seedlings weekly using a half-strength solution of a complete organic fertilizer. A fish and seaweed blend works well. Thin seedlings if they become overcrowded.

HARDENING OFF & PLANTING OUT

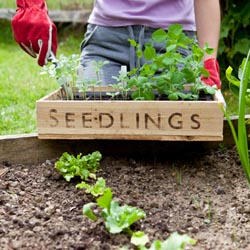
Seedlings may be moved outside after all danger of frost has passed. Move your trays outside gradually over a five to seven day period. Start by putting them out for a few hours, and then gradually increase the duration until they are left out all day and night. Keep them in a lightly shaded, protected spot during the day to prevent sunburn. Continue to monitor soil moisture and water as necessary. After you have “hardened off” your seedlings, gently transplant them into the garden. Try not to handle the root ball too much as they are quite fragile. Water thoroughly after transplanting and again every day for about a week. Newly set out plants will look sparse at first, but they are resilient and will grow and fill in quickly!
Gardener With Seedling Tray

Seedling Box Tray in Greenhouse

seed_starting_3

Save

Healthy Soil, Healthy Plants

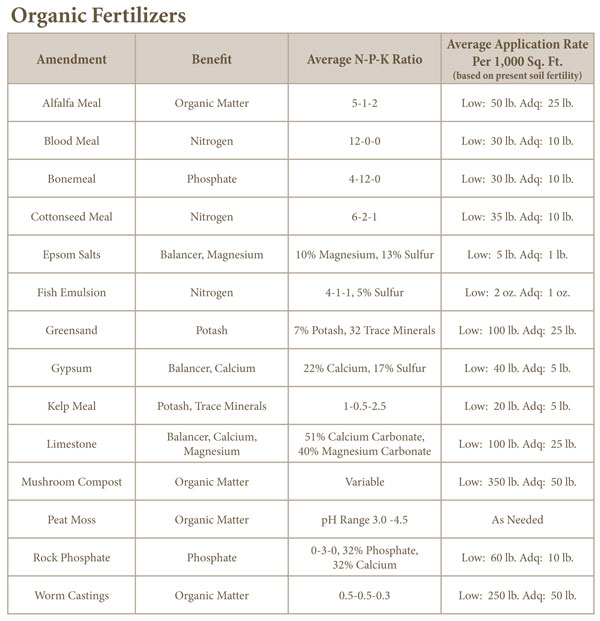
The key to successful gardening is “healthy soil.” Quite simply, when you feed the soil the proper nutrients, you let the soil feed the plants. So how do you “feed” the soil? First, you need to understand some basic principles about soil and why it is so important, then you can take steps to improve it.

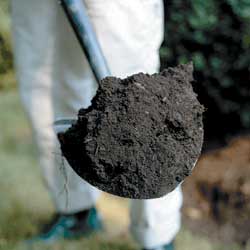
To start, you should determine the soil texture by moistening the soil and rubbing it between your thumb and fingers to determine its “feel.” Sands are gritty and will barely hold together; clay can be squeezed into a firm shape; and silt will act in a way to allow particles to cling together. Sandy soils tend to dry out quickly because they contain high amounts of soil air. Oppositely, clay soils have a tendency to pack together, shutting out air and water. The best garden soil, “loam,” has moderate amounts of sand, silt and clay. Generally, soil in our area tends to be clayey. This condition can be improved by adding sufficient amounts of compost. For sandy soils, humus should be added to help retain moisture and nutrients.

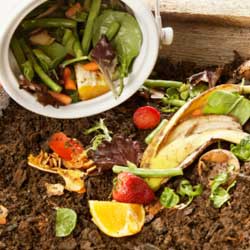
Next, you must evaluate the soil structure. Soil structure is affected by soil pH, the amount of humus and the combination of minerals in the soil. Ideal soils allow soil particles to clump together with air spaces between them for water drainage as well as oxygen consumption and carbon dioxide release from plant roots. The best way to improve soil structure is to add high amounts of organic matter like humus, dehydrated manure, composted manure, mushroom compost, alfalfa meal, peat moss, or worm castings.

You will also need to take a soil sample, to measure the pH and amounts of nitrogen, phosphorus and potassium in the soil as well as other nutrients. This will help determine exactly what the soil needs. Our staff will help you read the results and determine what to add to your soil and how much. Generally, a pH of 6.0 to 7.0 is acceptable. If your pH is lower than this, your soil is too acidic and requires lime to be added. If your soil is low in organic matter, it will often have a high pH level. All plants require a proper balance of nutrients – nitrogen (N), phosphorus (P) and potassium (K). Soils lacking any one of these elements will not produce healthy plants.

When dealing with poor, or improperly balanced soils, obtaining “healthy” soil may take two to five years to acquire. The best thing you can do to supplement your soil program is to use various organic fertilizers to meet your plants’ needs and regularly add organic matter. This will continue to help the soil structure as well as create biological activity that is also a vital part to developing productive soil.

fertilizer_chart

healthy_1healthy_2

It’s Pansy Season!

Growing Tips

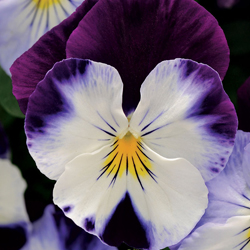
Easy to grow, Pansies are one of the first flowers to welcome spring and if you follow these tips you can grow perfect Pansies. Choose plants with an overall deep green color with plenty of buds for the best results and fastest blooming. Plant in fertile soil where the plant will receive 6 hours of daily sunlight. Use a liquid fertilizer (Jacks Blossom Booster)  when planting and fertilize every  week to maintain vigor and color. Replace with  petunias in the summer when it becomes too warm for pansies.

5 quick tips for Perfect Pansies

  1. Pansies will have prolific blooms when planted in full Sun. (Yes they can grow in part shade)
  2. It is important to fertilize Pansies for maximum wow color. We like putting a granular down like osmocote at time of planting and then 1x a week water with a liquid fertilizer like Jacks classic.
  3. Plant in rich soil that retains moisture but also drains well. For containers we love Gardner’s Gold potting soil. When planting in the ground we mix in Bumper Crop compost.
  4. Keep Pansies pretty by pinching them back. Remove dead/spent flowers by pinching the stalk back to the next set of leaves.
  5. Water when they dry out. Pansies respond well to cool moist weather, so check them frequently for moisture.

Pansies grow well in rain or cold. In fact, it easily overwinters in many areas. This three-season performer may be planted for fall color, overwinter, and then perk up again in early spring providing an early punch of pizzazz. If it becomes too leggy, just cut back the foliage back to 3 inches tall and fertilize. In a couple of weeks, it will be smiling up at you.

When planting in containers, consider the flower and container colors to maximize the visual effect. Interplant with other textures and colors for an eclectic rainbow of vibrance. When planting in fall, add spring blooming bulbs, as they’ll easily grow through the pansies to create a riot of spring color. Spiky grasses provide a tall and contrasting effect to the pansy’s trailing tendrils, especially in larger containers.

With so many stunning options and new colors to embrace, there’s sure to be a Pansy perfect for all your flower planting desires!

pansy_3

Save

Save