Monthly Archives: February 2017

A Feast for the Eyes

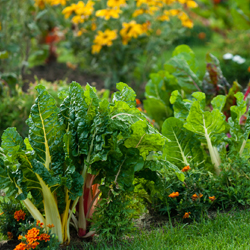
Traditionally, when planning a vegetable garden, the focus has been primarily on function with aesthetics as an afterthought. This year, why not try a new approach? Thoughtfully combine beauty and performance to create an edible garden that will explode with a riot of color and an abundance of produce. A feast for the eyes!

Color, texture and form are characteristics we keep in mind when designing our ornamental beds. We plan our gardens so that plants complement each other. We repeat colors and shapes for continuity and flow. We work in plenty of texture for interest. Vegetables, herbs and fruits can be just as vibrant, exciting, diverse and easy to combine as annual and perennial flowering plants are.

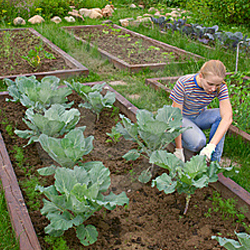
To begin, provide structure. Placing a picket fence around your garden offers instant structure and visually sets it apart from the rest of the landscape. If you plan on planting along the outside of the perimeter, you will create the allure of a garden within a garden. Place a straight pathway through the center, starting at the entrance. Divide the larger garden into smaller square planting beds using pathways to separate the beds. This will enhance the structure of, and provide easy access to, the garden beds as well as lead your eye through the garden.

Next, focus on plant selection. Begin with a plant plan or layout. Initially, base your selections on what is pleasing to your pallet. Consider unusual varieties of vegetables and herbs that come in unique colors. Repeat colors, both horizontally and vertically, to add depth and dimension to the garden. Don’t forget to add brightly flowering annuals such as zinnias and marigolds to mingle amongst the edibles. Another consideration is edible flowers like nasturtium and calendula. Contrast colors for a striking, eye-catching effect. Keep in mind, also, texture and form. Bold textures add drama to the garden and are often combined with fine foliaged plants for a softening contrast. Short, stout plants anchor the garden bed while tall, willowy plants raise the eye and lead you farther down the garden path. Take all these characteristics into account when planning and place plants in geometric patterns to create a quilt-like garden tapestry.

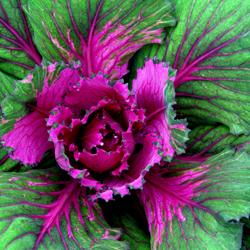
Finally, your spring edible garden will emerge invoking a feeling of calm, displaying a variety of cool greens, purples and blues found in peas, lettuce, cabbage and broccoli. Shortly after, the summer edible garden will be completely transformed at harvest time with an explosion of vibrant shades of red, purple, orange, yellow and the like. A feast for the eyes!
EdiblePlants-1024x457

Feast-2Feast-3

Feast-1

Lilacs

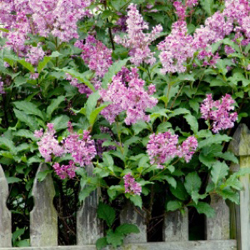
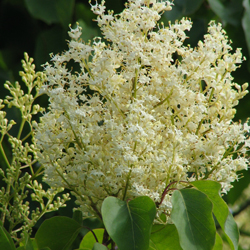
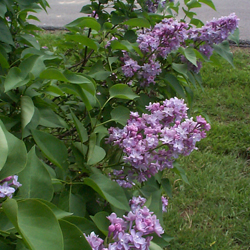
One of the most popular deciduous flowering shrubs, and certainly one of the most nostalgic, lilacs herald the arrival of spring. When we reminisce about this old-fashioned favorite we recall large panicles of sweetly scented, pale purple blossoms. Today, however, lilacs are available in an incredible variety of sizes, growth habits, flowering times, bloom sizes, shapes, colors and fragrances.

About Lilacs

Lilacs belong to the genus Syringa that consists of approximately 20 different species and about 1,000 different varieties. Most species are native to Asia, but Syringa vulgaris, the common lilac, is an Eastern European native. Some of the finest cultivars of this species were bred in France in the early twentieth century, hence the term “French Hybrid.” Lilacs were cultivated in America’s first botanical gardens and grown by both George Washington and Thomas Jefferson. They remain a steadfast favorite to this day in public gardens as well as backyards, and many municipalities even host lilac festivals to celebrate these blooms each spring.

Proper Lilac Care

If cared for properly, a lilac bush has the potential to survive for hundreds of years. Planting your lilac in pH neutral, well-drained soil that is high in organic matter will help ensure the longevity of your shrub. Providing at least 6 hours of direct sun each day and deadheading immediately after flowering will guarantee an abundance of lovely scented blooms. Give lilacs adequate growing space so that they may grow to their full potential. Spacing these plants too closely will cause them to grow tall and spindly and only flower at the top; instead, be sure they have plenty of room to grow out as well as up and you’ll be rewarded with copious blooms all over the shrub. Fertilize with a high phosphorus fertilizer in the early spring to ensure the best growth and most luxuriant blooms.

When your lilac reaches a height or shape that is no longer to your liking, you may remove up to 1/3 of the thickest stems. Cut them back to the ground. You may also shorten any unusually tall stems by cutting them back to a strong branch. Open up the crowded base of the shrub by removing a portion of the youngest stems. Remember; prune lilacs immediately after flowering before plants start to form next year’s flower buds.

Beyond the Classics

Syringa vulgaris provides the spring garden with perfumed blooms for up to two weeks. To extend the bloom season for up to 6 weeks, plant an assortment of the uncommon species along with the common lilac. Some excellent choices are hyacinthiflora (which blooms before vulgaris), paired with palibin, prestonia and reticulate (which bloom consecutively after vulgaris).

Want to branch out into even more lilac cultivation in your yard? See the chart below, or come in today to see the latest lilacs to love.

lilac_4

lilac_1

lilac_2

lilac_3

Growing in Flower Pouches

How many of us sit on our decks or patios, stare at a bare fence and think, “there must be something I can do with that.”

There certainly is!

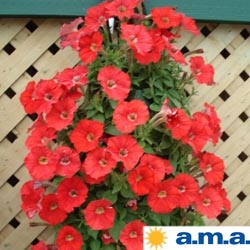
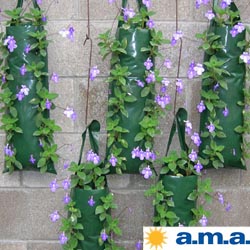
“Plant” your fence with flower pouches. Not just for fences, these flower pouches efficiently provide color and/or small veggies for tiny balconies, deck railings or other small areas. Better yet, they’re inexpensive, colorful and easy to plant.

About Flower Pouches

Available in different sizes, shapes and colors, flower pouches are small, heavy plastic bags with holes that are filled with soil and planted. After planting, they hang from hooks on fences, walls, decks, trees… Almost anywhere. Smaller versions may even be snuggled inside baskets or other containers that hang on the fence and conceal the bag.

Planting in Pouches

Many types of flowers, herbs and vegetables can be planted in pouches with great success. Smaller annuals, strawberries or vegetables are perfect for pouches. Petunias, marigolds, alyssum, lettuce and cucumbers grow famously. Plant early cool season flowers in early spring and replace with them with heat-loving annuals in the summer when they peter out.

It’s easy to plant a flower pouch, especially when inserting smaller plants, seedlings or starts. Use a lightweight soil-less potting mixture. You may either completely fill the bag with the soil and then poke the roots of the plant into the holes or you can fill to the first set of holes, plant the starts, fill to the next level, and so on. Unless you are planting very small starts, most people find the “fill to the next level and plant” system works the best so delicate roots are not damaged. Many gardeners skip planting the lowest slots to provide more root space. Others skip the top slots in order to plant on top of the pouch, but you may experiment, of course.

Tip: when planting the starts through the slots, use a dibble stick or dowel to create a downward sloping hole for the roots. This slant stabilizes the plant sooner as its roots grow and expand.

flowerpouch3flowerpouch1

flowerpouch2

Spring Lawn Renovation

Seeding:

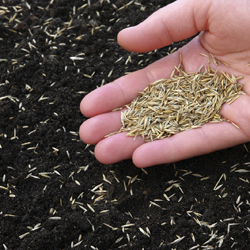
If you are planning to seed a new lawn or over-seed an existing one, it is best to seed as early as possible. It is important to get seed germinated and growing before trees begin to leaf out. This is especially true in shaded areas. Keep the area moist at all times until the roots become established, then you can gradually decrease the frequency of watering. The new grass can be mowed when it reaches a height of about three inches.

Rejuvenating a Weak Lawn:

Your lawn cannot live without air, water and nutrients. When a thick layer of thatch builds up, water and fertilizer may run off instead of penetrating the soil. Aerating and dethatching can help rejuvenate a lawn by restoring passageways in the soil to the root. Spring is an excellent time to dethatch cool-season grasses. Thatching rakes can be used for this purpose.

Test your soil to determine the pH. We recommend a small handful of soil taken from a depth of 3 inches. At a pH of 6.8 to 7.0, nutrients are most readily available to turf grasses, and beneficial microorganisms are more active to decompose thatch.

Fertilize your lawn with seed starter fertilizer and top dress with a very thin layer of compost or mushroom soil.

Crabgrass Control:

On established lawns that you are not over-seeding, apply a fertilizer combined with crabgrass control. This should be done in early to mid-April as the flowers are fading from the forsythia.  Crabgrass control products may also be applied separate from your lawn fertilizer. Reapplication of crabgrass control should be done again in early to mid June for optimum control. Remember, crabgrass seeds start to germinate when the soil temperature reaches 50 to 58 degrees. Use corn gluten as an organic alternative to chemical control on an established lawn.

On newly seeded lawns and those seeded in late fall or during the winter months, use a starter fertilizer with crabgrass control. You will need to reapply in four weeks because Tupersan is not as effective as Team. Apply a Team product in early to mid June.

Maintaining your lawn at a taller height, 4 inches, throughout the growing season will allow you to control crabgrass without the use of chemicals. Taller grass will shade out the crabgrass seed preventing it from germinating.

Insect Controls:

An early season application of Merit will provide effective white grub control for the growing season. This preventative method tends to give better results than applying insecticides when you notice damage as it may then be too late.

spring_lawn_3

spring_lawn_1

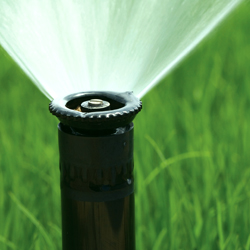
Grass sprinkler

Protecting Our Pollinators

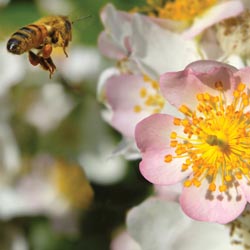
Every garden requires pollinators, and bees are among the finest. Without them there would be limited flowers and far fewer fruits and vegetables. Did you know that about 30 percent of the food we eat depends on the pollination of bees, including onions, cashews, coffee, carrots, chocolate and vanilla? If we don’t protect these prolific pollinators, our landscapes, gardens and diets will be irrevocably changed.

About Bees

Although there are many bees that are great pollinators, like carpenter, mining, sweat and cellophane bees, some of the most well known and easily identified bees are the honeybee and bumblebee. Both of these bees live in social colonies and are cavity nesters. Because these bees are active all summer long, they require a constant supply of floral nectar close to their hive and they thrive in flower gardens, orchards and other areas with abundant blooms.

Unfortunately, both these types of bees – along with many others – are disappearing rapidly, and two key threats are to blame.

  • Habitat Loss: As more natural habitat is lost to development, there are fewer nesting locations and inadequate food supplies for bees. While meadows developed into resorts and parks disappearing for strip malls are obvious examples of development, other less visible developments that can hurt bees include widespread use of flower cultivars that do not produce adequate nectar, eliminating critical bee food sources.
  • Pesticide Drift: Widespread, abundant spraying of pesticides to protect crops, lawns and parks can inadvertently hurt bees. Stronger pesticides can kill bees directly, while less potent toxins can contaminate nectar and will gradually build up to fatal levels in bees’ systems. Even if pesticides are not sprayed in areas where bees are abundant, high level spraying can easily be spread by wind patterns into critical bee habitats.

Inviting Bees to Your Garden

Fortunately, it is easy to bring more bees to your garden and encourage healthy bee populations. To support local bees…

  • Planting a variety of flowers that will bloom throughout the entire summer to provide ongoing food supplies.
  • Opt for native flower varieties that will be more easily recognized and used by bees, instead of introduced flowers that are less familiar.
  • Eliminate chemical use in your yard, as much as possible, including on your lawn, garden and trees, especially while plants are in flower.
  • Provide bees a safe place for shelter and to lay their eggs. A wood pile is suitable, or you can invest in a specialized bee house.
  • Make sure that there is an available water source for your bees. A bird bath or any simple water basin works just fine.

Want to bring bees to your yard and help them feel at home? Start with this list of native plants bees love, and ask our experts for more tips about keeping your lawn and garden bee-friendly!

Native Plants That Attract Bees

  • Apple (Malus)
  • Aster (Aster)
  • Blackberry & Raspberry (Rubis)
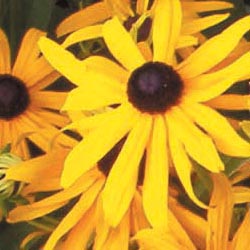
  • Black-Eyed Susan (Rudbeckia)
  • Blueberries (Vaccinium)
  • Currant (Ribes)
  • Elder (Sambucus)
  • Goldenrod (Solidago)
  • Highbush Cranberry (Viburnum)
  • Joe-Pye Weed (Eupatorium)
  • Lupine (Lupinus)
  • Penstemon (Penstemon)
  • Purple Coneflower (Echinacea)
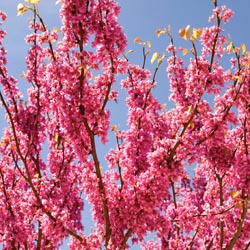
  • Redbud (Cercis)
  • Rhododendron (Rhododendron)
  • Sage (Salvia)
  • Stonecrop (Sedum)
  • Sunflower (Helianthus)
  • Willow (Salix)

bee_2bee_3

bee_1

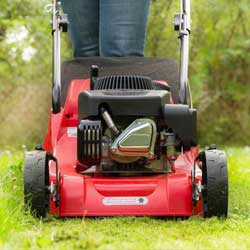
Mowing. Do It Right

If you have a lawn then you need to mow. If you need to mow then you may as well do it right. Here are the basics:

  1.  Service your lawn mower in the fall, after your last cut, so that you start the next season right. Change the oil, drain the gas, replace the spark plug and air filter, lubricate the throttle cord and sharpen the blade.
  2. Before your first cut of the spring season, fill your tank with gas and adjust your wheel height. Cool-season grasses should generally be cut at a height of 3 to 3 ½ inches. Never remove more than 1/3 of the plant. This longer height will require that you mow more frequently but it will ensure a stronger root system, help maintain soil moisture and will greatly reduce weed competition.
  3. Only mow a dry lawn. Cutting a wet lawn is a sure way to spread disease. The best time of the day to do this is in the evening. Early in the morning, after the dew has dried, is the second best time.  Mowing in the heat of the day will cause your turf grass to go into shock.
  4. Before you start your mower, clear all objects from the lawn. This includes toys, lawn furniture, trash, fallen branches, stones and anything that would cause you to stop and restart the mower. Keep your eye out for anything that is a hazard, items that may jam your mower or become projectiles.
  5. Grass clippings are loaded with Nitrogen, just what your lawn needs to stay healthy. Leaving them where they lie can reduce your fertilizer use by as much as 25%. Spread them out so that they don’t become anaerobic.
  6. Always remember to keep your mower blades sharp. You may need to resharpen them during the growing season. Dull blades rip and tear at the grass and create an environment conducive to the spread of disease.
  7. Change directions each time you mow. Mowing causes the grass to lie over.  Alternating your direction will correct this problem.
  8. Did you know that dirt and debris are the main cause of lawn mower engine failure? Always take a few moments after mowing for some preventative maintenance. Grab an old rag and wipe down your equipment including air vent grates.
mowing_2mowing_1

Minor Bulbs: Perfect Partners for Early Spring Color

A garden stroll in the early spring offers a great deal of promise but generally little color. You can rectify this with a little planning and planting this fall to ensure bright spring blooms to enjoy.

What Is a “Minor” Bulb?

Often passed over at the garden center for showy, larger-flowering bulbs, minor spring bulbs give the garden a head start on spring, extending the season by blooming as early as February and March. These beautifully blossomed seasonal gems are short in stature and produce daintier flowers but, when planted en masse, make as powerful a statement as any daffodil, tulip or hyacinth planting.

Chionodoxa, Muscari, Eranthis, Galanthus and other minor bulbs are planted at the same time as tulips, daffodils and hyacinths, and in the same way, although not so deeply. The general rule of thumb is to plant bulbs three times as deep as the bulb is high. Your soil should be well drained so the bulbs do not rot. Don’t forget to include bone meal in the planting hole for strong growth in the spring.

Minor bulbs make perfect partners for all of your other traditional spring-flowering bulbs. Their size makes them suitable for rock gardens and walkways, as well as filling in spaces between other spring bloomers. They also naturalize well and will help fill in any gaps in a spring garden or wildflower lawn.

Top Minor Bulbs

There are many lovely bulbs with smaller, stunning spring flowers to choose from. Some of the most popular and versatile options include…

  • Chionodoxa (Glory of the Snow): Small, 1 inch white-centered blue or pink flowers appear on leafless stems. Plant in large groups in front of early blooming shrubs or naturalize in the lawn. When grown in shade, blooms last several weeks. Plants grow 4-10 inches tall.
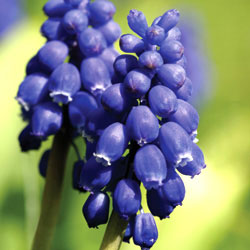
  • Muscari (Grape Hyacinths): Offering the rare and cherished blue color in the garden, Muscari have small spherical blossoms bunched into triangular clusters on top of delicate 6-9 inch stems. Grape hyacinths are available in various shades of blue, purple and white.
  • Eranthis (Winter Aconite): A relative to the buttercup, Eranthis unfolds bright yellow, honey-scented blossoms that can carpet the chilly ground and bring life to a dormant rock garden. Plants grow 2-4 inches tall.
  • Galanthus (Snowdrops): The cold is no deterrent to the bell-shaped frosty white flowers of Galanthus. This plant thrives in light shade under leafless trees and is well suited to random planting amidst tough grass. Shorter varieties grow to 4 inches while giant snowdrops reach 10 inches.
  • Leucojum (Giant Snowflake): Drooping bells of white or pink flowers with green tips adorn this frost-hardy 4 inch plant.
  • Pushkinia (Striped Squill): The white flowers of this plant look light blue because of the blue stripes on the petals. Plant in sun or partial shade in well-drained soil. Striped Squill grows 6-8 inches tall.
  • Scilla (Spanish Squill): This late spring-flowering plant has multiple stems with up to 12 bells on each stem. Colors are blue, pink and white. Scilla needs adequate moisture in the flowering season as it grows to 10-12″ in height. Plant in full sun or partial shade.
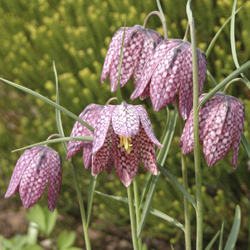
  • Frittilaria meleagris (Checkered Lily): This small Frittilaria grows to only 9 inches tall compared to its sibling Frittilaria imperalis (Crown Imperial) that grows to a height of 3 feet. The checkered lily’s name is derived from its checker-patterned petals.

Any of these smaller, less obtrusive bulbs can make a great early spring statement in your garden or landscape, bringing it to life long before most spring blooms are at their peak.

snowdrop_250x250

checkeredlily_250x250_3

hyacinth_250x250

Save

Bringing Your Tropical Plants Indoors for the Winter

As the summer comes to an end and autumn approaches, the days get shorter and cooler temperatures signal the time to ready your plants for winter. How can you protect your treasured tropicals from winter damage?

Overwintering Tropical Plants

Don’t wait until frost warnings or freezes occur to bring tropical plants inside, especially since these plants are more susceptible to dropping temperatures. Try to have all of your plants acclimated to the new indoor environment by the end of October. Avoid the temptation to move your tropicals back outside if it suddenly gets warm, because they will have to re-acclimate when you bring them back inside again. With a little extra care even exotic hibiscus can be over-wintered inside the house.

First, it’s a good idea to prune approximately one-eighth to one-fourth off the total height of the plant’s foliage. This helps reduce the shock that the plant receives with the change of conditions when bringing them indoors. Check the plants for signs of insects and treat them with Neem oil or pyrethrin spray as well as a systemic insecticide that will provide protection for up to six weeks.

Position indoor tropical plants in a very bright location that receives no less than 6 hours of light per day. If the winter is very cloudy, supplement your plants with an artificial light source. Be sure the room is warm, but avoid putting the plants too close to a heating vent, which can dry them out drastically.

Because they are tropical plants, they will need good humidity which can be achieved by using a humidity tray. Use a saucer that is at least 3-4 inches larger than the pot and fill it with an inch of stones. Pour water over the stones until they are half covered, then place the pot on top of the stones. The humidity immediately around the plant will be increased, but avoid setting the pot directly in any water, which can lead to fungus and rotting. Grouping several plants close together can also help them preserve humidity for more luxuriant growth.

Fertilizing can be continued if the plant is in bright light, but at a diluted rate (1/4th of recommended) and only 1-2 times per month. . You will find the plant will not utilize as much water in the winter because its growth has slowed. Generally, plants should be watered every 5-14 days depending on location, pot size, soil type and plant type.

If you have any questions about winter care of your plants, our staff will be glad to help you keep your tropicals in good condition all winter long.

tropical-2tropical-1

The Fall Vegetable Garden

Fresh vegetables don’t have to end as the days grow shorter – fall is a great time to plant an autumn garden to extend the growing season. Many vegetables such as broccoli or cauliflower are of a higher quality when grown in the fall, while others, like kale, develop better flavor after a frost. Spinach, chard, kale, collards, mustard and rapeseed all grow rapidly and flourish at the end of the season, ideal for autumn gardening. Loose-leaf lettuces do well, too.

To prepare your bed, immediately pull out whatever plants have finished producing. Spade or till the soil to a depth of 6-8 inches, rake the area lightly and work in a light application of composted manure or 5-10-5 fertilizer to provide adequate nutrition for rapid-growing fall veggies.

Broadcast a mixture of seeds like mustard, kale and rapeseed, or combine seeds of several types of lettuce like curly leaf, red leaf and oak leaf to allow you to harvest your salad already mixed. It works best to plant greens in blocks or wide rows, because they’re easier to harvest and you’ll have fewer weeds. If you plant blocks each time a new space opens up, you’ll have staggered plantings that can produce over a long time.

Some autumn vegetable varieties will tolerate cold better than others. Read seed packets before you purchase them to determine what will be best in your area, but don’t be put off by such notations as chard’s taking 60 days to mature. The greens are good when they’re younger, too.

Water seeds after sowing and keep the ground evenly moist until the seedlings are up and growing. Seedlings may also need to be sheltered from extreme heat. Protect them by shading them from the sun with Reemay fabric until they are established.

Although insects tend to be less bothersome in late fall, some vegetables in the cabbage family, including mustard, kale and collards, may attract cabbageworms. Apply Bt (Bacillus thuringiensis) sprays for an organic method of control. As the plants begin to fill out, thin them enough to allow air to circulate and dry off moisture. This helps prevent insect problems too.

Harvest your fall vegetables as soon as the plants reach edible size. Even after the first frosts, you’ll be able to keep harvesting to enjoy the yield of your extended-season garden.

Top Fall Vegetables

  • Broccoli
  • Brussels Sprouts
  • Cabbage
  • Cauliflower
  • Swiss Chard
  • Collards
  • Kale
  • Lettuce, Head
  • Lettuce, Leaf
  • Mustard
  • Rape
  • Spinach

FallVeggie_2FallVeggie_1

Outdoor Ornamentation

Do you miss the vibrancy of your flowerbeds and the rich, lush colors of your landscape once winter sets in? With warm weather pots, window boxes and hanging baskets already in place, decorating the outside of your house this winter will be a cinch!

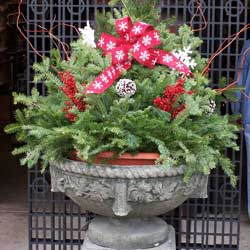
  1. Use only containers that are winter safe. Porous pots, like terra cotta, are not a good choice as they tend to crack when they freeze. Better choices include cast iron or aluminum urns, fiberglass or foam containers and cocoa-lined wire hanging baskets and troughs. For a truly holiday look, consider containers that may have red-and-green coloration or other holiday hues, or look for whimsical holiday-themed designs.
  2. Use the soil that is already in your containers. Remove just the tops from your previous plantings, allowing their roots to remain in the soil as an anchor for your winter arrangement. OASIS Floral foam is another good choice that works well for smaller outdoor arrangements like those in hanging baskets. You may also need some plant or gardening pins to help keep your arrangement in place and secure.
  3. Begin by adding greens to your container (note: your greens will last longer if soaked in Wilt-Pruf for 24 hours before using). Cut branches to the desired length and remove all green needles from the portion that will be inserted into the soil. Create a dense base for your arrangement using either white pine or spruce. Consider allowing some boughs to trail over the edge of the arrangement for more visual interest, or mix up different types of greens for interesting texture.
  4. Create a focal point for your arrangement with the addition of a few tall branches of curly willow, Harry Lauder’s Walking Stick, red twig dogwood or white painted birch. Position these taller elements near the back of the arrangement to allow more room for additional plants and decorative items. To add more magic to the arrangement, consider painting taller branches gold or silver.
  5. To include additional color and texture, incorporate more winter-themed plants into the arrangement. Magnolia leaves, holly, incense cedar, winterberry, China berry, pepper berry, protea, eucalyptus or other decorative branches and berries are all top choices. Go for a lush, tiered look for the best effect.
  6. To bring your arrangement to life add mini white or colored lights, desired ornaments and weather-proof ribbon. For a more whimsical look, consider garlands, candy canes, cranberry strings or even a fairy gingerbread house. Remove these when the holiday season ends and leave the arrangement intact until time for spring planting.
  7. You might spruce up around the pot to bring even more notice to your arrangement. Consider a ribbon around the pot, or add light-up gift boxes or wrapped boxes around the pot to create a larger focus.

With just a few steps, the outdoor containers you enjoy in spring, summer and fall can continue to be lovely accents for holiday and winter decoration.

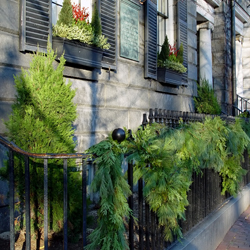
Pine branch garland adorning black wrough iron fence in bostonoutdoor-3