Monthly Archives: February 2017

Raising Root Crops

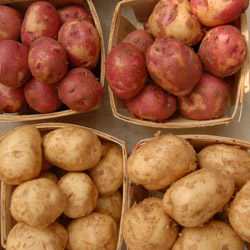
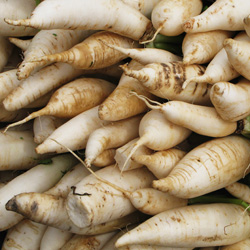
Root crops are among the easiest vegetables to grow, and often the first and last vegetables in the garden to mature. Your garden may produce enough vegetables to take you through the entire year and, if kept correctly, root crops will last a long time in storage. These vegetables are great to grow, even in a small space. Many root crops are frost tolerant and with most, the tops, or greens, are also edible.

What Root Crops Need

To get the best harvest of root crops, no matter which types you opt to add to your garden, you need to meet their cultivation needs.

  • Soil
    Root crops grow best in deep, loose, rock-free soil that will allow the roots to form and grow easily. To nourish the plants, supplement the soil with plenty of organic matter.
  • Fertilization
    Root crops require a high phosphorus fertilizer for optimum growth, but check the needs of individual crop types to choose the best mixture. Always apply fertilizer according to the proper directions to prevent burning.
  • Temperature
    Most root crops are considered cool season vegetables and are planted both early and late in the growing season. Warm days and cool nights are most beneficial for root expansion.
  • Light
    Full sun is best.
  • Planting
    Seeds should be sown 2-3 weeks before the last expected frost date and subsequent plantings made every three weeks thereafter as weather permits (some exceptions apply). Planting depth varies depending on the type of plant; follow the directions on the seed packet. After seedlings emerge, thin to desired spacing as determined by the diameter of the root at harvest time. Beet and turnip tops that are thinned are edible raw as salad greens or they may be cooked. Root crops are generally not transplantable because they have a tap root.
  • Mulch
    Mulch plants that have already been thinned with salt marsh hay to retain soil moisture and minimize weed growth.
  • Pest Control
    Maintaining appropriate cultivation requirements will reduce or eliminate the need for pest control. As with all vegetables, it is important to rotate crops each year. Rotating root crops will discourage root weevils.
  • Basic Storage
    All root crops may be stored for a time before being eaten. In general, store at 32 degrees Fahrenheit and 95 percent humidity. Leave the crops in the garden as long as weather permits, then dig. Store the harvest in a root cellar or refrigerator.

Tips for Favorite Root Vegetables

  • Carrots – Plant in sandy soil if you want the classic, long, narrow type.
  • Beets – You may harvest 1/3 of the tops without affecting the root.
  • Garlic – grows best in well drained, but moisture-retentive soil.
  • Horseradish – Use caution when planting this aggressive perennial.
  • Kohlrabi – Has a mild, sweet cabbage flavor.
  • Leeks – Flavor is best if harvested after a light frost.
  • Onions & Shallots – Plant from seed or sets.
  • Potatoes – Best planted from ‘seed potatoes’ to match variety.
  • Radishes – Mature in as little as three weeks.
  • Sweet Potatoes – Warm weather root crop, will not withstand a frost.
  • Turnips – For a fall crop, sow seeds in midsummer.

raising-root-1

raising-root-2

raising-root-3

Pink Muhley Grass

Ornamental grasses are becoming increasingly popular, and there is now an over-abundance of options available at garden centers. So many choices can make the selection process difficult, even overwhelming. There is one ornamental grass, however, that takes the cake. Pink Muhley Grass is arguably the most colorful ornamental grass around and it is sure wow your friends and neighbors.

About Pink Muhley Grass

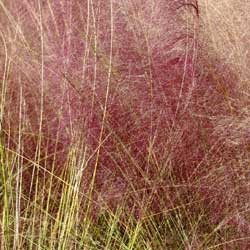
Pink Muhley Grass (Muhlenbergia capillaris) is a native grass that is deer, drought and salt tolerant. It is hardy in zones 7-10 and may be grown as an annual elsewhere. Broadly adaptable, this grass prefers sun but will tolerate part shade and will grow well in just about any soil type. ‘Regal Mist’, or also called ‘Lenca’, is a cultivar known for the deepest plume color.

Perfect used as a specimen plant in containers or in groupings in beds and borders as well as naturalized in a meadow garden, this fall bloomer is an outstanding ornamental plant. The pink-purple flower plumes that grow up to 4 feet are also exceptional for use in cut and dried floral arranging.

Proper Care

This ornamental grass is very easy to care for. Simply prune your Pink Muhley Grass clump back hard in late winter or very early spring before the attractive new growth begins to show. Although drought tolerant, the plant will be fuller and lusher with regular, consistent watering. It is especially adaptable to poorly drained soils, and can grow in full sun or partial shade locations.

In the Garden and Landscape

There are many stunning uses for this outstanding grass, whether you are cultivating a formal garden or a more relaxed landscape. Consider these popular options…

  • When not flowering, the green clump creates a textured mound acting as a groundcover or background for other smaller plants. It can also soften harsh garden corners, walkway edges or awkward intersections.
  • As a finely textured grass, plant Pink Muhley Grass with contrasting companions such as calla lilies, evergreen shrubs or low growing groundcovers to create interest in the landscape.
  • Plant in front of the larger smoketree Cotinus coggygria ‘Grace’ for an exquisite coordinating display of color and texture.
  • Plant where it will be backlit. It positively glows where it catches the early morning or late afternoon sun.
  • Use as a beautiful and unusual addition to floral arrangements.

Do you need another reason to grow Pink Muhley Grass? Oh, yes, the birds will thank you – they love the seeds!

pink-muhley-1

Green Gardening

Planting a vegetable or flower garden seems like the perfect thing to do when you are looking for ways to adopt a greener, more environmentally-friendly lifestyle. Some traditional gardening practices, however, may not be quite as “green” as you might think. Planning your gardens with the environment in mind and choosing some practices that maintain healthy ecosystems can help you create a truly “green” garden. 

Tips for a Green Garden 

There are easy, effective steps you can take in your garden to go green, including… 

  • Plant local and native species of trees and shrubs which are naturally adapted to the conditions in your area, thus requiring less watering and having natural defenses for local insect pests and plant diseases.
  • Collect rainwater for watering your container gardens and new transplants, and adjust your irrigation schedule to compensate for whenever Mother Nature does the watering for you.
  • Use organic compost and mulch to improve soil health and reduce the need for pesticides and fertilizers. Better yet, make your own compost so you can adjust it to exactly what your plants need while keeping more waste out of landfills.
  • Opt for disease-resistant and pest-resistant plants rather than trying to force plants into an unfriendly area where they will need chemical assistance and extra maintenance to thrive.
  • Try to use natural products instead of chemical fertilizers and pesticides. Use traps, parasites and natural predators such as ladybugs and lacewings. Plants that repel insects – basil, chives, mint, marigolds or mums – mixed in with other plants can help keep pests away.
  • Choose wildlife-friendly plants such as flowerbeds that will attract hummingbirds, butterflies, bees and other pollinators, and don’t be upset to share some of your garden space with other critters.

These are just a few of the simple changes you can make in your gardening practices that will benefit the environment.

Green Products 

More and more “green” products are readily available to help you maintain the natural health of your garden. Before using a product, however, be sure it is suitable for your situation, and follow all application and use instructions. Even organic or eco-friendly products can become toxic contaminants if they are improperly used.

Popular options for green gardening products include… 

  • Dr. Earth contains probiotic beneficial soil microbes, plus ecto- and endo- mycorrhizae which feed the fiber of the living soil by releasing natural organic matter. People and pet safe.
  • Dr. Earth pest controls are organic controls for all of your pest problems, including all types of unwanted or troublesome insects. People and pet safe.
  • Espoma Organic Traditions line of products includes bone meal, kelp meal, garden sulphur, potash and garden lime for helping to improve your soil without artificial chemical compounds.
  • Bonide offers organic fertilizers as well as organic formulas for pest and plant disease control, such as fruit tree sprays.
  • Scotts Organic Choice lawn care products provide more environmentally friendly choices for your yard.

Developing “green” gardening practices benefits you and your family, your garden, your native plants and animals, your water supply – our world, all of us.

SONY DSC

Top Native Shrubs for Year-Round Interest

We just love incorporating natives into the home landscape, and it’s easier to do than many gardeners realize. Including native plants is an important part of sustaining local pollinators and wildlife. Furthermore, native plants are naturally lower maintenance and pest-resistant, and wow, are they beautiful!

Favorite Native Shrubs

It’s easy to find native shrubs to provide interest in the garden the whole year through, from fresh spring growth to brilliant summer blooms to outrageous autumn foliage to stunning winter structure. Our list offers outstanding selections that will do well in a variety of moisture levels, soil types and sun exposures. Cultivars of these species offer variations in size, form, leaf color and shape as well as flower colors.

  • Sweet Pepperbush (Clethra alnifolia)
    Deciduous shrub, 3-8 feet high x 4-6 feet wide. Fragrant white blooms in July to August. Full sun to part shade, but will tolerate heavy shade. Moist to wet soil, tolerates erosion and clay soil. Use as a hedge, to naturalize or in rain garden. Attracts butterflies.
  • Sweetfern (Comptonia peregrina)
    Deciduous shrub, 2-5 feet high x 4-8 feet wide. Insignificant flower, ornamental and fragrant leaf. Full sun to part shade. Medium moist soil preferred, but also drought tolerant. Use to naturalize or in rain gardens.
  • Silky Dogwood (Cornus amomum)
    Deciduous shrub, 6-12 feet high x 6-12 feet wide. Yellowish-white flowers in May to June followed by showy fruit. Full sun to part shade. Medium to wet soil. Deer tolerant. Good for erosion control. Use as a hedge or in a rain garden. Attracts birds.
  • Winterberry (Ilex verticillata)
    Deciduous shrub, 3-12 feet high x 3-12 feet wide. Showy red fruit in the winter. Full sun to part shade. Medium to wet soil and tolerates clay soil. Tolerates air pollution. Controls erosion. Use as a hedge or in a rain garden. Attracts birds.
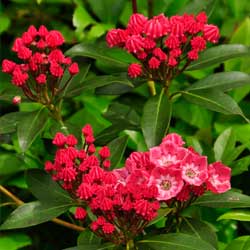
  • Mountain Laurel (Kalmia latifolia)
    Broadleaf evergreen, 5-15 feet high x 5-15 feet wide. May-blooming with rose to white flowers with purple markings. Sun to part shade. Medium moist soil. Deer and rabbit tolerant.
  • Spicebush (Lindera benzoin)
    Deciduous shrub, 6-12 feet high x 6-12 feet wide. Fragrant greenish-yellow, flowers and showy fruit. Part shade but can tolerate heavy shade. Medium soil moisture and drought tolerant. Deer tolerant. Can grow in clay soil. Attracts birds and butterflies.
  • Northern Bayberry (Myrica pensylvanica)
    Deciduous shrub, 5-10 feet high x 5-10 feet wide. Showy fruit in the winter. Full sun to part shade. Dry to medium soil moisture. Use as a hedge, naturalize or in a rain garden. Attracts birds.
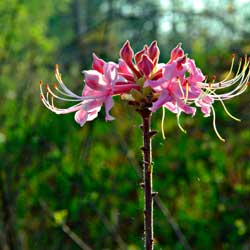
  • Pinxterbloom Azalea (Rhododendron viscosum)
    Deciduous shrub, 3-5 feet high x 3-5 feet wide. Blooms white to pale pink in May to July. Part shade. Medium to wet soil moisture. Very ornamental and good as a cut flower. Tolerant of rabbits. Attracts hummingbirds and butterflies.
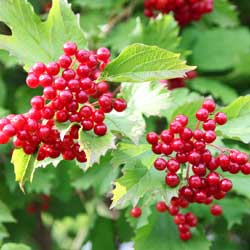
  • American Cranberry Bush (Viburnum opulus ‘americanum’)
    Deciduous shrub, 8-12 feet high x 8-12 feet wide. White lacecap flowers in April to May. Edible fruit. Full sun to part shade. Medium soil moisture. Use as a hedge or in the shrub border. Attracts birds and butterflies.

If none of these suggestions quite meet your preferences for a year-round native shrub, stop in to see our experts for more tips and options – new species and cultivars are always arriving!

top-native-3top-native-1

top-native-2

Try Something New: Pomegranates

Want to grow an exotic fruit that is delicious, nutritious, beautiful and incredibly hip? You really should consider planting a pomegranate! It’s not as difficult as you may think.

Why Pomegranates are Popular

Pomegranate is a stunning superfood rich in antioxidants, folic acid and vitamins A, C and E. It has no cholesterol, and is also rich in fiber and potassium. Because of these nutritional advantages, pomegranate is showing up in a multitude of supermarket products like yogurts, juices, salad dressings, jellies and desserts. It can be added to sauces, fruit crisps, salsas, relishes, dips and more. You can even make a pomegranate martini! And, of course, it’s an extraordinary experience eating a fresh pomegranate. These are stunning, delicious fruits that are rarely seen in backyard gardens, but can make a great landscaping statement when properly grown.

Growing Pomegranates in the Landscape

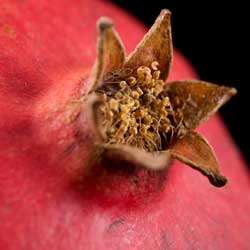
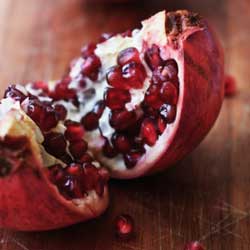
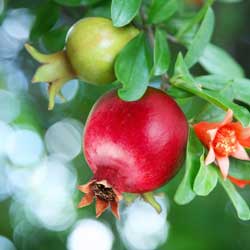
Pomegranates grow as multi-stemmed, small trees or large shrubs. They reach 15 feet tall by up to 15 feet wide. In spring, vibrant, gorgeous orange-red flowers grace the branches of this plant. These beautiful blossoms develop into the luscious pomegranate fruit containing dozens of tart and tangy bright red seeds and pulp. The fruit ripens somewhat square in the early fall and has a leathery skin that can be yellow to red in color.

The cultivar ‘Wonderful’ is hardy to zone 7 and is easy to grow. Plant your tree in full sun. It will thrive in the summer heat and in most soils. Pomegranates are drought tolerant, however, the fruit is better and the seeds more plump with regular deep irrigation. Because this fruit tree is self-fertile, there is no need to plant a second one for pollination.

Enjoying Your Pomegranates

If you’ve never cut your own pomegranate, it can be frustrating to learn how to separate the juicy seeds from the husk and membrane. To access the seeds…

  1. Cut off the crown of the fruit.
  2. Score the leathery husk in quarters from stem to crown end.
  3. Set the scored fruit in a bowl of cool water and let soak for a few minutes.
  4. Hold the fruit under water and break scored sections apart with your fingers, separating the seeds from membrane. The seeds will sink to the bottom of the bowl.
  5. Discard the skin and membrane.
  6. Drain the seeds on paper towels.
  7. Toss pomegranate seeds into your salad, mix them in your yogurt or smoothie or shake them into a martini and enjoy!
pomegranate-1pomegranate-2pomegranate-3

Ladybug or Lady Beetle?

The different names given to ladybugs are almost as numerous as the number of species. But bug or beetle, understanding more about these garden guests can help you better appreciate their diversity and all the help they can offer in your garden and landscape.

What’s In a Name

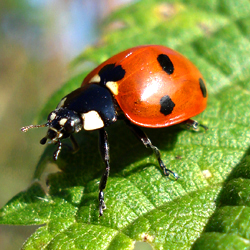
You may call them ladybugs (although they are not really bugs), lady beetles (they are technically beetles), lady birds or in Germany you would say “Marienkafer” (Mary’s beetles). In North America, there are more than 350 distinct species of ladybugs, and there are more than 4,000 ladybug species around the world. Most species can be identified by the pattern of spots on their elytra (flight wing covers). In many areas, these helpful insects go by different common names, including lady fly, lady cow, little hen, insect of fortune, Mary’s bug and more.

About These Bugs

Lady beetles are members of the beetle family Coccinellidae, which means “little sphere.” In their life cycle, a lady beetle will go through egg, larval, pupal and adult stages, though the length of each stage and how quickly the beetle proceeds through each one will vary depending on the species and local conditions. Lady beetles may live in shrubs, fields, trees and logs.

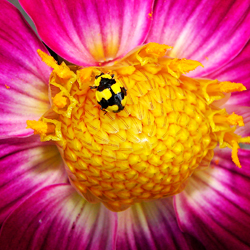
Lady beetles’ favorite food is the notorious aphid, though they do eat a variety of different insects. A female lady bug has huge appetite, eating from 75-100 aphids per day, while the male eats about 40 per day. This makes them ideal garden helpers, and many gardeners deliberately release swarms of lady beetles to help control aphid outbreaks. Most lady beetles are predators, but a few are plant eaters, and can be crop pests if not controlled appropriately. Crops most at risk from certain lady beetle species include potatoes, beans and different types of grain. When lady beetles swarm in vineyards and are inadvertently pressed with wine processing (it inevitable that some insects are part of the process), they can impact the taste of the resulting wine.

Self-Preservation

Lady beetles have some surprisingly innovative ways of protecting themselves. First of all is their coloring. Most predators know that bright colorings mean that their victim would likely taste gross, usually sharp or very bitter, and bold colors can even indicate poisons or stinging. While lady beetles don’t sting, their bold red and black coloration can easily mislead predators. Lady beetles also produce a pungent odor when threatened or may just play dead. As well, the lady beetle larvae is kind of alligator looking, so not many predators will not mess with it.

Ladybugs and lady beetles are fascinating insects, well known to gardeners throughout the world. The more you know, the more you’ll respect and appreciate these iconic insects.

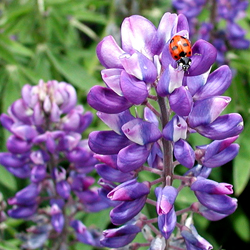
ladybug_article3ladybug_article2ladybug_article1

Growing Grass in the Shade

Cool season turf grasses prefer to grow in the sun. To establish a thick, healthy lawn of Kentucky bluegrass and perennial rye, you will need at least six hours of full sun daily. Fine and tall fescues are more shade-tolerant and require a minimum of four hours of full or eight hours of filtered sun a day. When plants do not receive enough sun, they cannot manufacture food (photosynthesis) effectively to support growth. As a result, plants that do not receive adequate sun are less heat- and cold-tolerant and more susceptible to disease and insect damage. When it is a tree or shrub that is causing the shade, there is also competition for soil nutrients and water. 

What does this mean for those of us with less than optimal light on our lawns? If it is grass that you wish to grow, it is not impossible, but you will have to settle for thinner turf. It doesn’t have to be any less healthy or hardy, however. Your chances of maintaining a healthy, thin lawn in a shady area is increased when adopting the following guidelines: 

  • Increase the amount of light and air circulation, if possible, by thinning tree canopies or removing the trees altogether.
  • Test your soil pH. It should read between 6.0-6.5 for growing fine fescue grasses.
  • If drainage is poor, improve it. Most turf grasses prefer well-drained soil.
  • Use a shady grass seed mixture with a high percentage of fine fescue grasses.
  • Do not sod. Most sod on the market is Kentucky bluegrass, which requires full sun.
  • Sow seed in late August to avoid heat and drought stress, weed competition and suffocation from falling leaves. Early spring is the second best time to seed.
  • During periods of drought, provide deep soakings to encourage a deep root system. Water early in the day to allow leaf blades a chance to dry and therefore reducing the possibility of disease.
  • Mow grass high, 3-4 inches. More leaf surface is required to increase photosynthesis in the shade.
  • Limit foot traffic in shady areas. This grass is already growing under stressful conditions and high use will contribute to its decline.
  • Fescue requires less nitrogen than other grasses. You may allow the grass clippings to stay in place. As they break down they will provide nitrogen to the soil. A spring and fall application of a high phosphorus fertilizer should also be used.

It is highly unlikely that you will have success when attempting to grow lawn in deep or heavy shade. The one exception is Poa trivialis, commonly known as rough bluegrass. This type of lawn is very shade-tolerant, but must have consistently moist soil. Without both heavy shade and constant moisture, you will not be able to grow a rough bluegrass lawn. 

Turf Alternatives 

Alternatives to turf in a shady area include: 

  • Shade-Tolerant Evergreen Ground Covers

Though not quite the same as grass, these groundcovers provide a green landscape without needing plentiful sunlight. They can also be lower maintenance and don’t require mowing. Selections include common periwinkle, pachysandra, purple wintercreeper, English ivy and lilyturf.

  • Perennial / Annual Shade Garden

Why not remove turf entirely in favor of other shade-loving plants? There are plenty of stunning perennials and annuals that don’t mind a bit of darkness. Visit our garden center and speak with our knowledgeable staff. We have an extensive selection of shade plants available and can help you make choices that will best suit your landscape conditions.

  • Mulch

Mulch is an excellent turf alternative for shady areas especially under a shallow-rooted tree where it can be difficult to grow anything. Mulch can also help you define paths to walk through the shade garden and will prevent mud from becoming a problem on those paths. You can opt for wood nuggets, shredded bark, gravel, river rock or even artificial mulches in a variety of colors. 

It can be a challenge to grow grass in the shade, but if you choose the proper type of grass and care for it well, you can cultivate shade-loving turf. If you’d rather not fuss with it, there are plenty of amazing alternatives that can make even the darkest corner of your landscape shine more brightly.

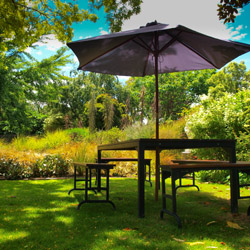
dining table with parasol

Jump Start Your Pond

Are you ready to get your pond started up for another beautiful spring and summer? It can be a big job to rejuvenate such a large water feature so it remains balanced and healthy after a long, harsh winter, but with a few careful steps, your pond can be back in shape in no time.

When to Reopen Your Pond

It is important that you don’t try to get your pond started too early in the season. All risk of hard freezes should be long past, and even nightly frosts should be tapering off or already finished before you restart your pond. The exact time will vary based on your pond’s size, depth and location, as well as your ambient weather conditions and the pond’s overall ecology. For example, a smaller, shallower pond in a sunny area will be warmed up and ready to restart before a larger, deeper pond in a shady spot. It can be helpful to keep a journal or calendar from year to year to note when you reopened your pond and how successful your efforts were. In time, you’ll be able to adjust your calendar easily without risking the health and wellness of your pond, even if annual conditions change.

Easy Steps to Restart Your Pond

When you are ready to jump start your pond…

  • Remove the netting that was set in place last fall. If needed, clean and make repairs to the netting right away so it will be ready to use next fall. Store it safely where it will be easy to reach when needed again.
  • Remove excess sediment from the bottom of the pond with a vacuum or a net. It is not necessary to remove every bit of sediment, but most of the debris should be removed so the pump can function effectively.
  • Test last year’s pump and replace if necessary. Be sure to test any additional moving or electrical features, such as waterfalls, fountains or lighting around the pond so repairs can be made if needed.
  • If water level is low, add fresh water to desired height. Avoid overfilling the pond, however, which can disrupt the essential chemical and microbial balance that keeps the pond healthy.
  • Add de-chlorinator as necessary to remove heavy chemicals from the water that has been freshly added to the pond. As with any chemical treatments, be sure to test the water several times to be sure you reach the proper balance.
  • Place aquatic plants in the pond and begin fertilizing to meet their nutritional needs. These may be plants that you’ve overwintered in a safe location, or you may choose to add new or exotic plants in late spring.
  • Begin feeding fish when water temperature stays above 55 degrees. Keep feedings minimal at first as fish come out of dormancy, as excess food will only rot and lead to greater bacteria and algae growth in the water.

It is perfectly natural for your pond water to turn green at first, but with the proper plants it should balance itself out in no time. It may take a few days or even a couple of weeks for your pond to return to its healthy, active state, but if you’re restarted it properly, you shouldn’t have any major problems.

pond

Planting Basics – Trees & Shrubs

Are you ready to add trees and shrubs to your landscape? You don’t need to hire professionals to do the planting when you learn the basics of doing it the right way yourself.

Soil Preparation

How quickly and how well trees become established once they are planted is affected by the amount of stress they are exposed to before and during planting. Minimizing planting stress is the goal of proper planting. Trees and shrubs should also be thoroughly watered prior to planting to minimize water stress.

Ideally, soil preparation should be carried out well ahead of planting. Preparation could include incorporating organic matter into the soil to improve aeration, assist drainage of compacted soils and improve soil nutrient-holding capacity. Specific preparation may be needed if the soil has an inappropriate pH or is lacking in certain elements. Trees and shrubs with a limited soil tolerance range may require very specific soil preparation to meet their requirements.

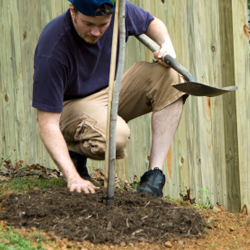
Additional soil preparation is essential when you are ready to plant trees and shrubs. Dig the planting hole 50 percent wider but only as deep as the root ball. Prepare soil by mixing one-third existing soil, one-third organic matter and one-third topsoil.

Planting Container-Grown Trees & Shrubs

When you buy a plant from a garden center or nursery, it often comes in a small pot that holds the roots. Remove the plant from that container gently, but without pulling on delicate stems or foliage. Squeezing the container all around can help loosen the root ball so it slides out more easily, or the container may be thin enough to cut away.

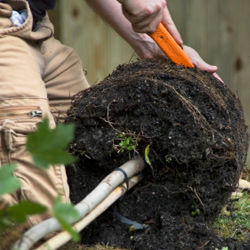
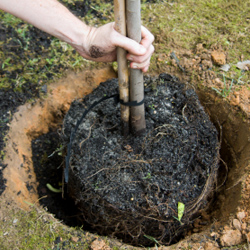
Because the plant was grown in a container, its roots have been restricted by the shape of the container. Loosen the roots all the way around, even on the bottom. If the root system is too tight to loosen with your fingers, cut through roots slightly with a knife or pruning sheers. Make three or four one-inch deep cuts, then gently pull the roots apart.

Center the plant in the prepared hole, keeping it 1-3 inches above grade. Keep roots spread out.

Planting Field-Grown Trees & Shrubs

If you are transplanting a tree or shrub that has been field grown, it may have bare roots or be lightly bagged or burlapped. Center the plant in the prepared hole 1-3 inches above the grade. Cut and remove all cords or twine from the root ball and trunk. Burlap should be left on, but loosened and pulled away from the trunk and below the soil surface. Remember to move trees carefully. Roll the root ball on its side and “steer” it into the hole with the trunk. Straighten the tree upright in the hole, checking it from different angles to be sure it is fully upright.

Completing the Planting

For both container-grown and balled and burlapped plant material, backfill the planting hole with soil your mix and pack firmly. Make a rim of soil around the plant to act as a “saucer” for holding water.

Water thoroughly with a slow soaking, and use a root stimulator fertilizer to provide good initial stimulus for the roots to spread out.

Apply a 2-inch layer of mulch around your new planting, keeping an open space of 3 inches around the trunk or base of the plant to allow for air circulation.

Staking Container & Field Grown Trees and Shrubs

When larger trees or shrubs are planted, they are not yet firmly established in their new locations and may tip or lean as the soil settles. For larger trees, use three wires secured to anchor stakes in firm ground (never into the root ball). Where the wires touch the tree, they should be covered with rubber hose to prevent damage. Remove stakes as soon as roots become established. This can be as soon as a few months, so check your tree frequently. Stakes should not be left in place any longer than one growing season.

New Plant Care

All newly planted trees and shrubs need gentle care as they settle in to their new locations. To keep them healthy and encourage good initial growth…

  • Water Properly
    Plants should be slowly soaked to a depth of 4 inches, which is the equivalent of about an inch of water per week. This is necessary during the first year or two. Let the hose run slowly at the base of the plant until the water has penetrated to the root depth. Too much water can also be a problem. Feel the soil. If it is soggy or squishy, do not add water. Frequent light watering is not as good as a thorough soaking once per week, which will encourage strong root growth.
  • Fertilize Appropriately
    Your new plants should be given a Root Stimulator type fertilizer right after planting. You should not use a fertilizer meant for mature plants on new material, as it could cause damage to your plant. It is essential for new plants to develop a healthy root system – top growth will follow. After the first season, regular fertilizers can be used.
  • Prune Safely
    Pruning at planting time may be necessary for larger trees to reduce leaf surface to match cut roots. Remove one-third of smaller twigs. Do not cut back the main trunk or larger branches. If shaping is necessary, trim side branches enough to get uniformity.
  • Be Alert for Insects and Diseases
    Keep an eye out for holes or brown leaves or needles. This could be a sign of insect or disease problems. Ask our staff for help identifying the insect or disease and to prescribe appropriate treatments.
  • Special Care Plants
    Some plants need extra special care because of their finicky needs. For example, azaleas, hollies, rhododendrons and dogwoods all need well-drained, acidic soils, high in organic matter and a shady location. Research the trees and shrubs you are planting to be sure you are meeting their needs right from the beginning.

It can seem intimidating to plant your own trees and shrubs, since they are an investment in your landscape that you hope to enjoy for many years. By understanding planting basics, however, you can easily give every plant a great start in its new home.

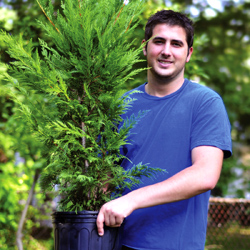
Time to PlantTime to Plant

Time to Plant

Time to Plant

Summer Sizzles With Crocosmia

There is an excellent assortment of bulbs available for planting this time of year that promise a bounty of summer blooms. The thing is, many of these bulbs are not winter hardy. This can create a predicament for gardeners anxious for easy summer flowers but short on time and space to dig and store tender bulbs. Crocosmia can be the answer.

Introducing Crocosmia

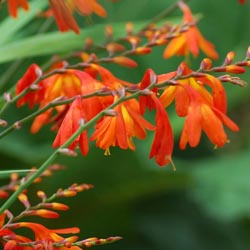
Native to South Africa, Crocosmia – also known as montbretia, coppertips or falling stars – sizzles all summer long in colors of yellow, orange and red. The numerous small florets are tubular in shape and borne along a long, gracefully arching stem rising above sword-like foliage. Together, this formidable combination creates exotic elegance sure to be a showstopper in the garden or landscape. Hummingbirds and butterflies also find it irresistible when in bloom, and the fall seedpods are delectable for many seed-loving finches and sparrows.

Planting Crocosmia

Plant Crocosmia corms now, while they are available. Plant them in well-drained soil in full sun, 2-3 inches deep and 8-10 inches apart. A south-facing location is best, or in colder regions, add Crocosmia next to a wall that will help warm the soil. The pointy side of the bulb should be facing up. Place a handful of bone meal in the planting hole and water the soil well when done planting. These are drought-tolerant flowers, but supplemental water will still be welcome in extremely dry conditions.

Crocosmia look best when planted en masse. A grouping on either side of a sunny entrance way can be stunning, and they look equally fetching when tucked into the perennial border. This plant performs well in containers and makes an excellent cut flower – in fact, cutting the flowers will encourage even more beautiful blooms to form.

Blooms will first appear in May or June and will continue blooming throughout the summer. Flower spikes can stretch 2-3 feet tall, adding a bold burst of color to the landscape. Even without the flowers, the blade-like foliage is attractive, and some cultivars show pleats or rippling for more textural interest.

After flowers have finished blooming, simply snip off the faded flower stalks. Leave the foliage to fade naturally as you would with any other bulb. These leaves continue to produce food to provide nourishment for next year’s flowers. Leaves may be cut back to the ground once they are completely yellow, and a thick layer of mulch should be added for winter protection. Once established, these bulbs are winter-hardy and will return year after year to heat up the spring and summer with their gorgeous colors and forms.

Crocosmia